2. Visual Studio Development Environment Setup#
Note
This guide was written against Visual Studio 2026
TODO: prerequisite check: ensure Python is installed and on the PATH
WITHOUT A VIRTUAL ENVIRONMENT ALREADY ACTIVATED (IT’LL SCREW YOU LATER).
Even if you’re in (base) you’re in a virtual environment and it’s game over
you __must__ deactivate the environment AND THEN make the local venv.
2.1. Download and Install Visual Studio#
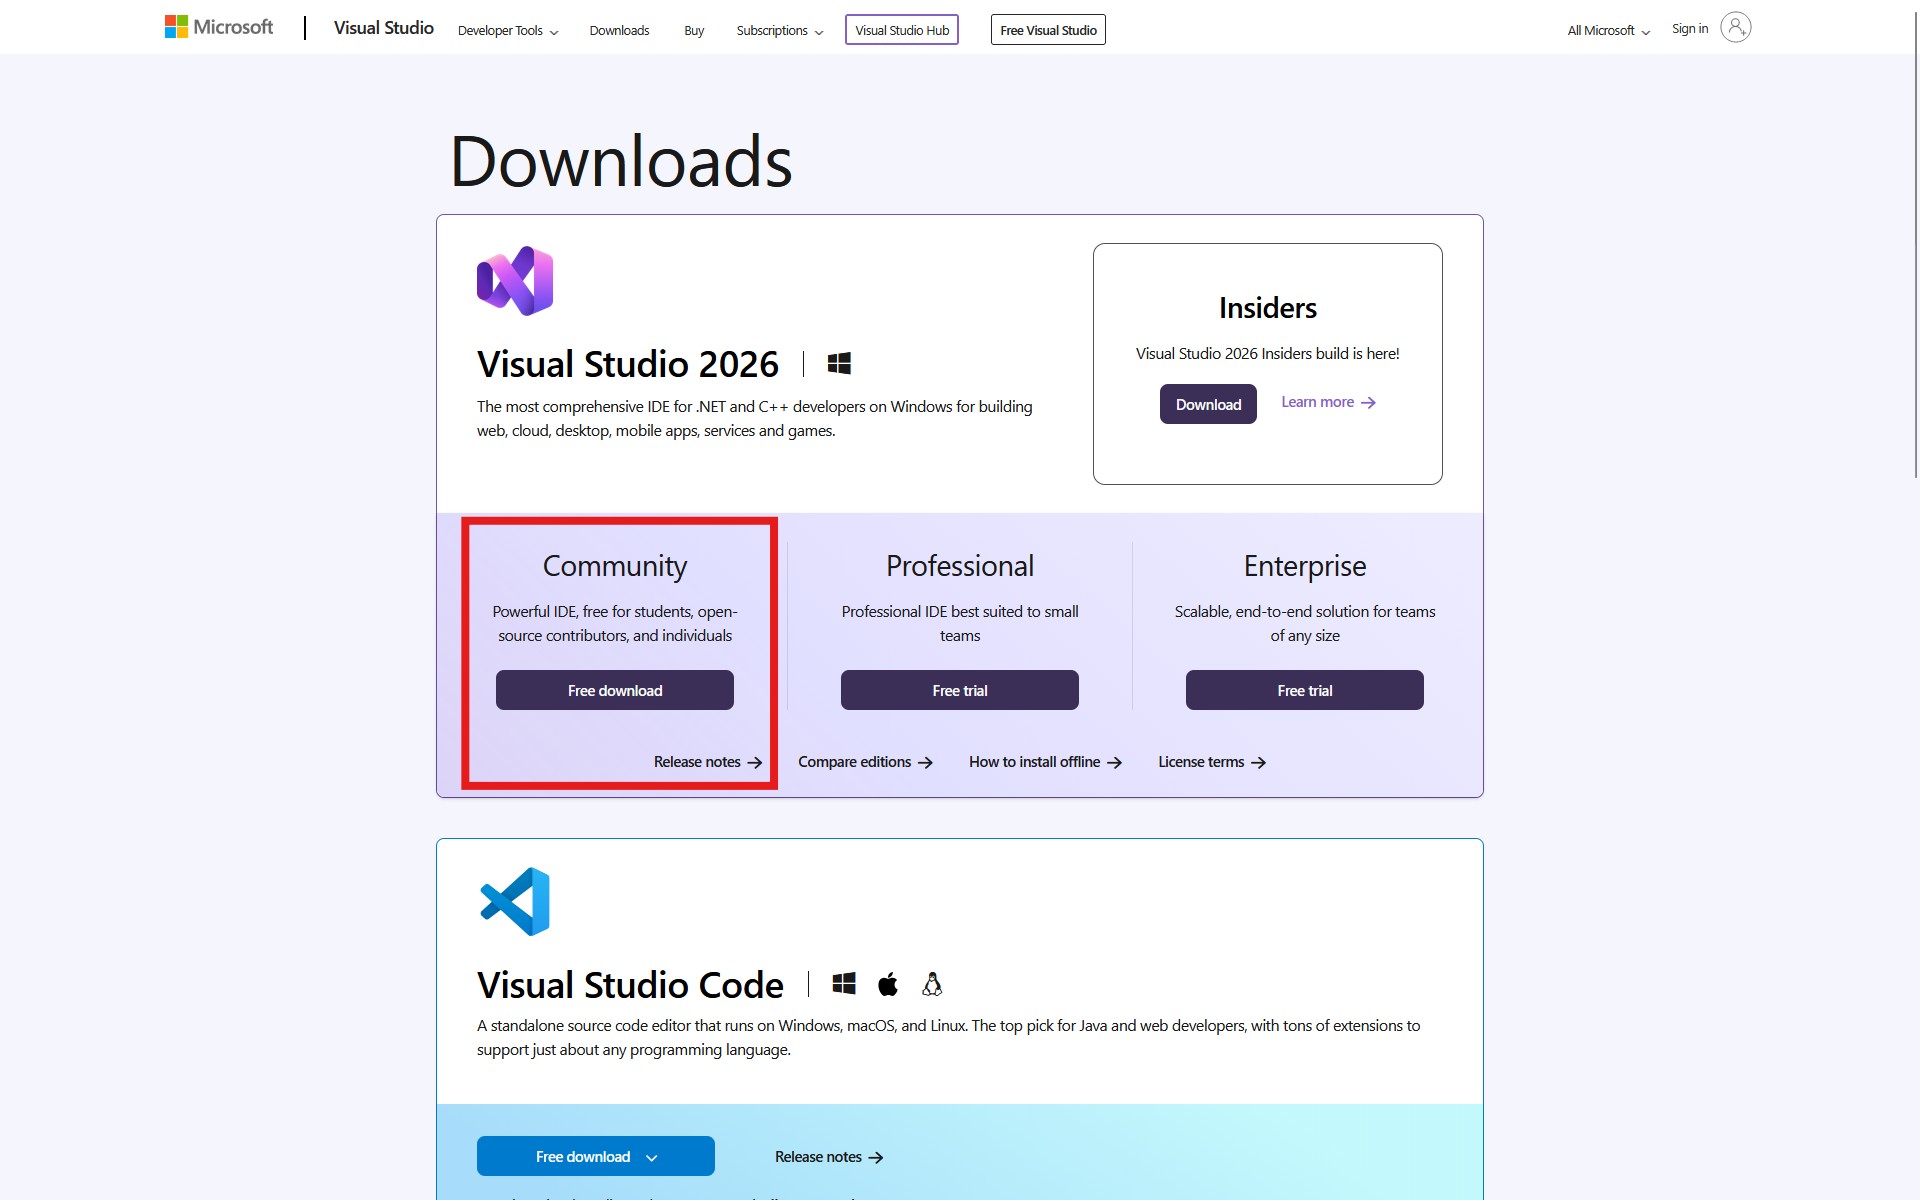
Fig. 2.1 Visual Studio 2026 can be downloaded from the Visual Studio Downloads page. The
free Community Edition is fine for developing opynsim.#
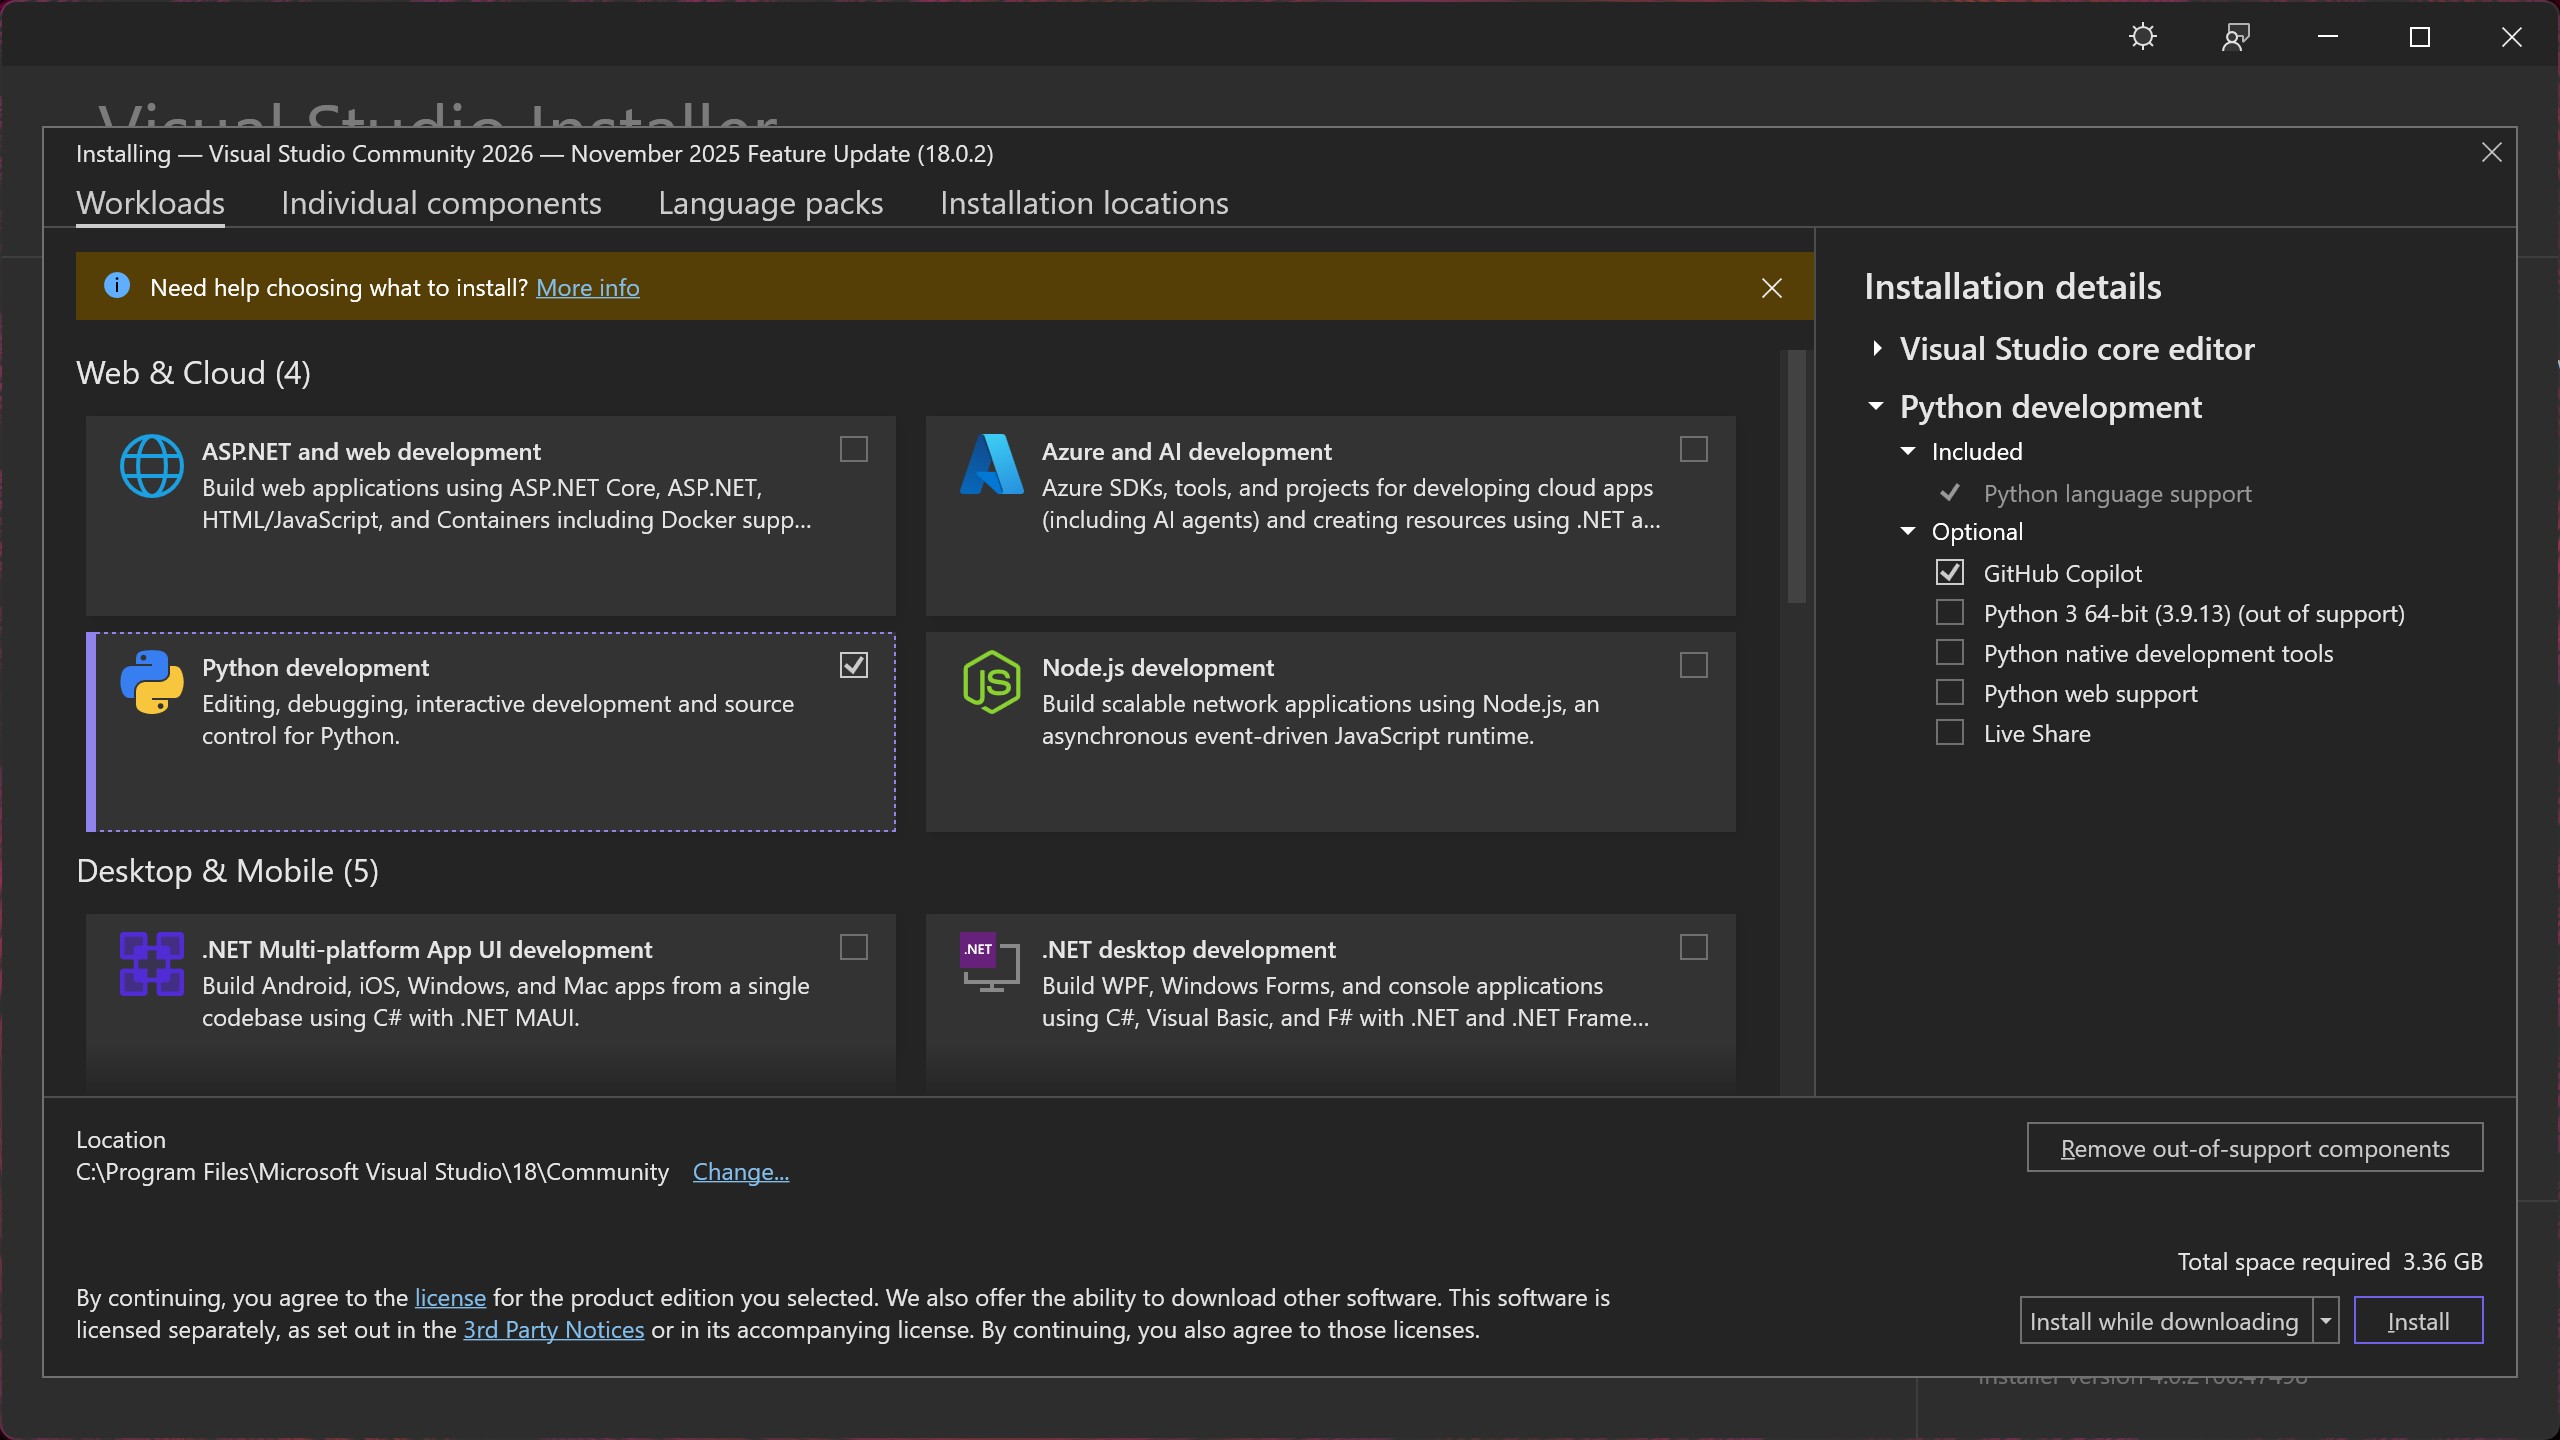
Fig. 2.2 When installing Visual Studio, you will be greeted with an options screen where you
select which workloads you are developing. For the best experience when developing
opynsim, select “Python Development” (pictured) and “Desktop development with C++”
(next figure).#
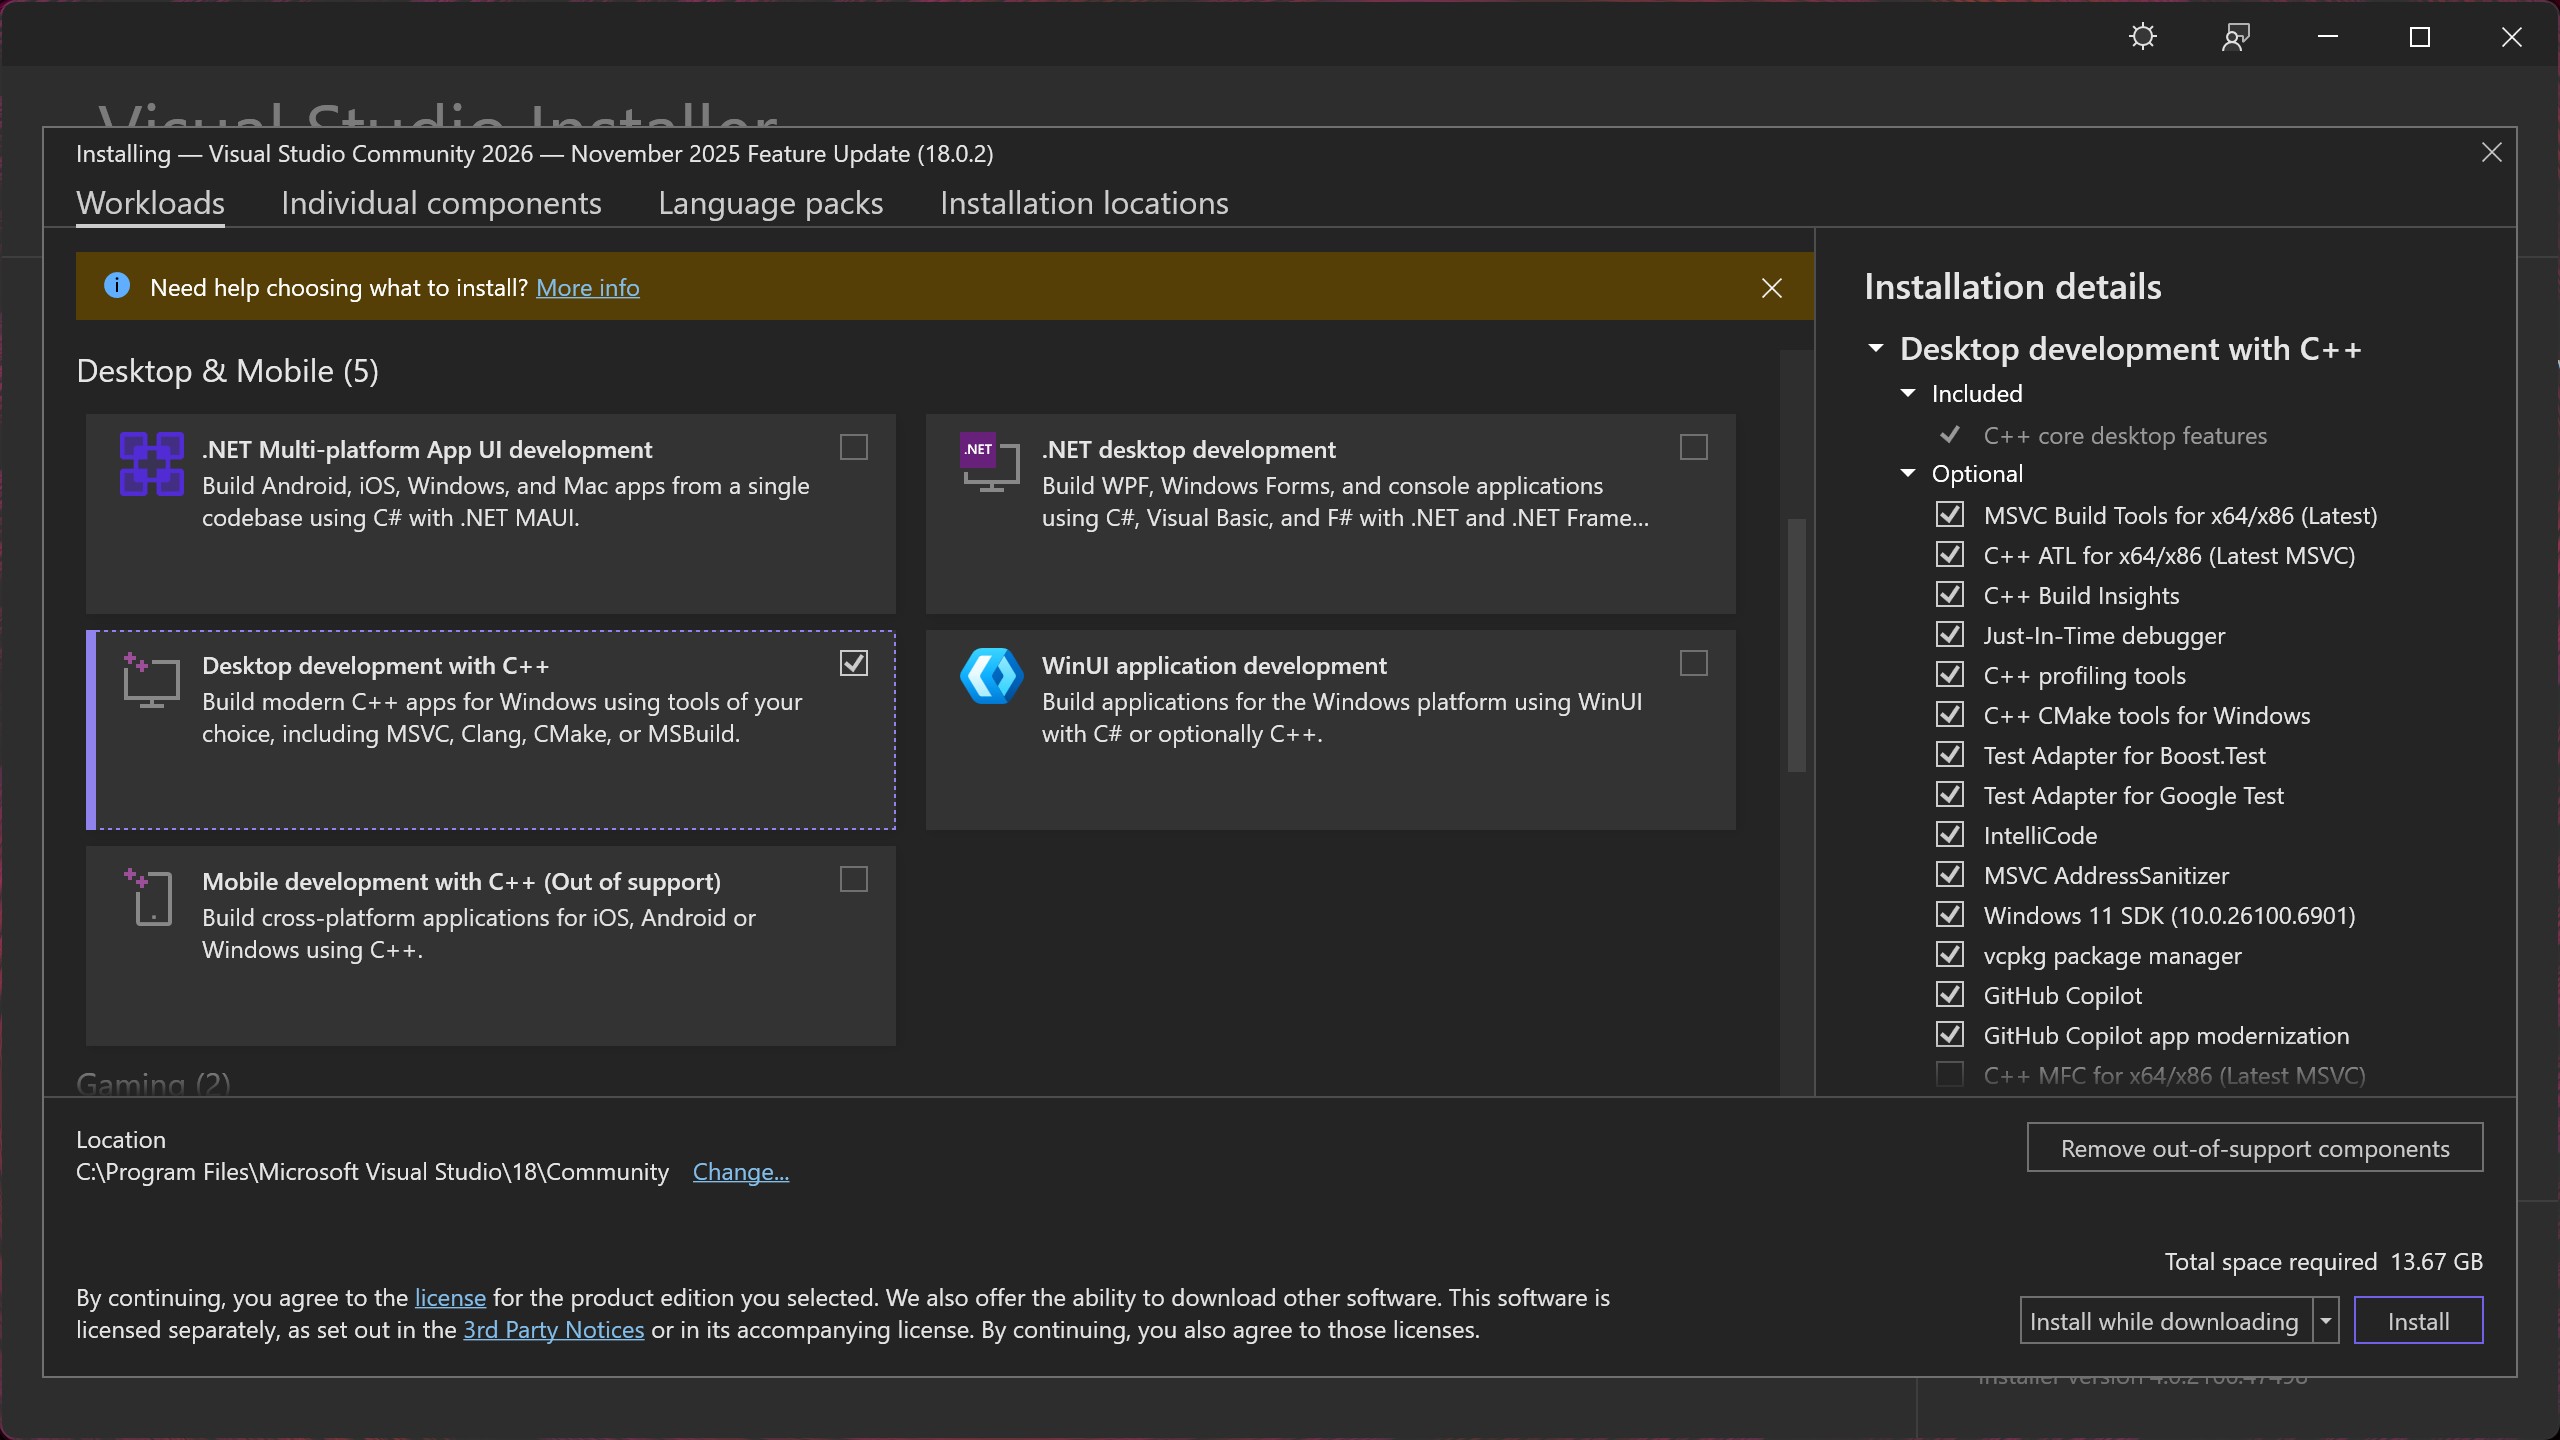
Fig. 2.3 The “Desktop development with C++” option should be selected in addition to the Python
development option (previous step). These options provide the necessary tools and compilers
to build opynsim with the least hassle.#
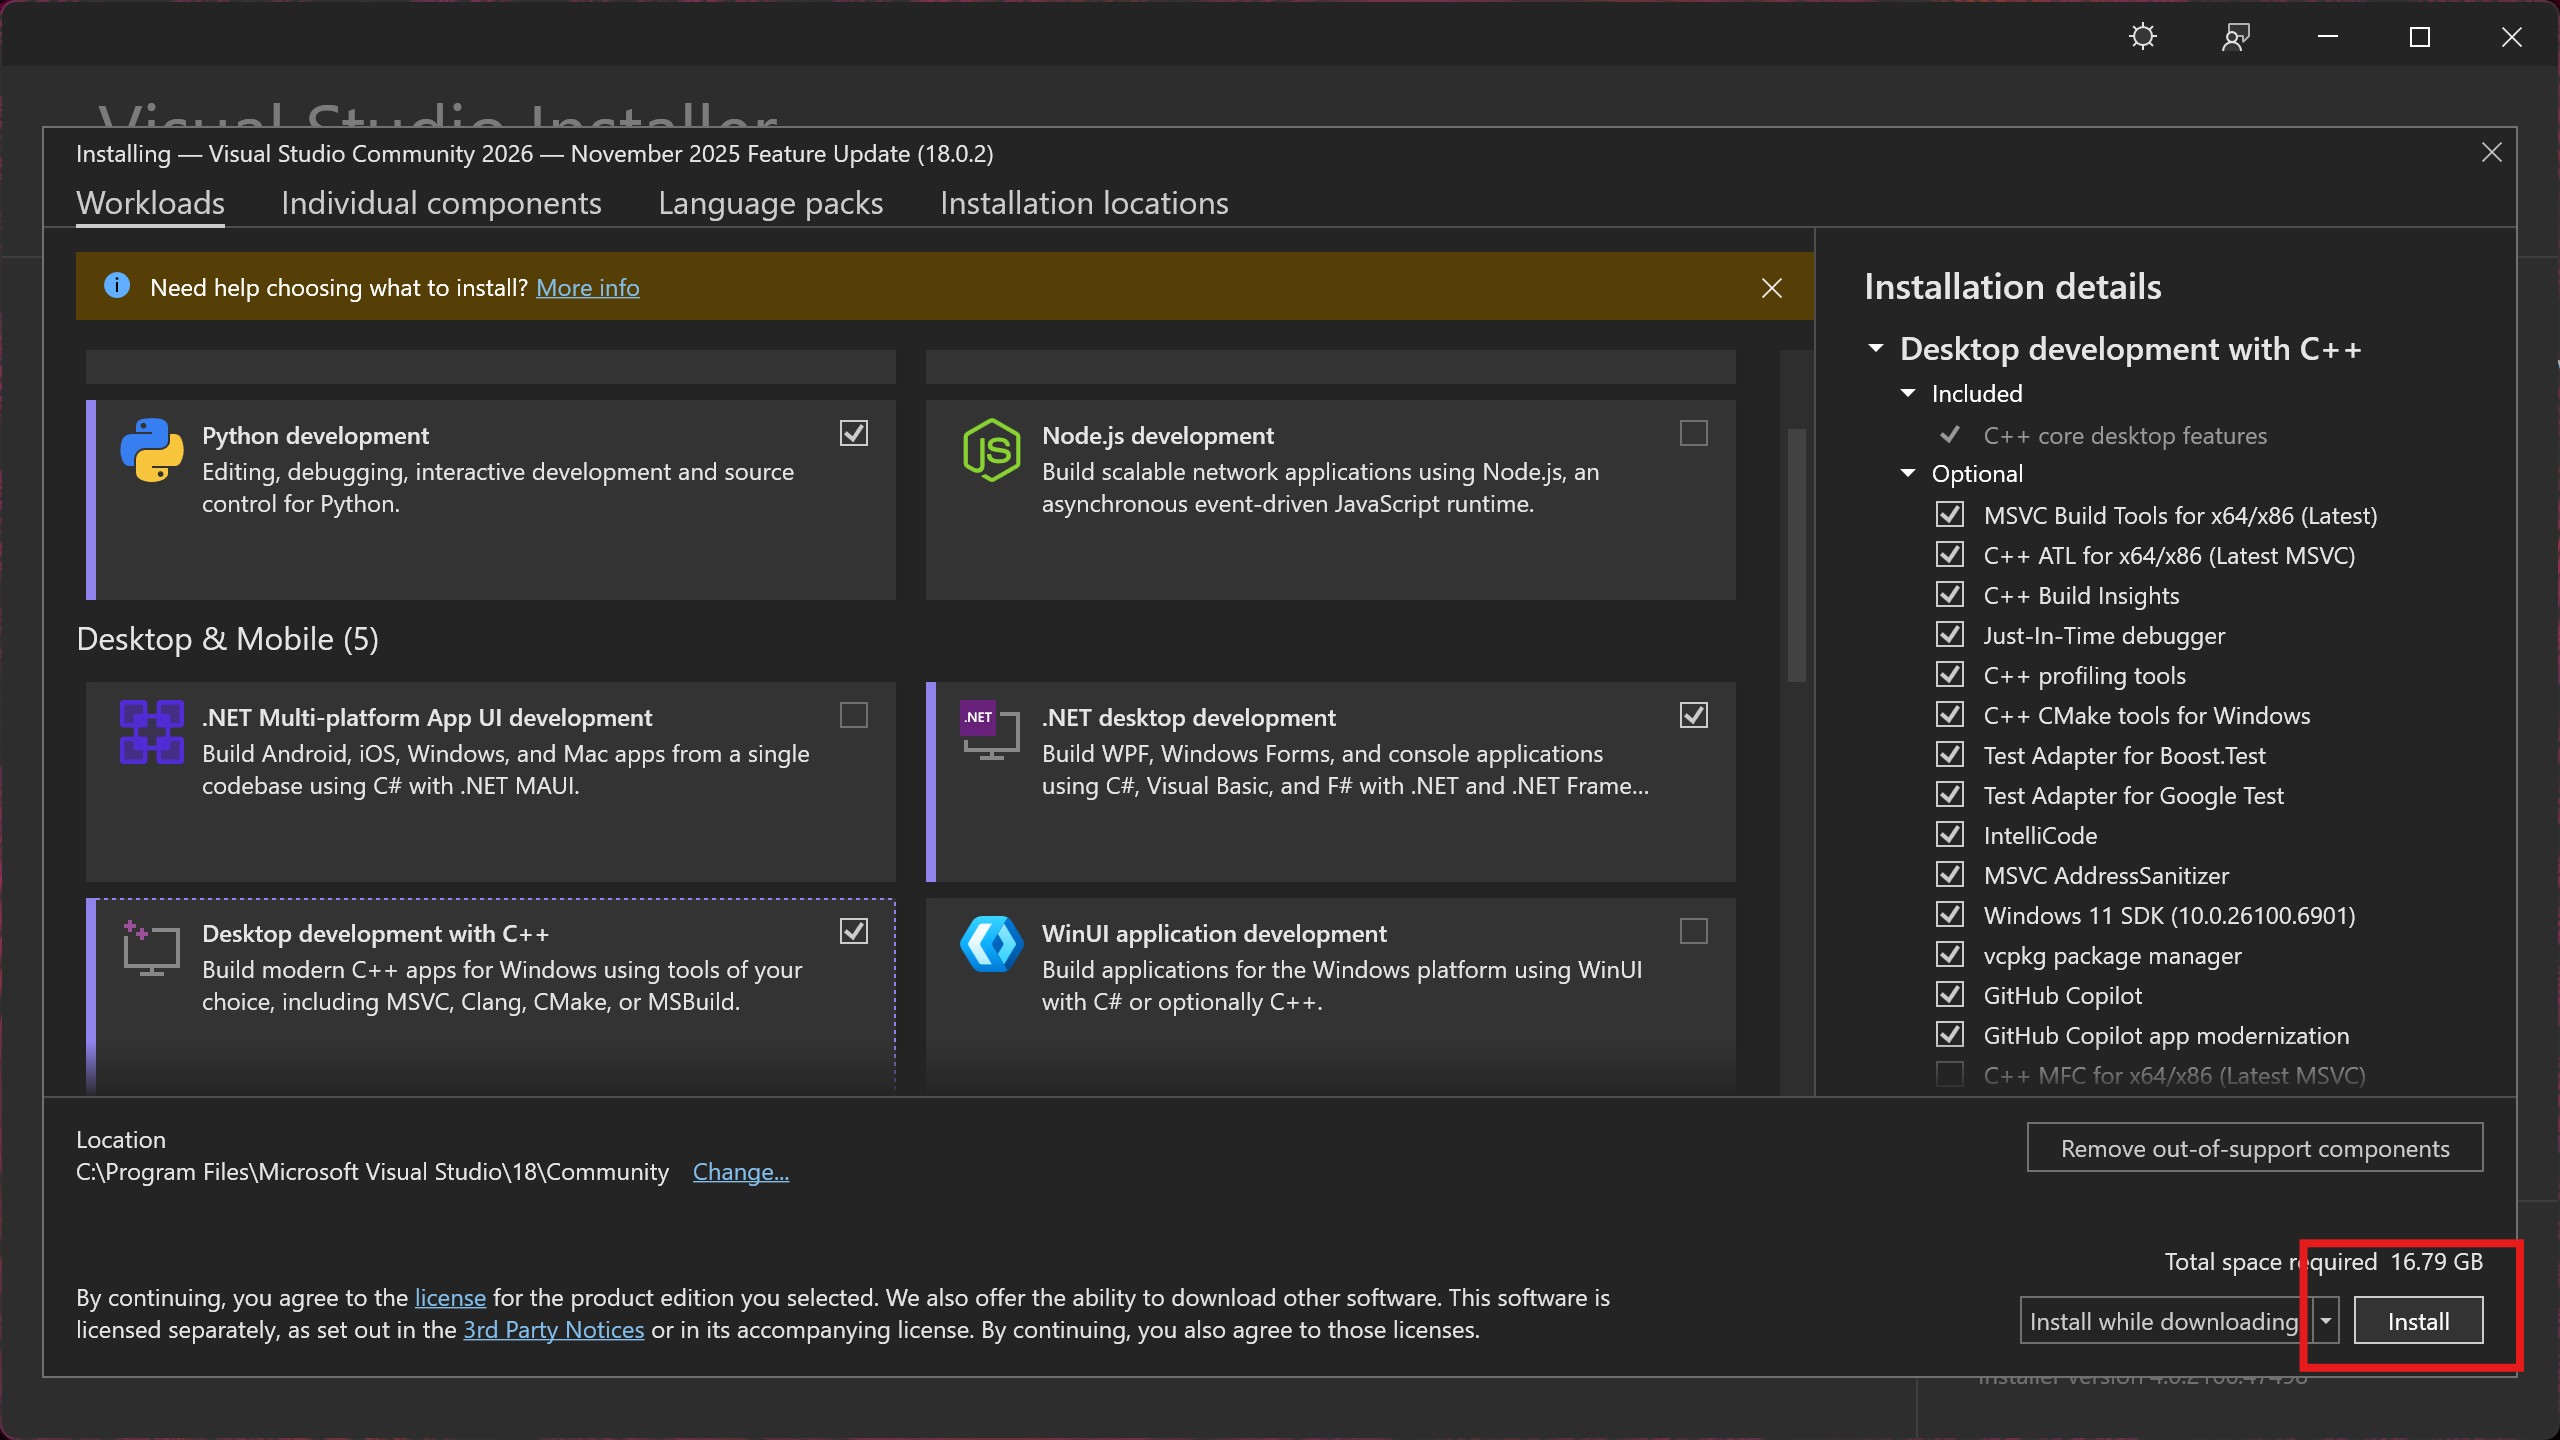
Fig. 2.4 Once you have selected the desired workflows (at least “Python Development” and “Desktop development with C++”), install Visual Studio.#
2.1.1. Using CLion on Windows?#

If you’re planning on developing opynsim with CLion on Windows, you’re done here 🎉! You
should now be able to select Visual Studio as a toolchain when opening opynsim in
CLion.
2.2. Open OPynSim in Visual Studio#
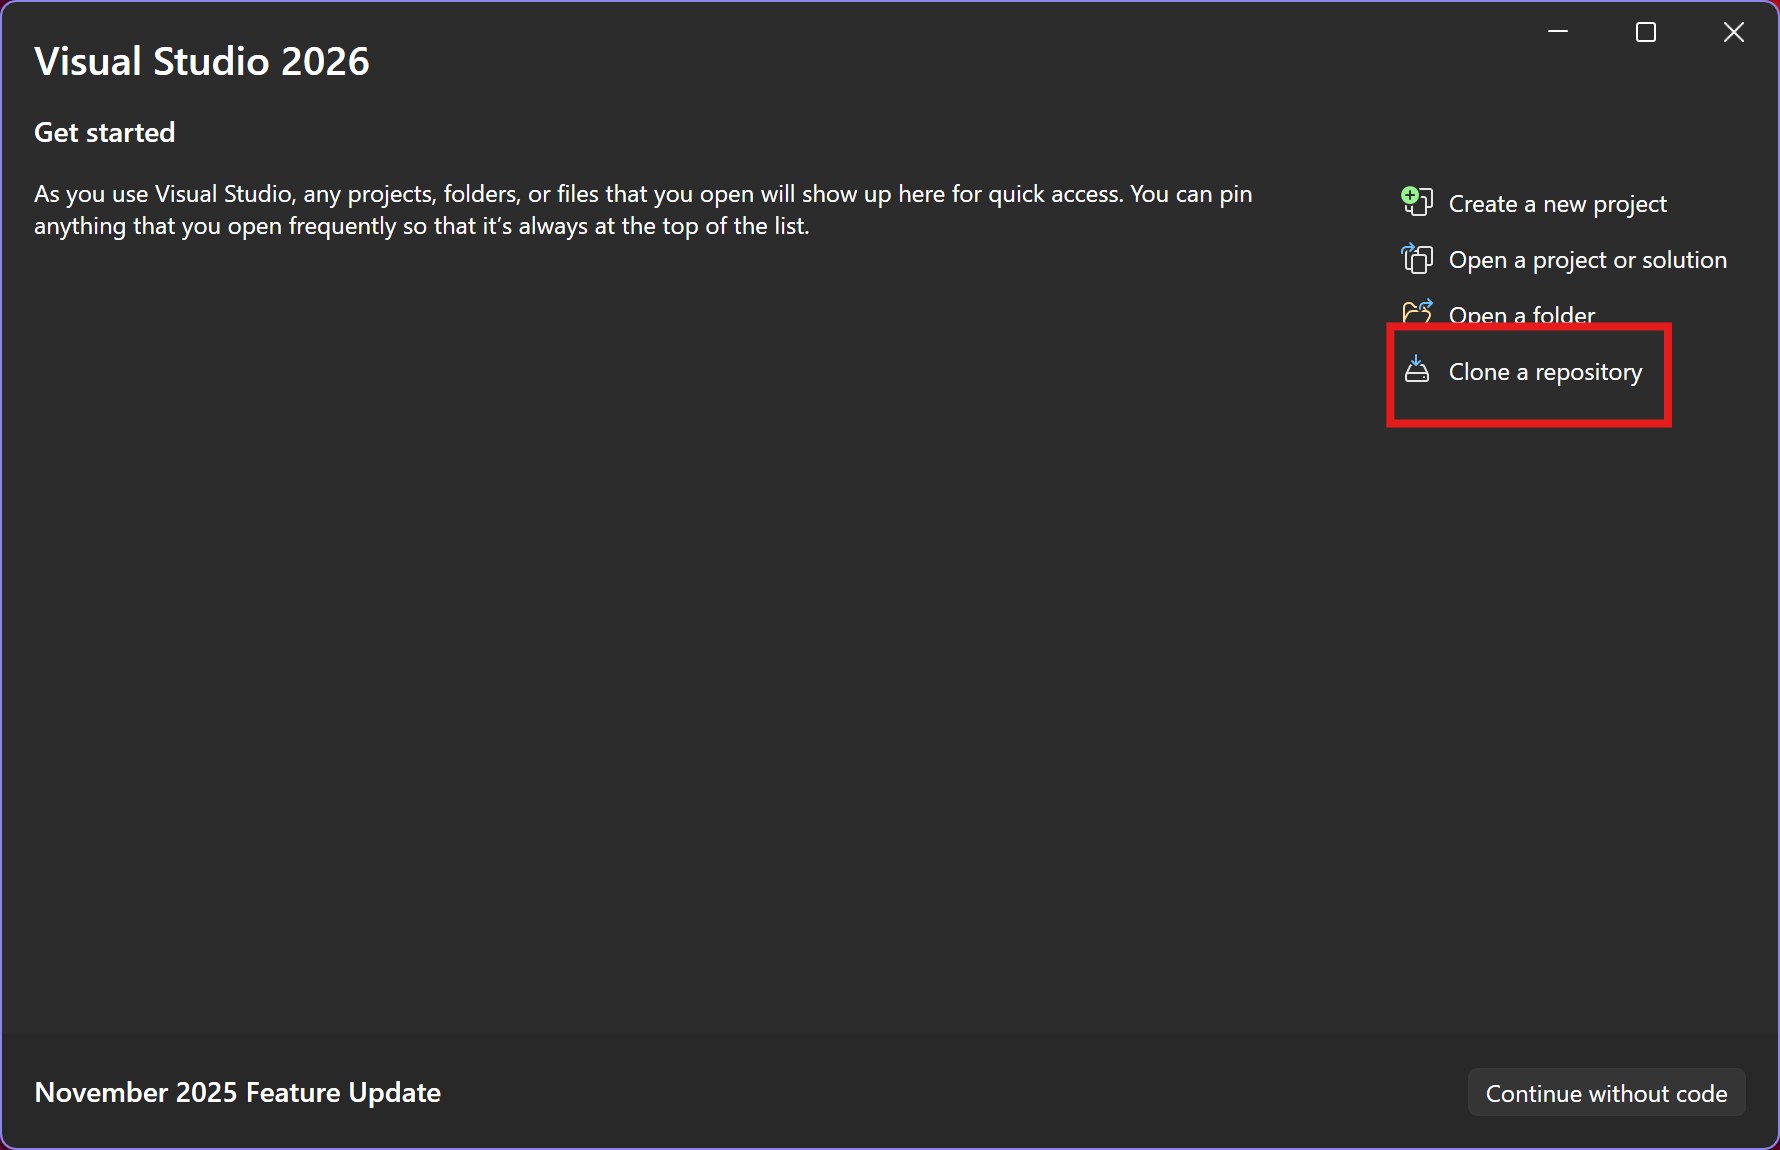
Fig. 2.5 After Visual Studio is installed it will open its splash screen, which is where
you select which project you will work on. opynsim is a cross-platform hybrid
(C++/Python) CMake project, which Visual Studio can either open as a folder (if you
already have it on your computer), or clone externally (pictured).#
This guide clones the opynsim repository via Visual Studio (pictured), just
to keep everything contained within one application.
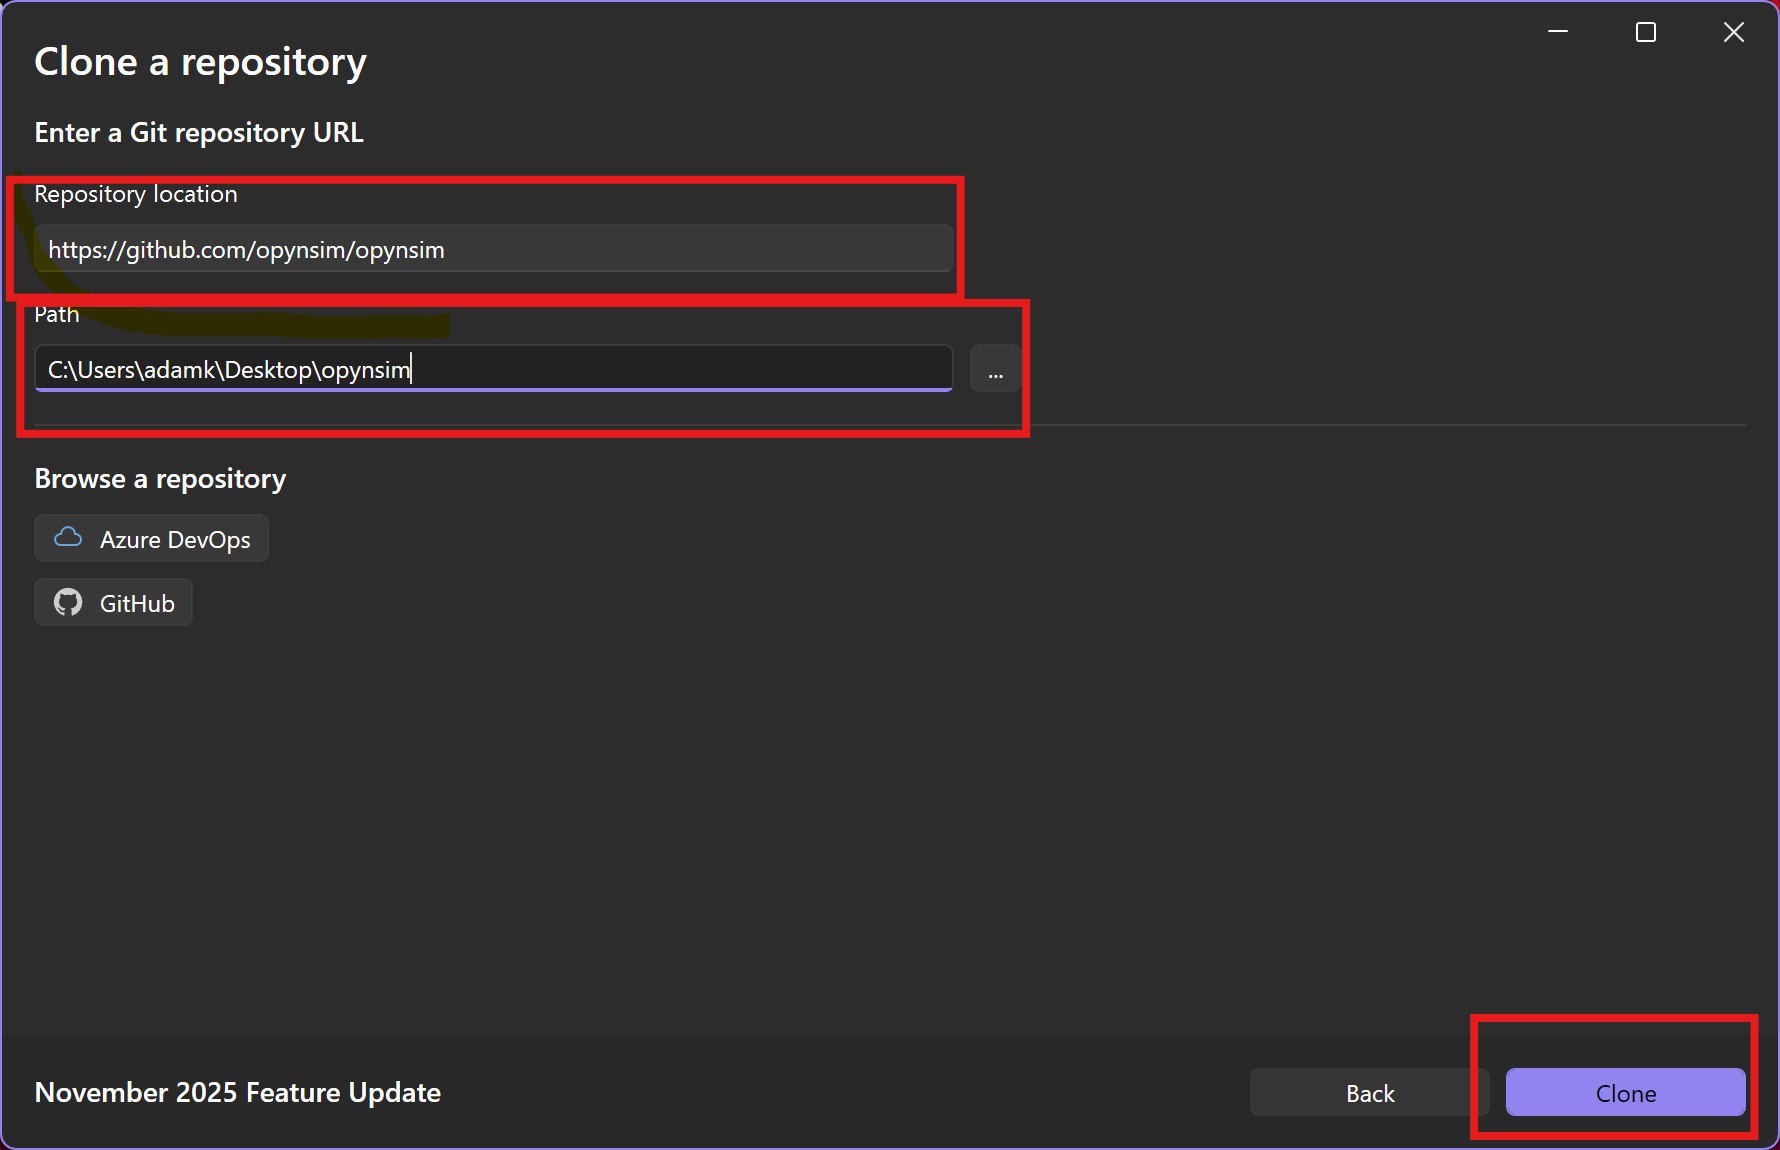
Fig. 2.6 Fill out opynsim’s details in the “Clone a Repository” prompt. The URL of opynsim’s
central repository is https://github.com/opynsim/opynsim. Optionally, choose
a path where it should be checked out to (I prefer my Desktop, for example).#
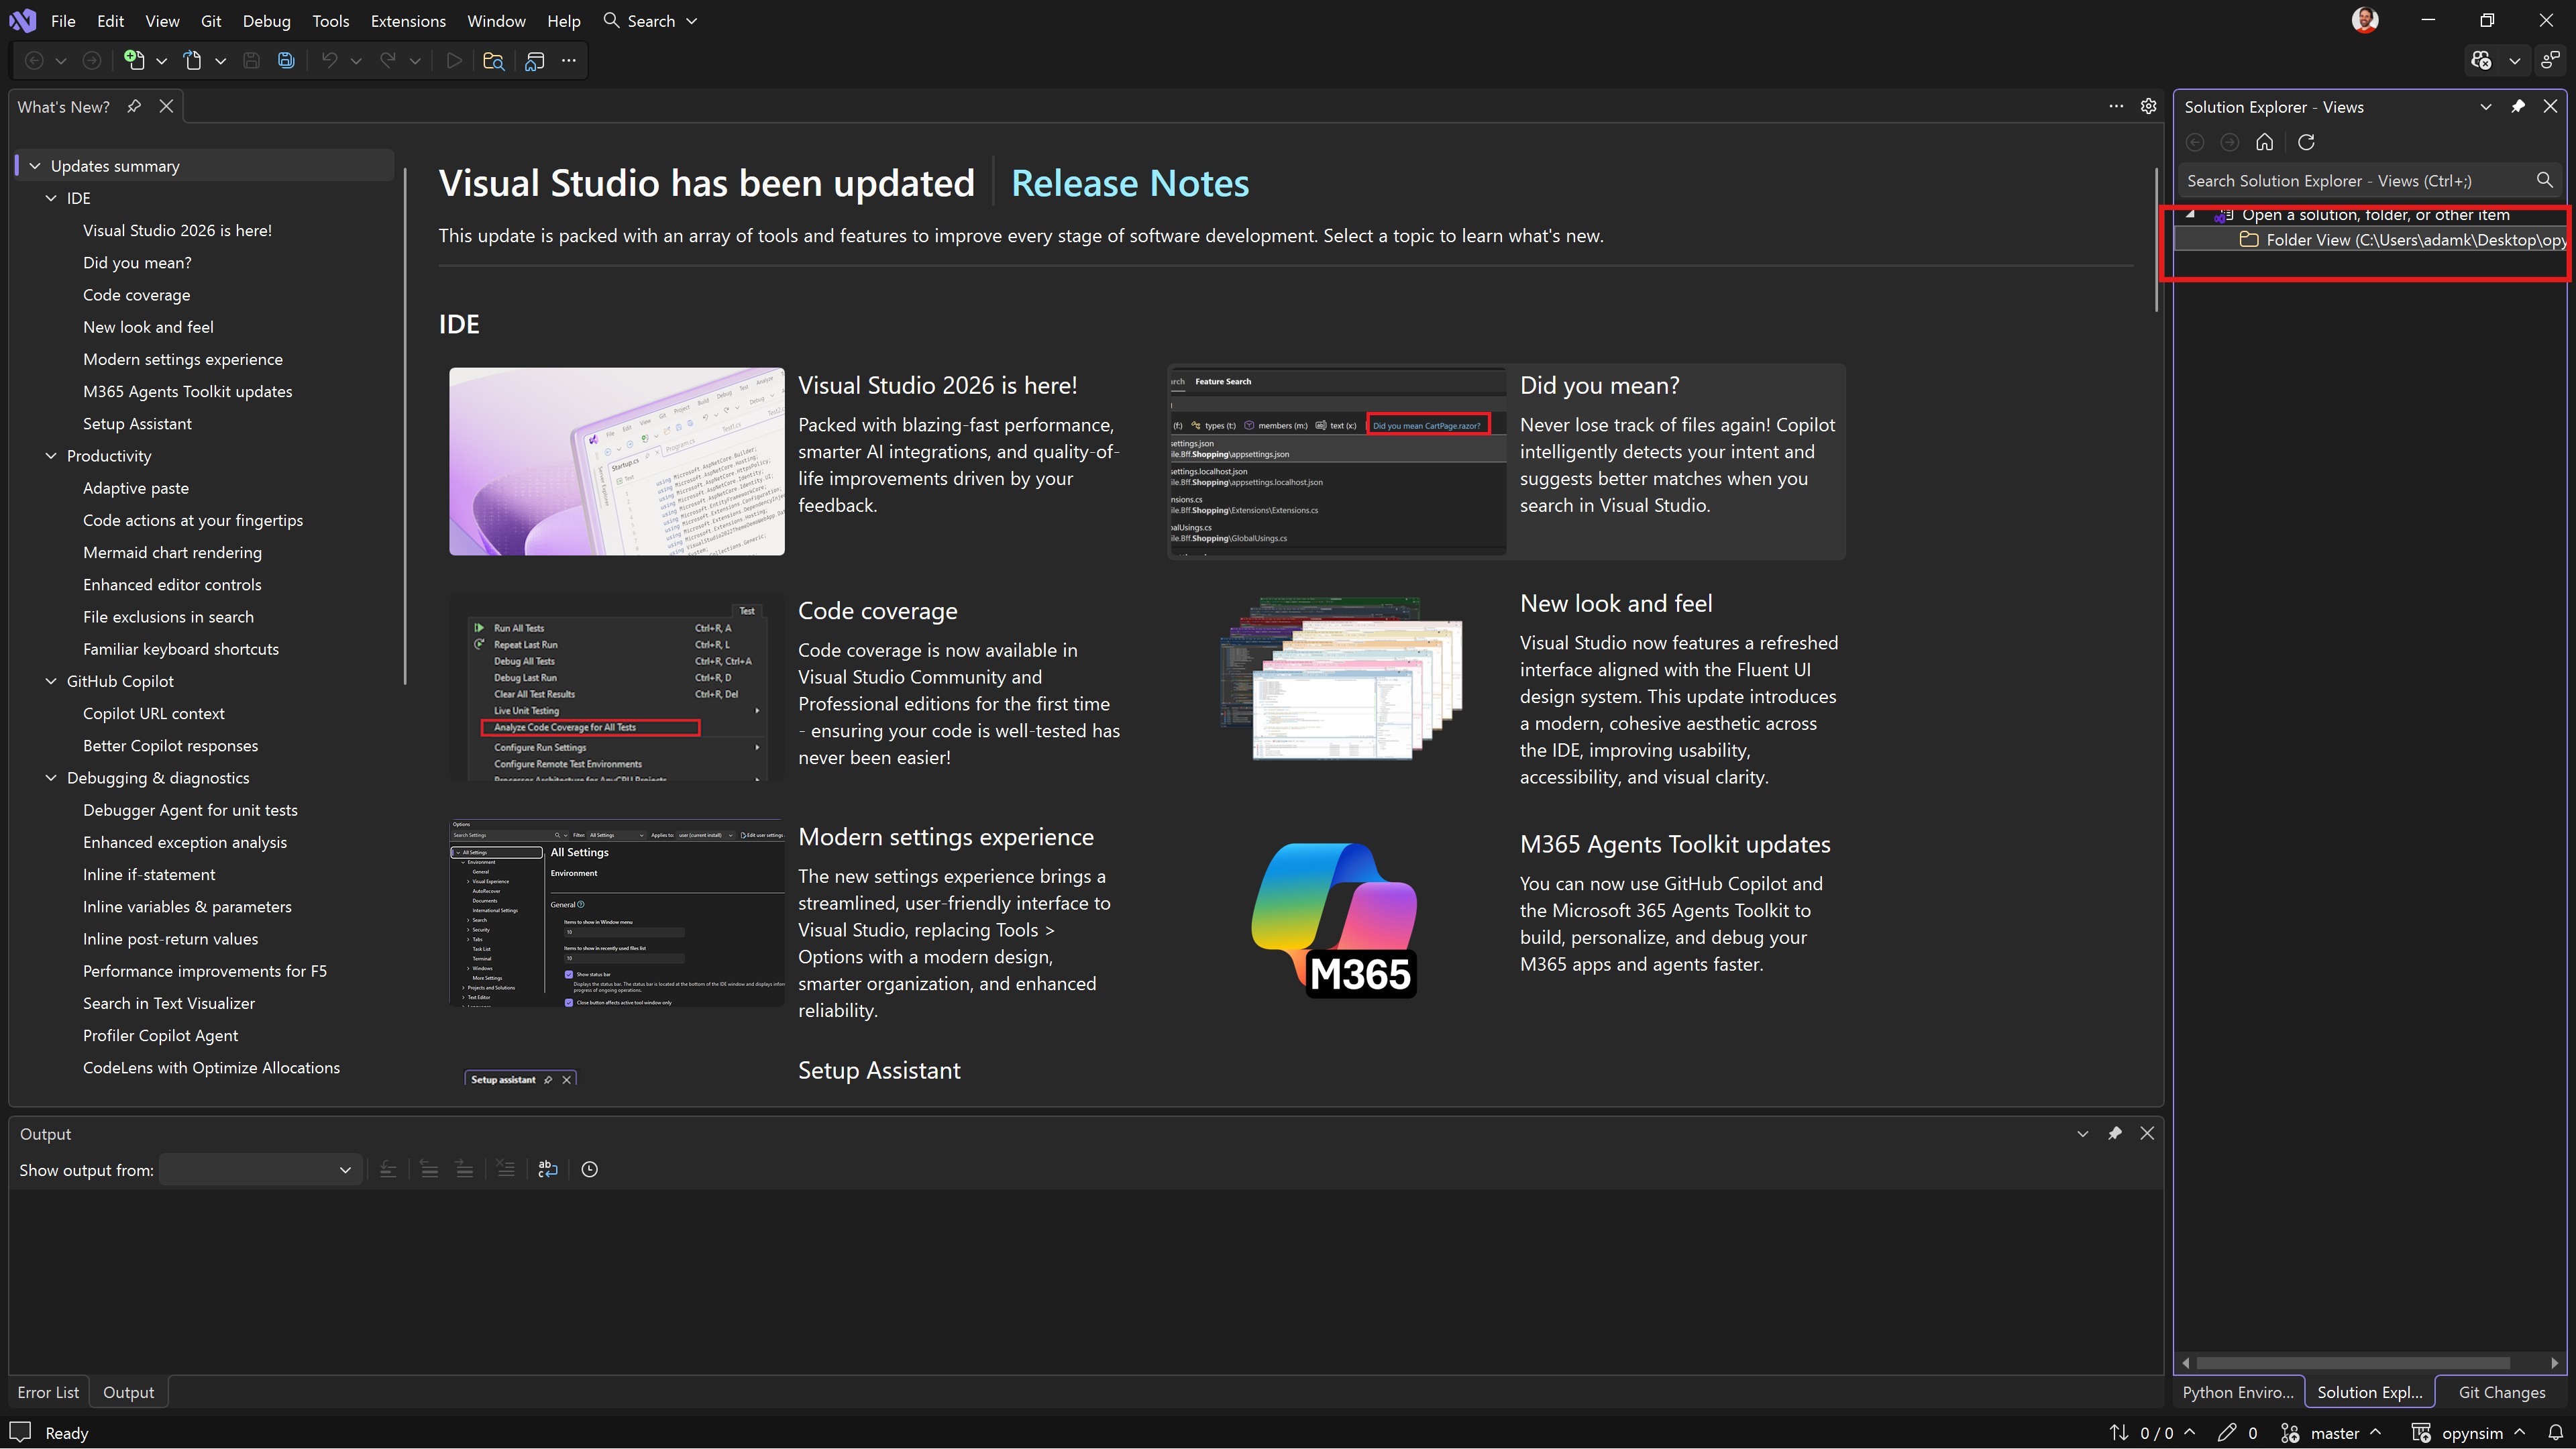
Fig. 2.7 Once the repository is cloned, Visual Studio will then open and show the “What’s New” tab
(you can close this). Click the folder view (annotated) to open the opynsim project as
a folder.#
2.3. Setup Python Virtual Environment#
TODO: be VERY VERY CAREFUL around here: some users might have miniforge/condaforge and therefore already be in a virtual environment. This won’t work later on when they run
opynsim_debugger.exebecause those virtual environments aren’t on the PATH for Visual Studio.
This section sets up Visual Studio with the correct Python virtual environment for developing
opynsim, which contains the necessary python packages.
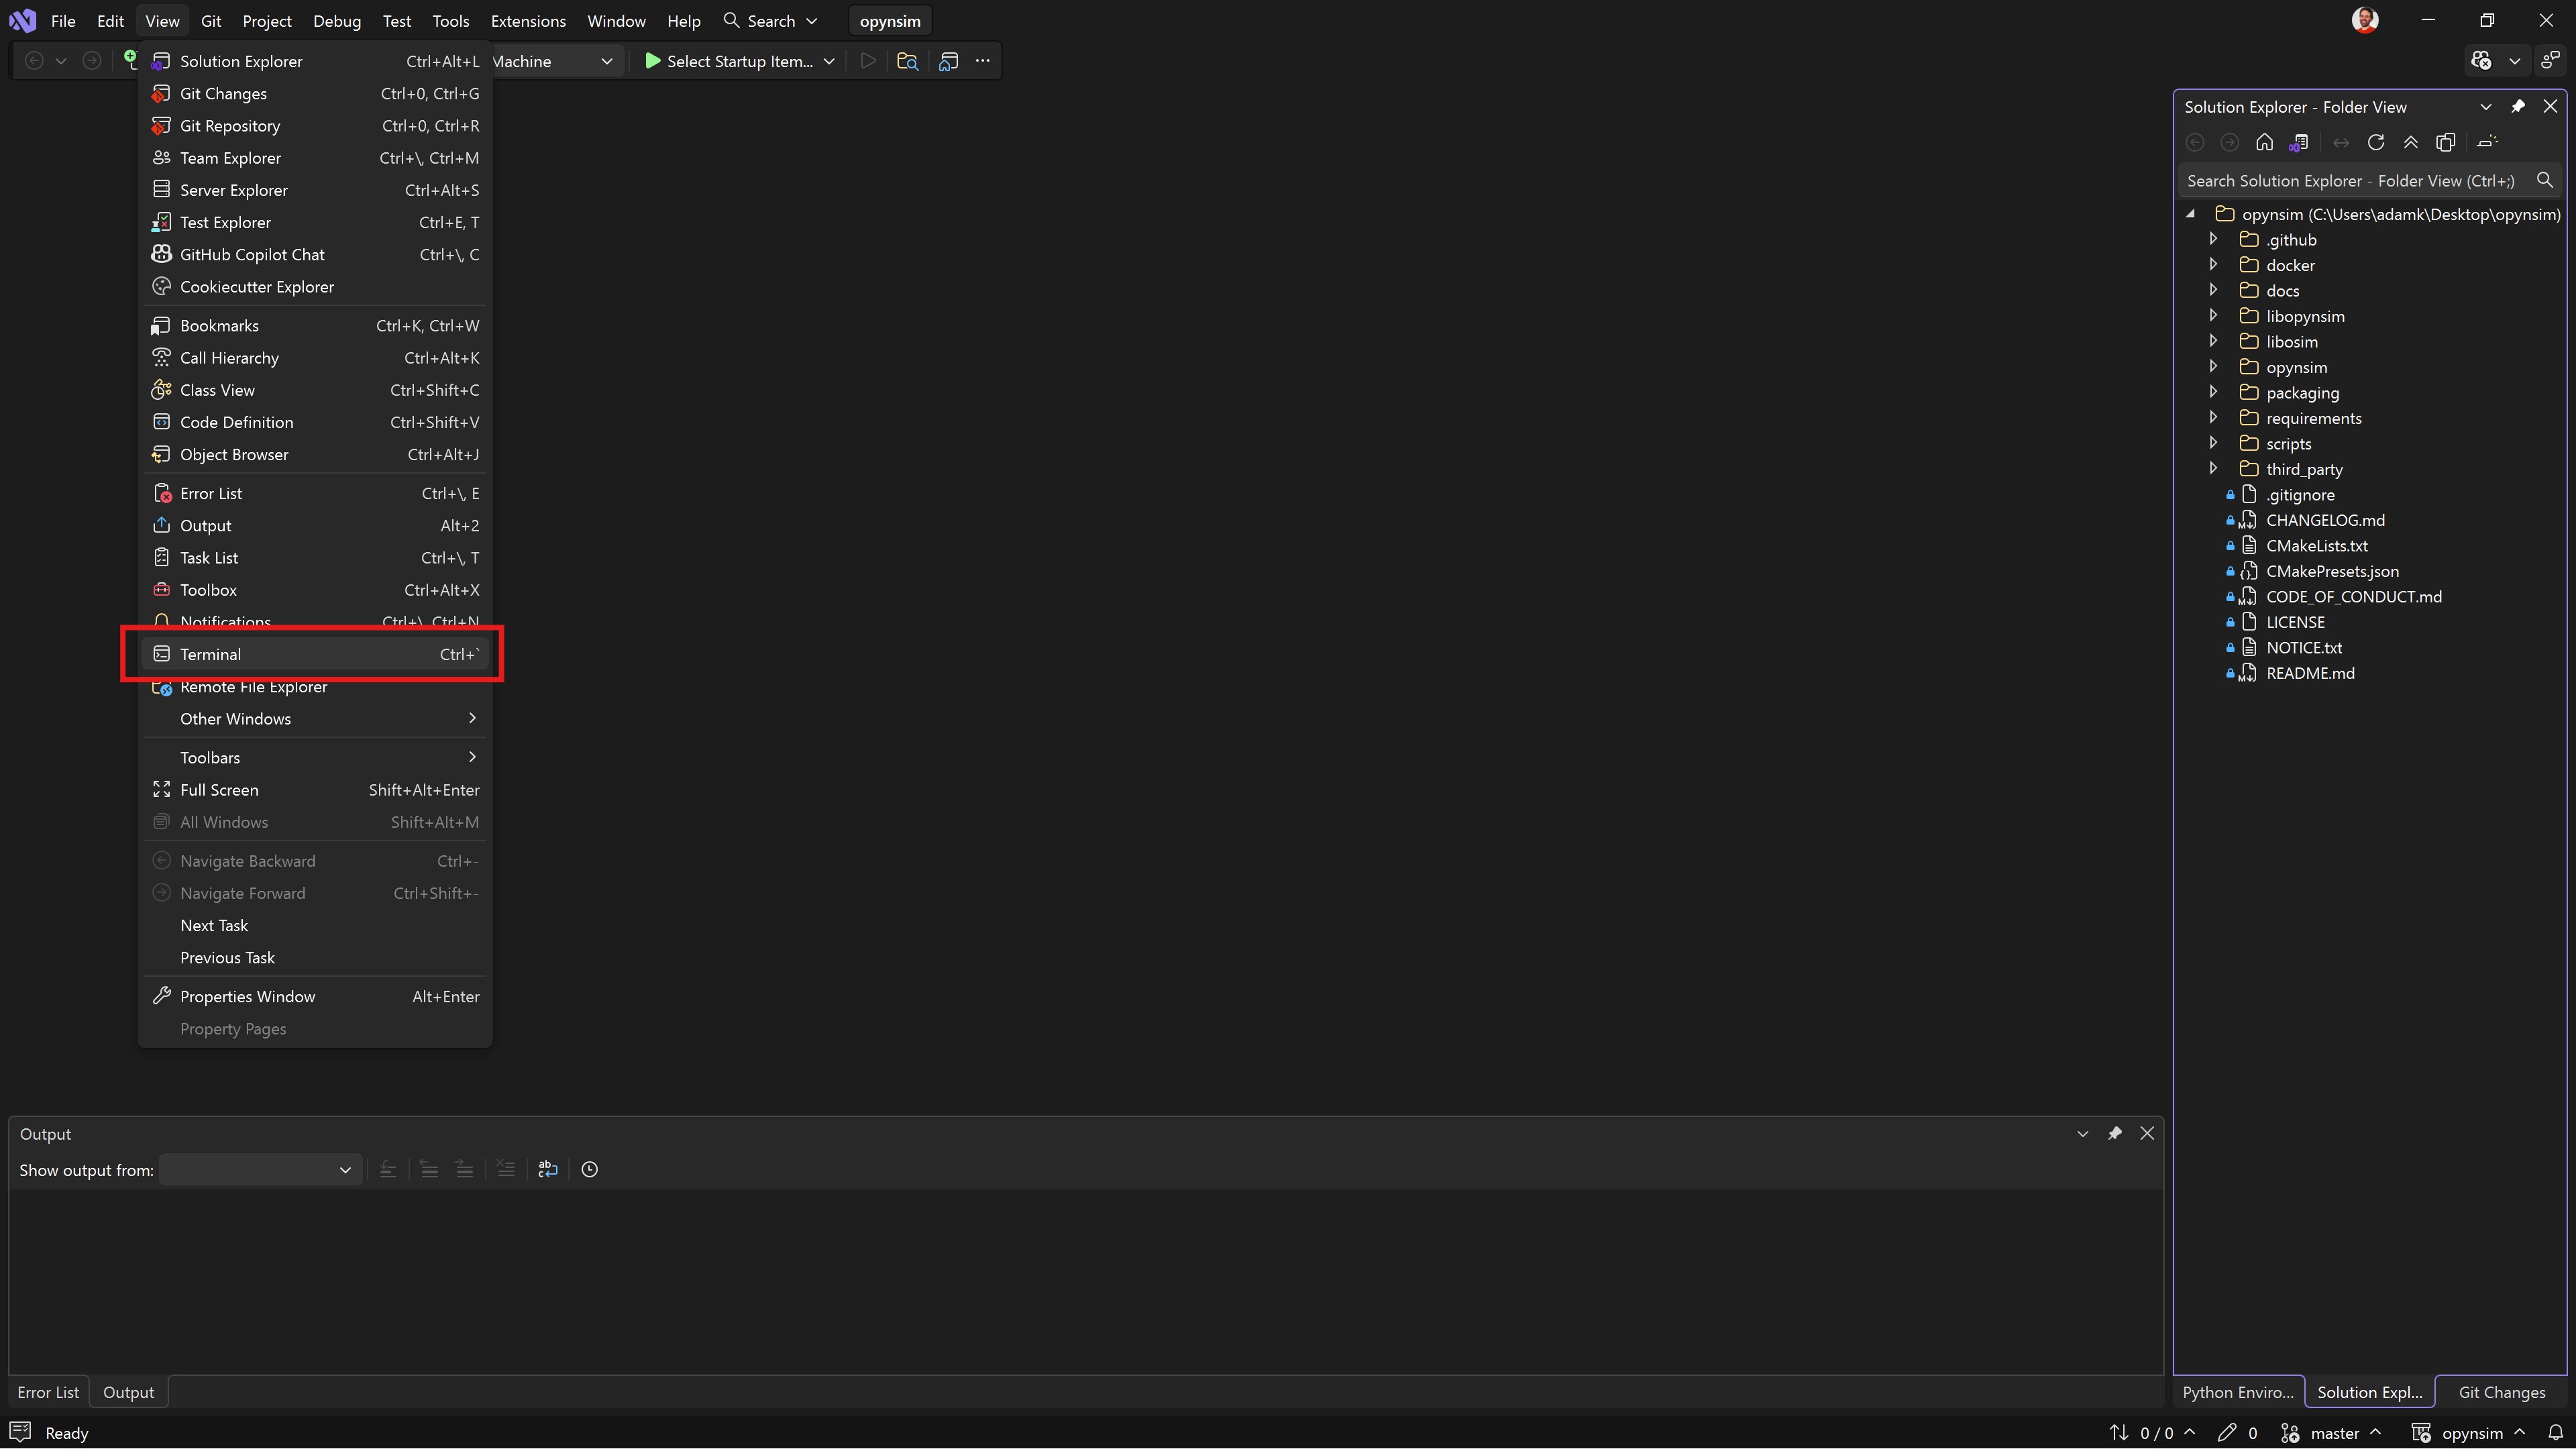
Fig. 2.8 Open a terminal from the view menu.#
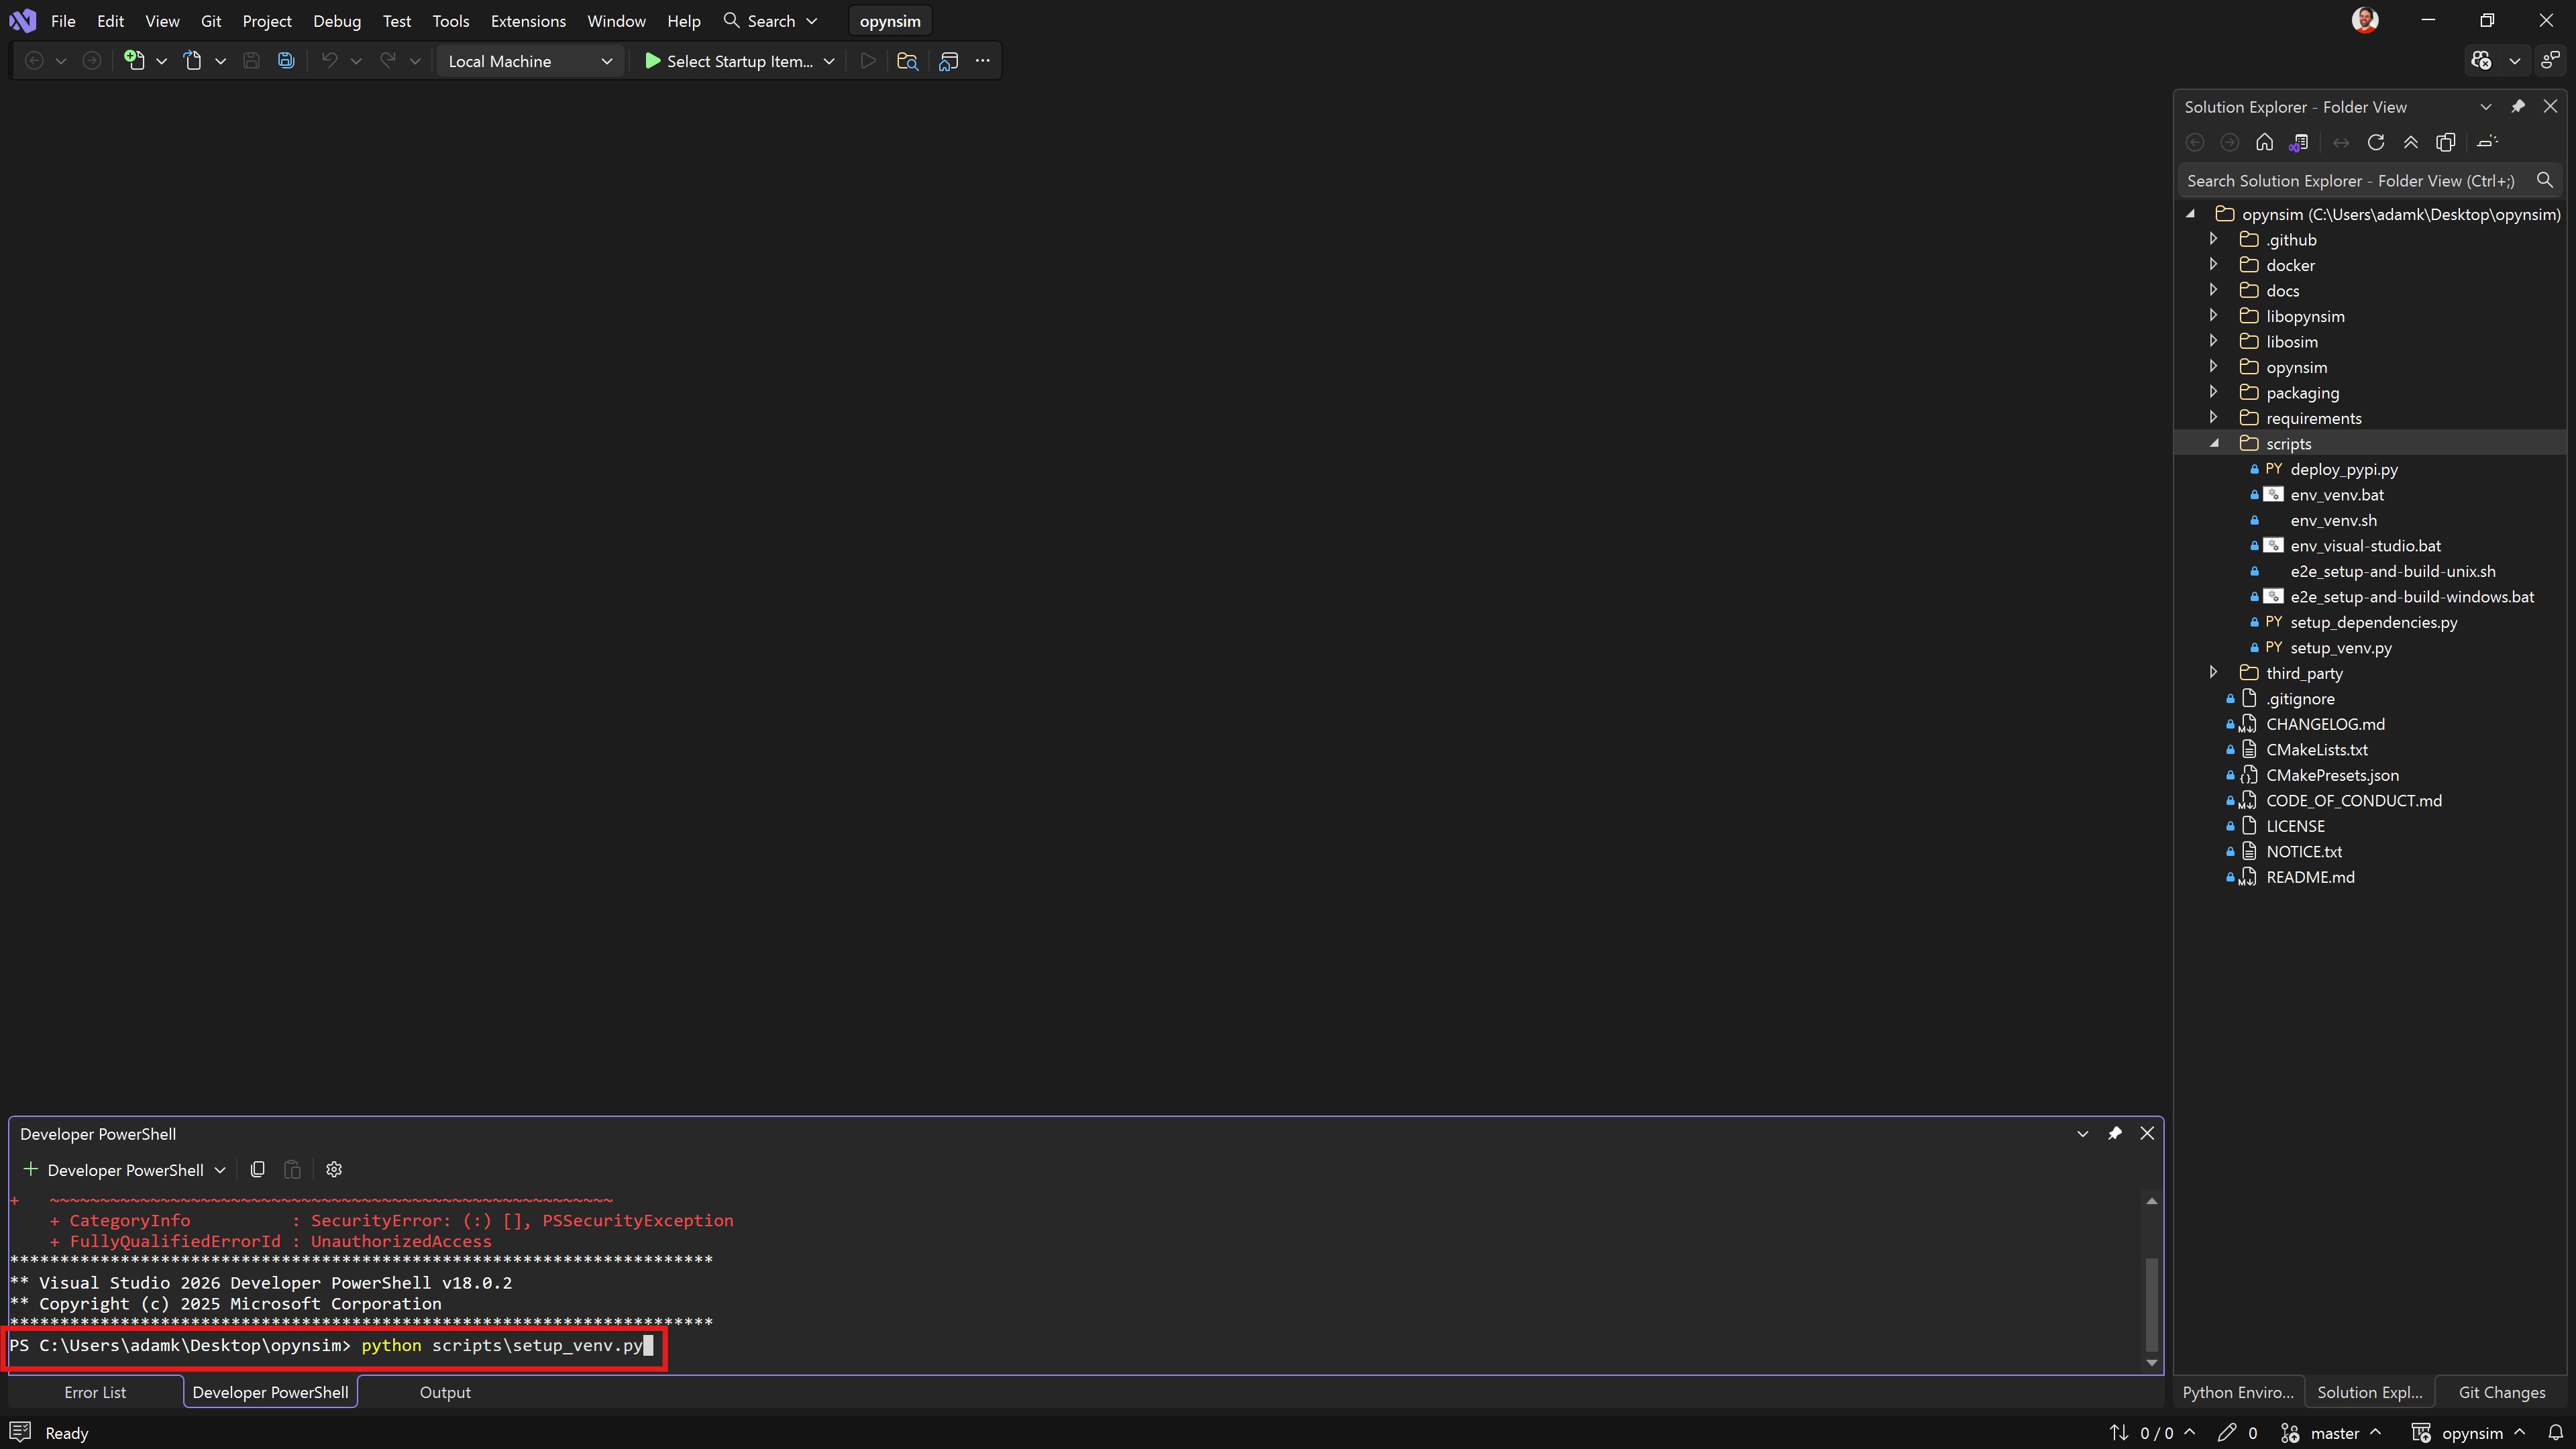
Fig. 2.9 Run virtual environment setup script by running python scripts/setup_venv.py from the
terminal. This will create a local .venv directory in your opynsim source directory
with the appropriate packages that opynsim uses.#
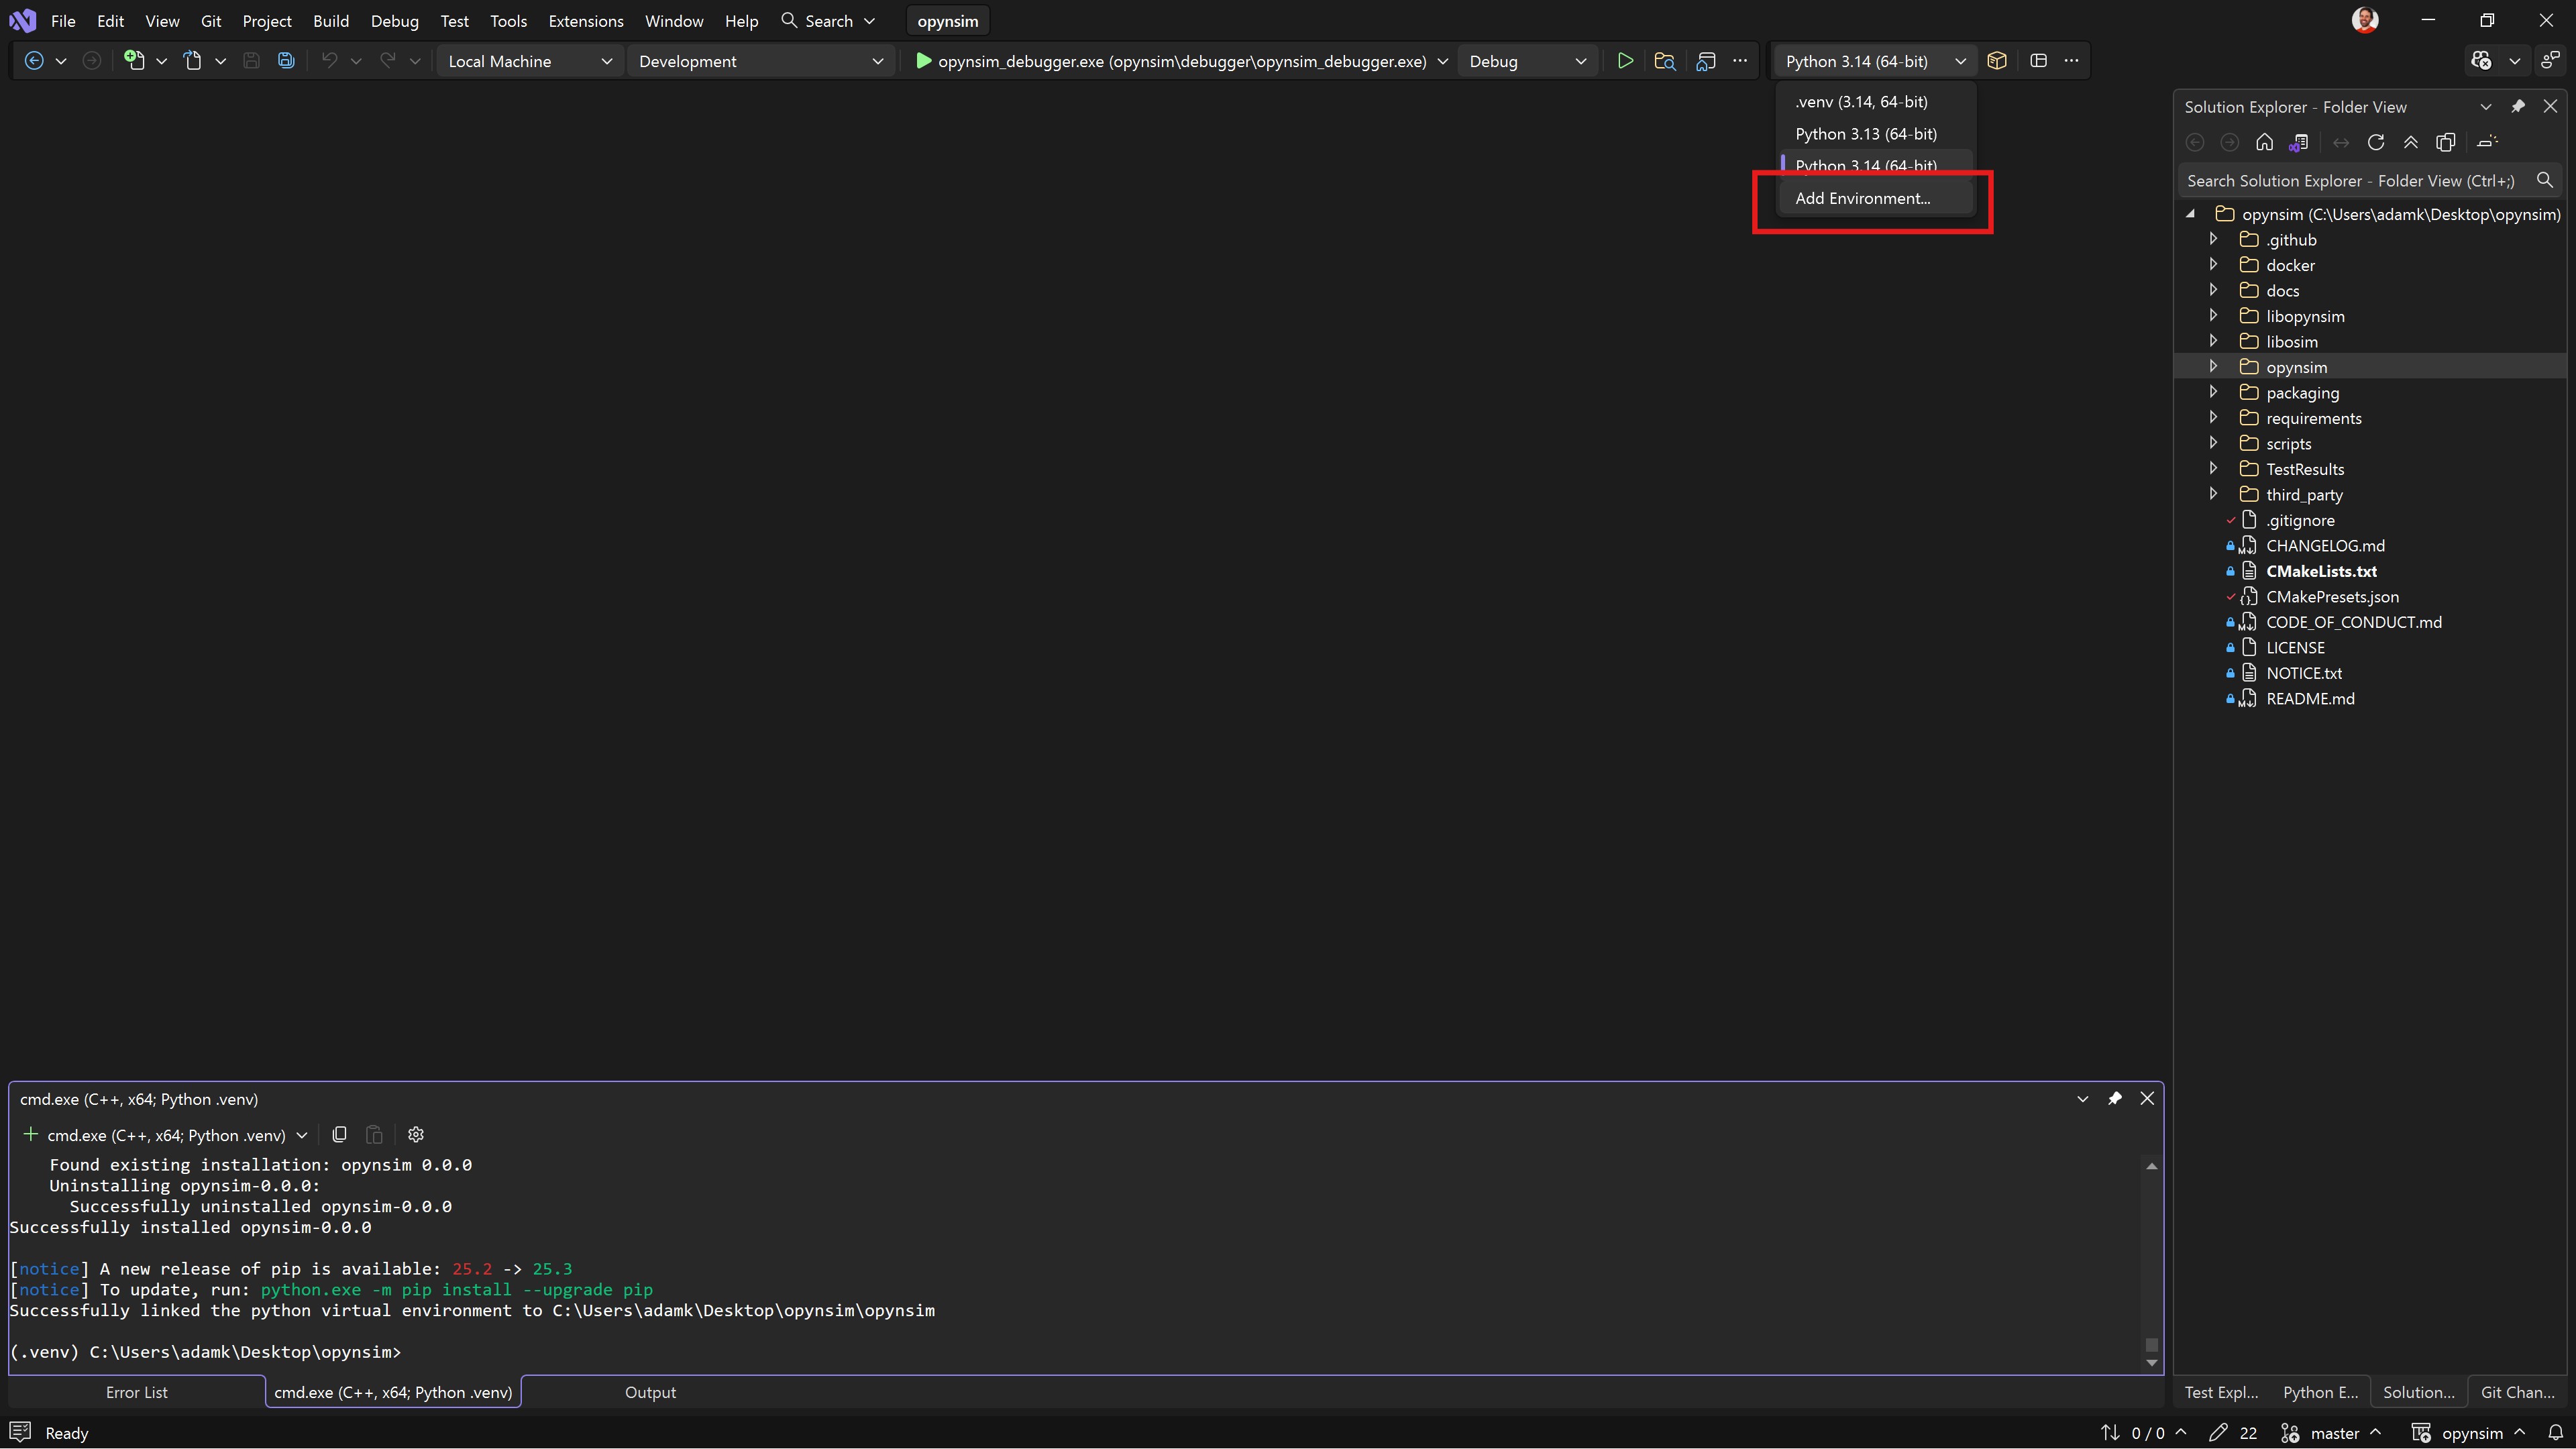
Fig. 2.10 Tell Visual Studio to use the virtual environment. Click the Add Environment button
(annotated) to begin configuring Visual Studio to use the environment.#
Note: If you can’t see the Python toolbar, then open a python file (e.g. opynsim/opynsim/__init__.py)
in Visual Studio, which usually makes it show the bar.
Note #2: you might not need to do this. If Visual Studio already lists .venv as an
available environment, it has probably already auto-detected the environment. Confirm this
with the next step (list the environments, ensure it’s listing the correct location). If it
is wrong, add a new environment with a different name (e.g. .venv (opynsim)).
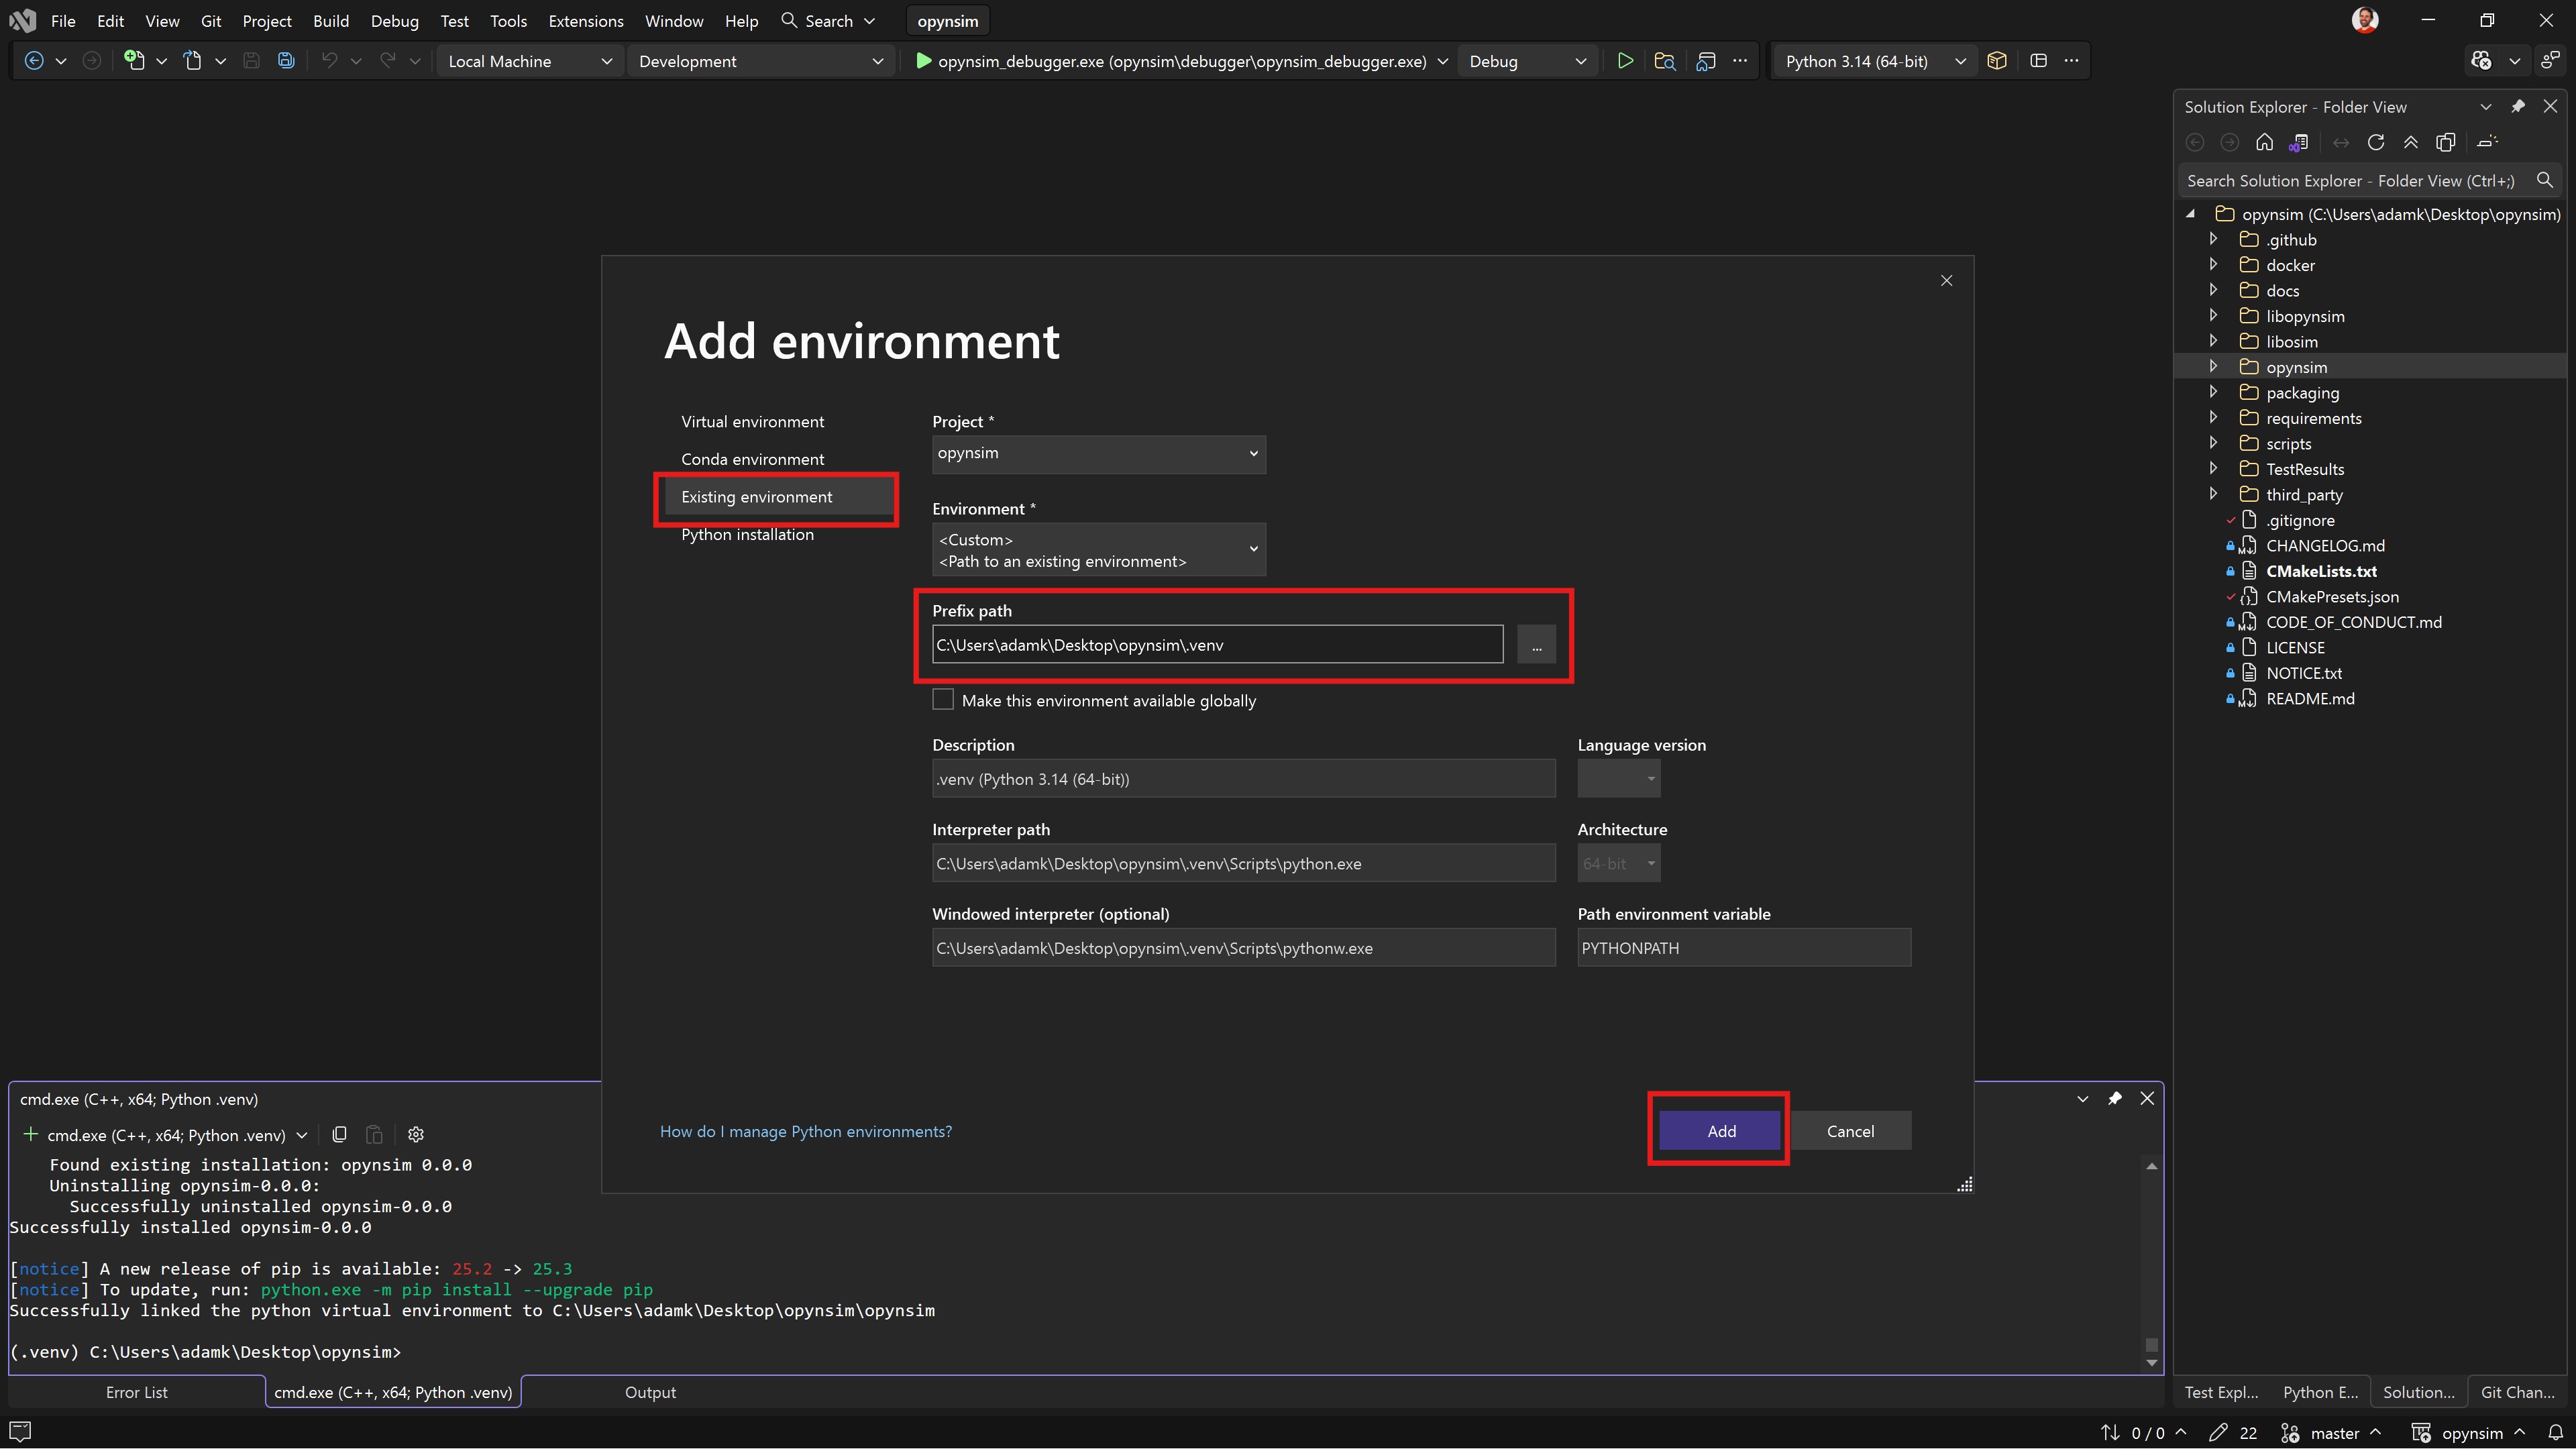
Fig. 2.11 Select “Existing Environment” and set prefix path to the .venv directory that was created
in the previous step. This lets Visual Studio know which virtual environment it should use.#
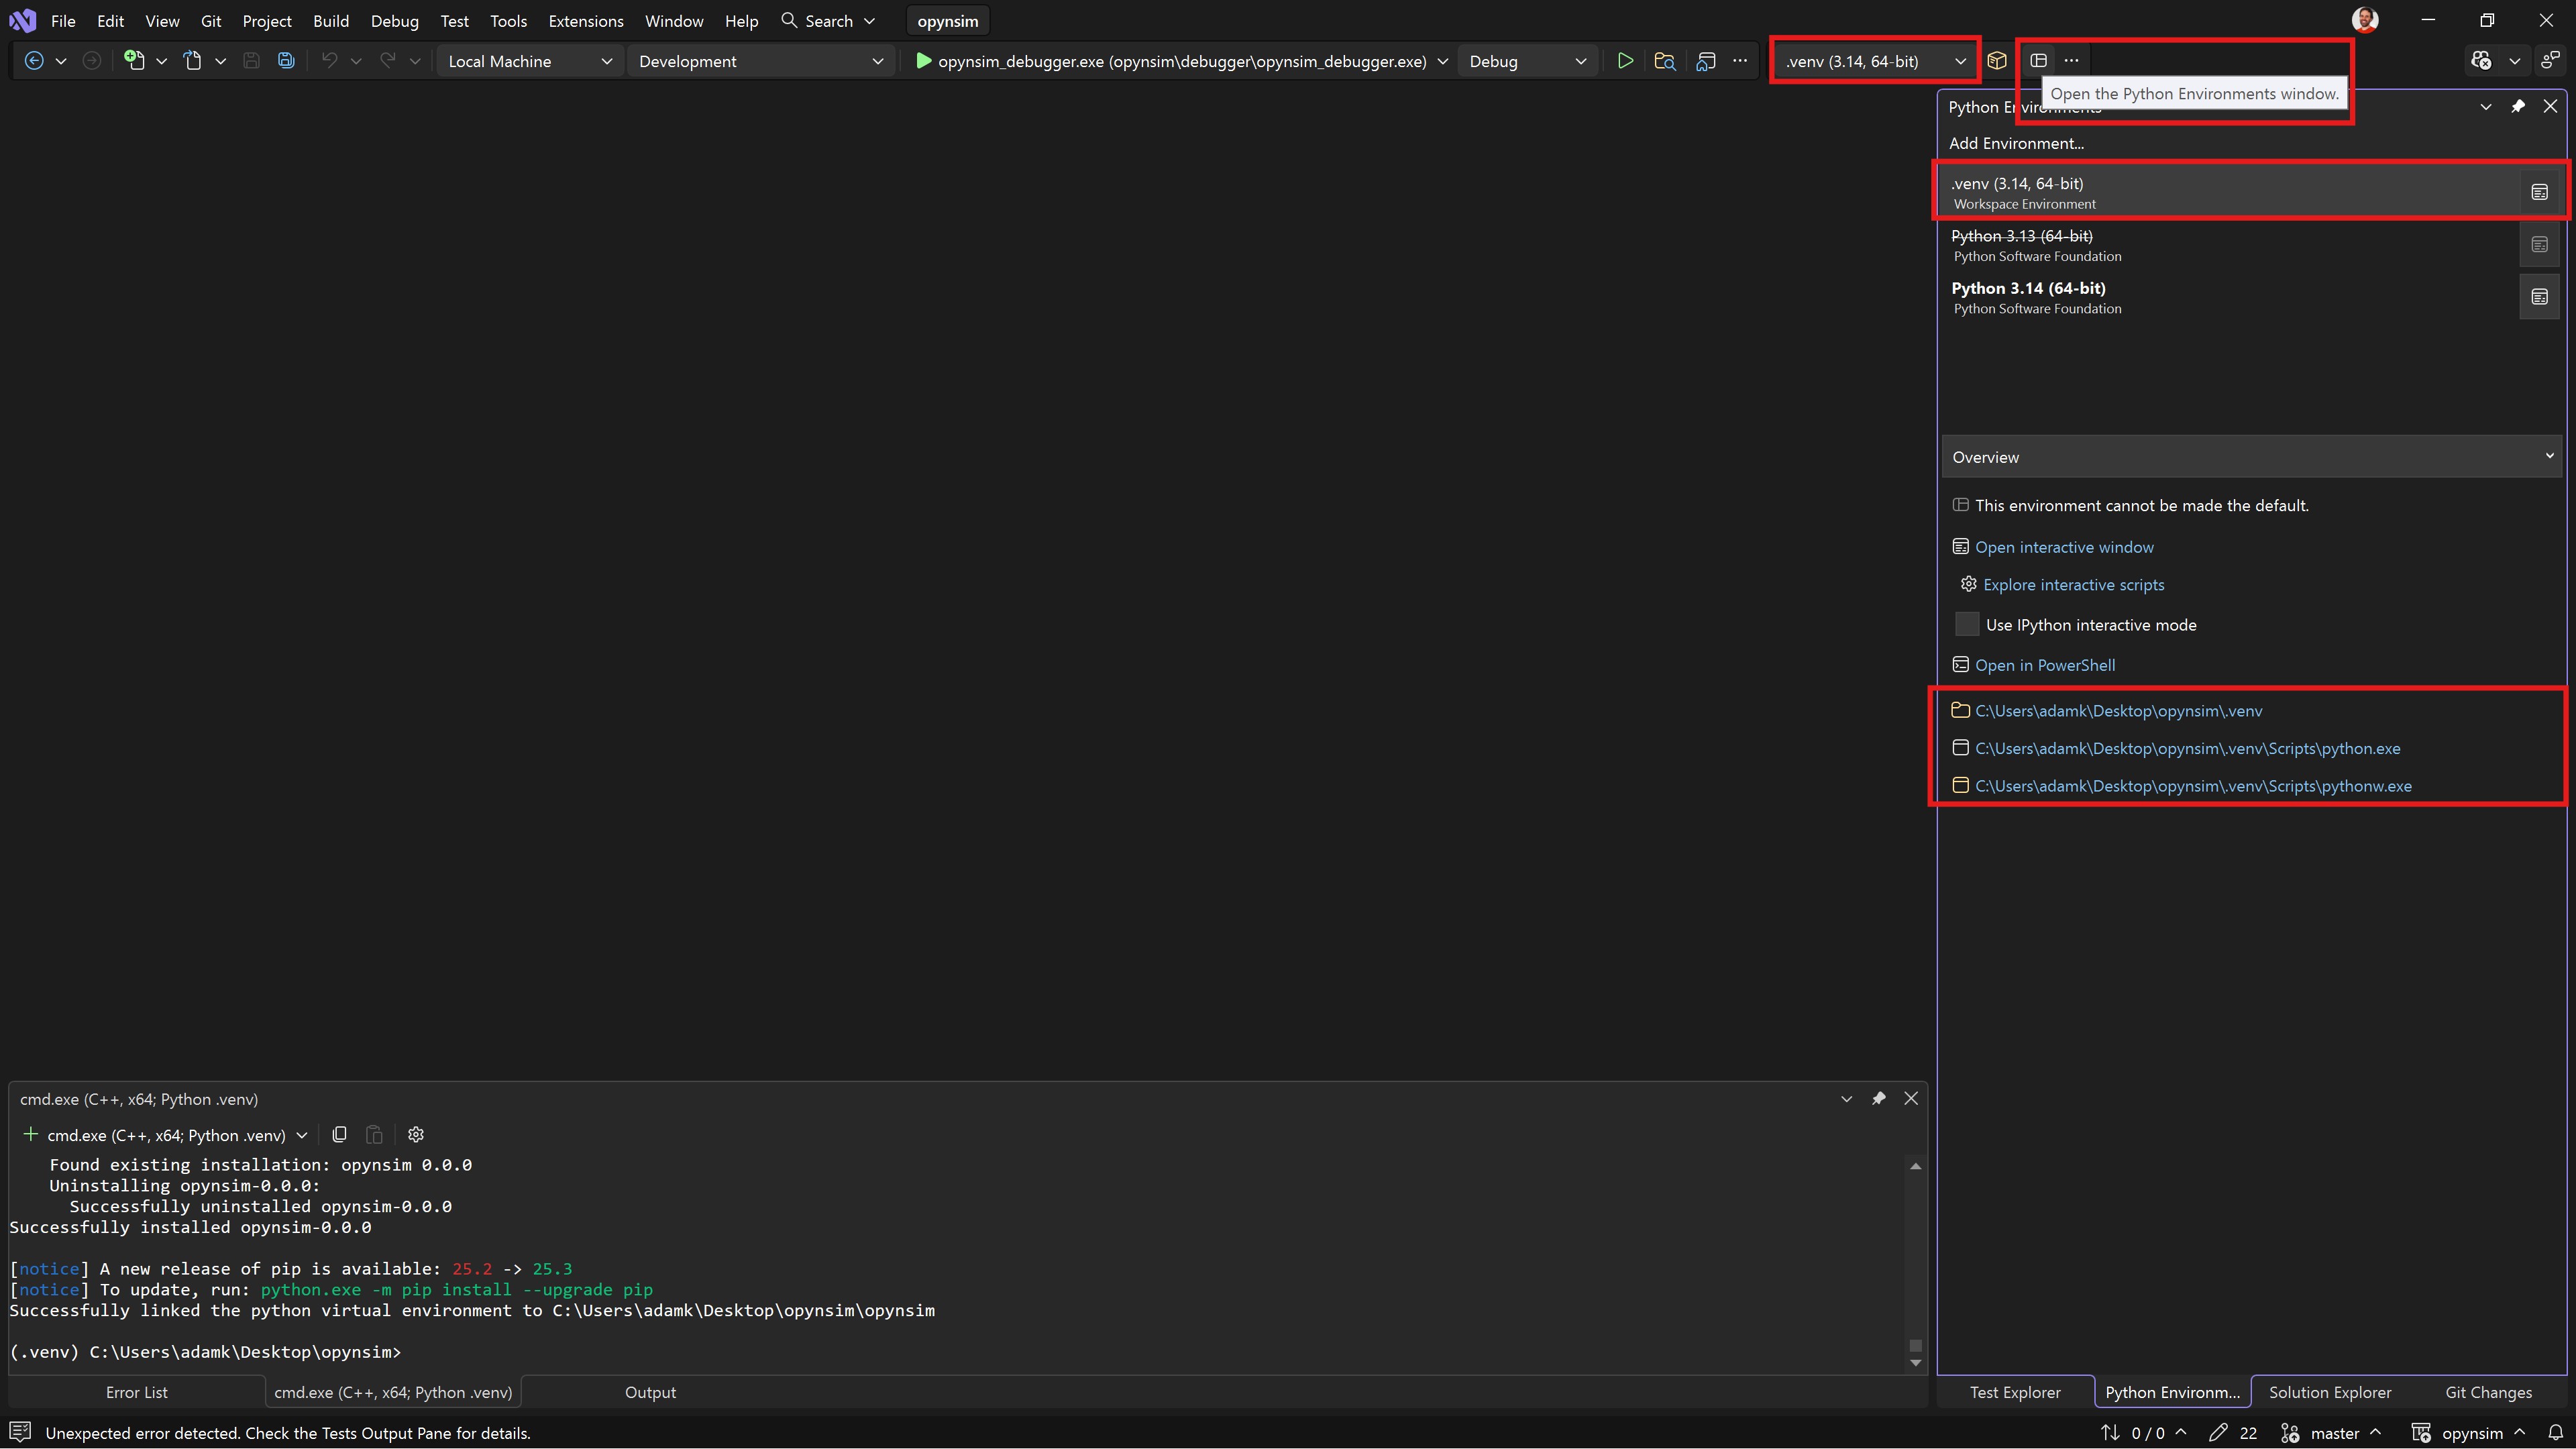
Fig. 2.12 To confirm that the python virtual environment has been setup, click the “Open the Python Environments Window”
and ensure that .venv is listed and connects to the local virtual environment you created in
the previous steps. Ensure Visual Studio uses the environment by selecting it in the toolbar
at the top of Visual Studio (annotated).#
2.4. Setup Terminal Environment#
This step sets up the terminal in Visual Studio to use the python virtual environment and also have access to the C++ environment (compiler, cmake, etc.).
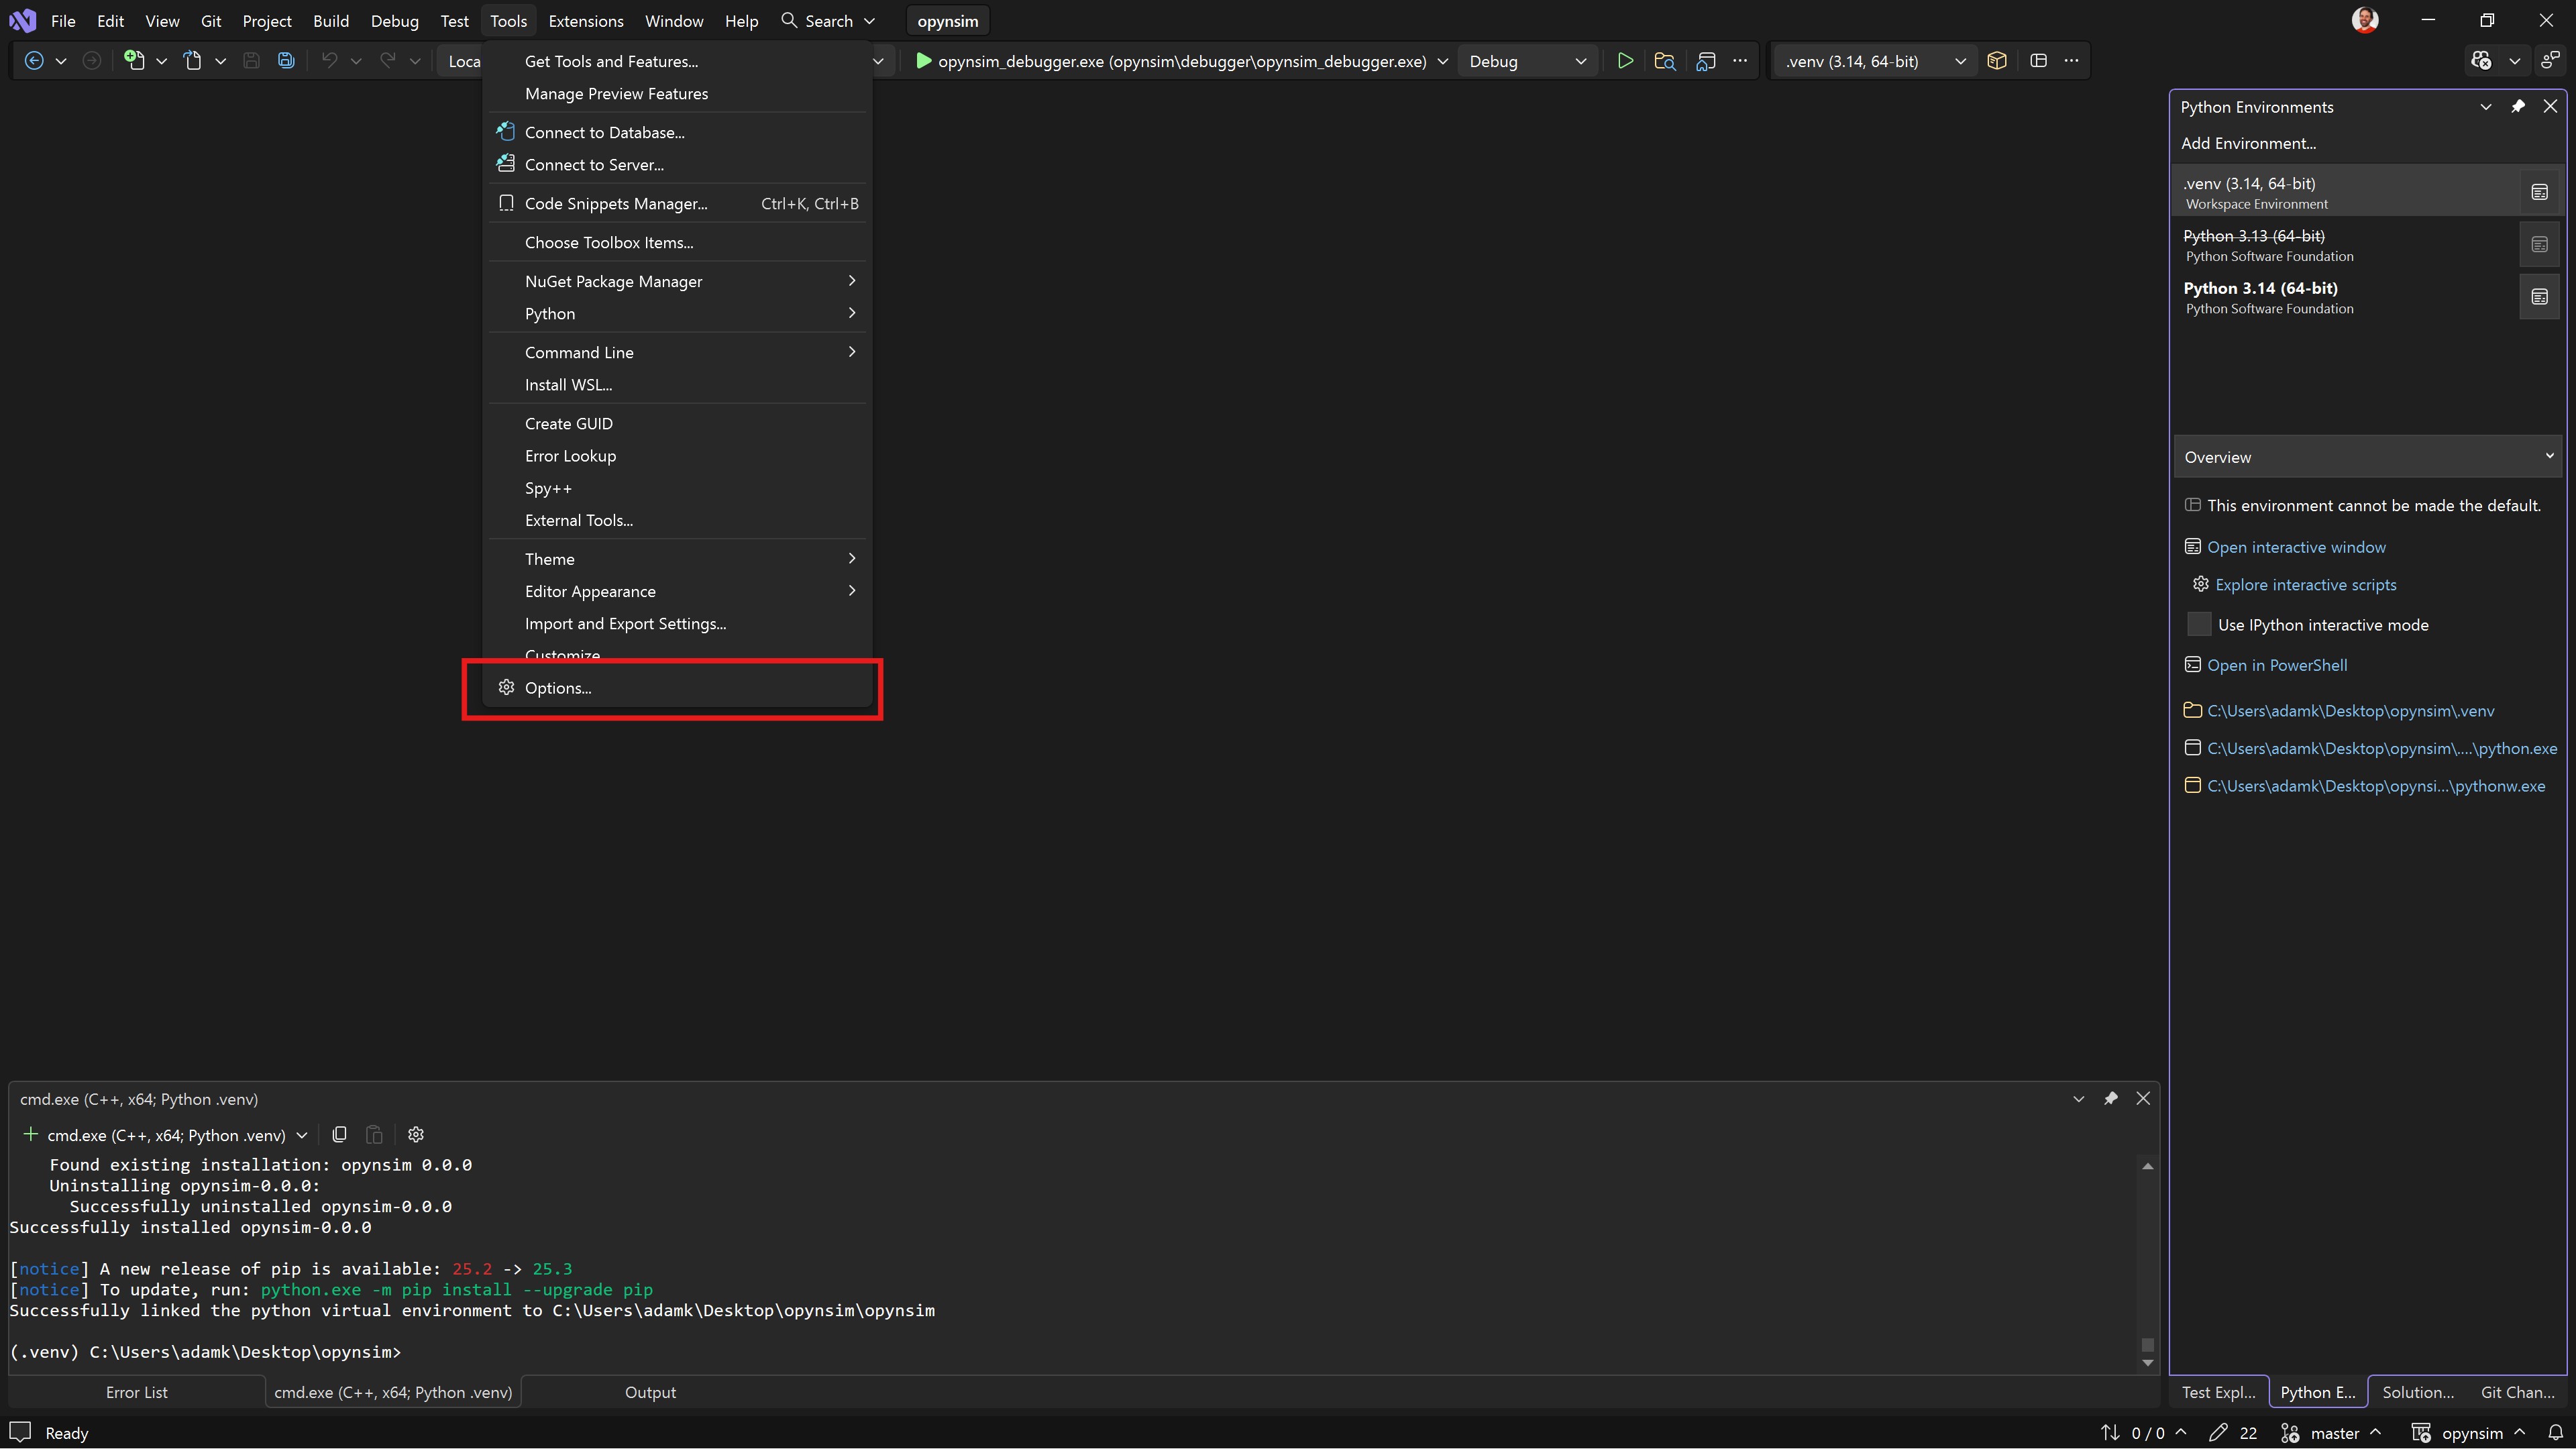
Fig. 2.13 Open the Visual Studio options menu from the tools menu.#
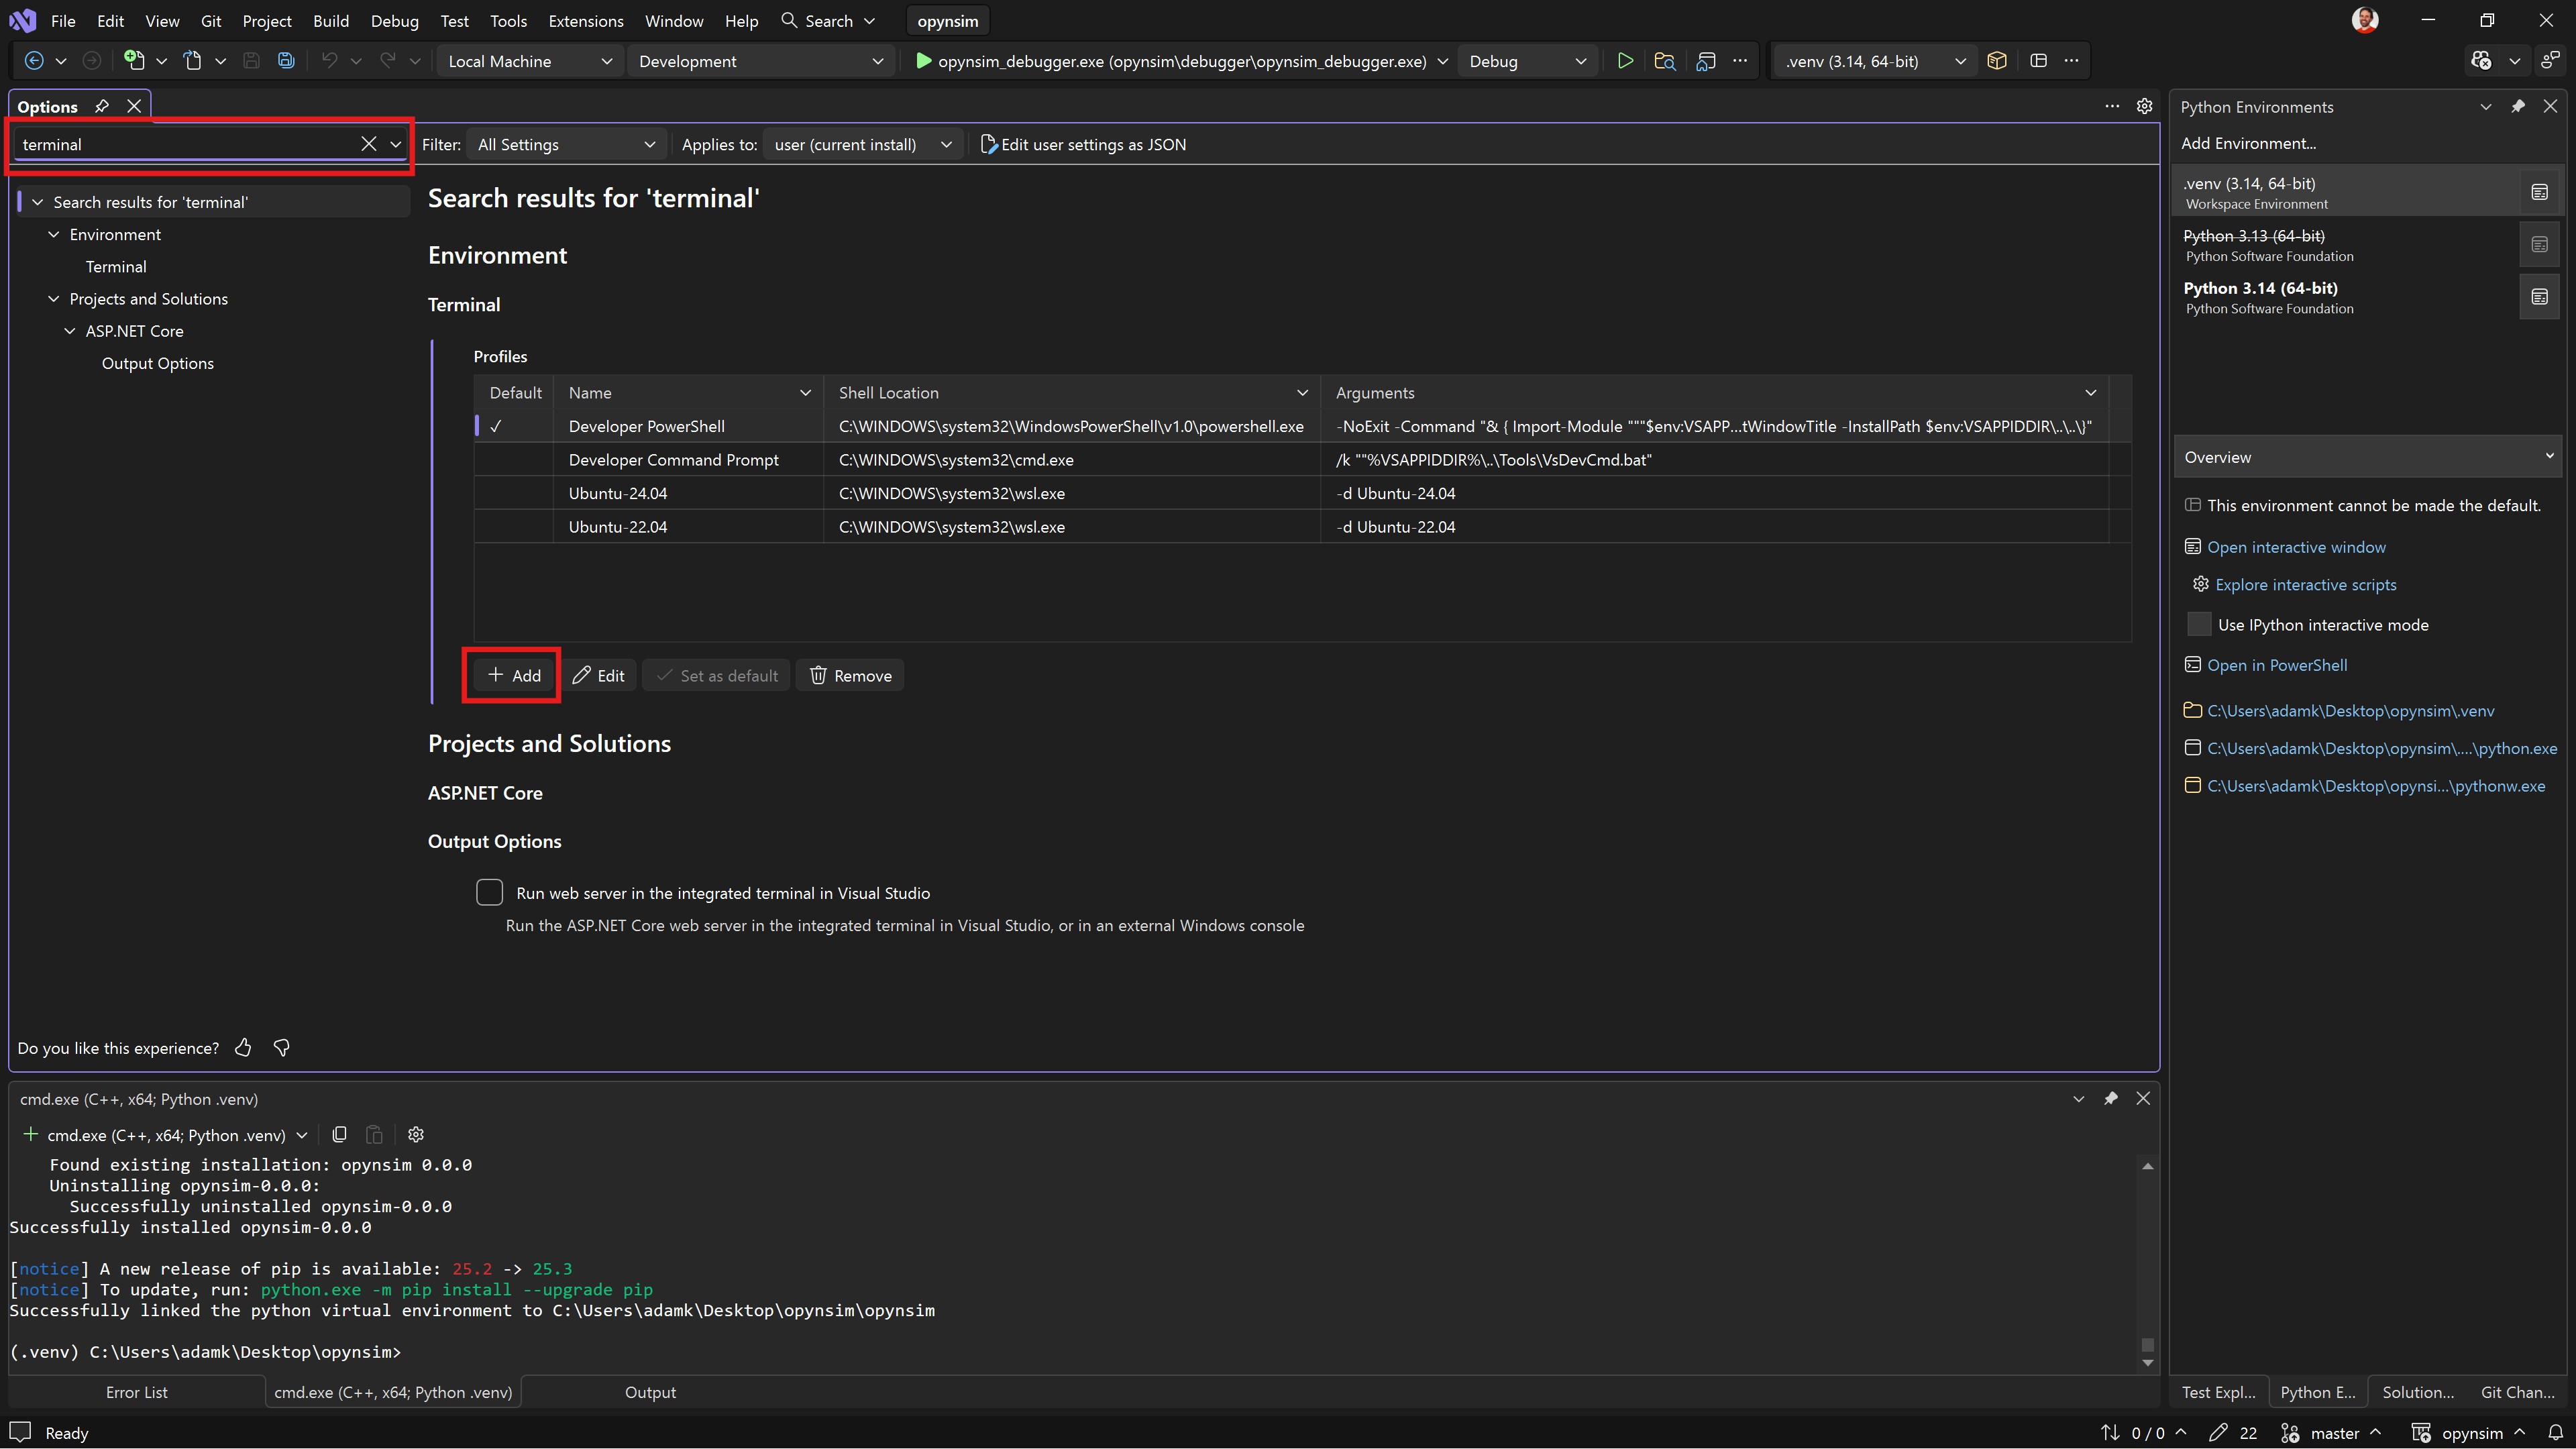
Fig. 2.14 Search for terminal, click Add below the list of terminals.#
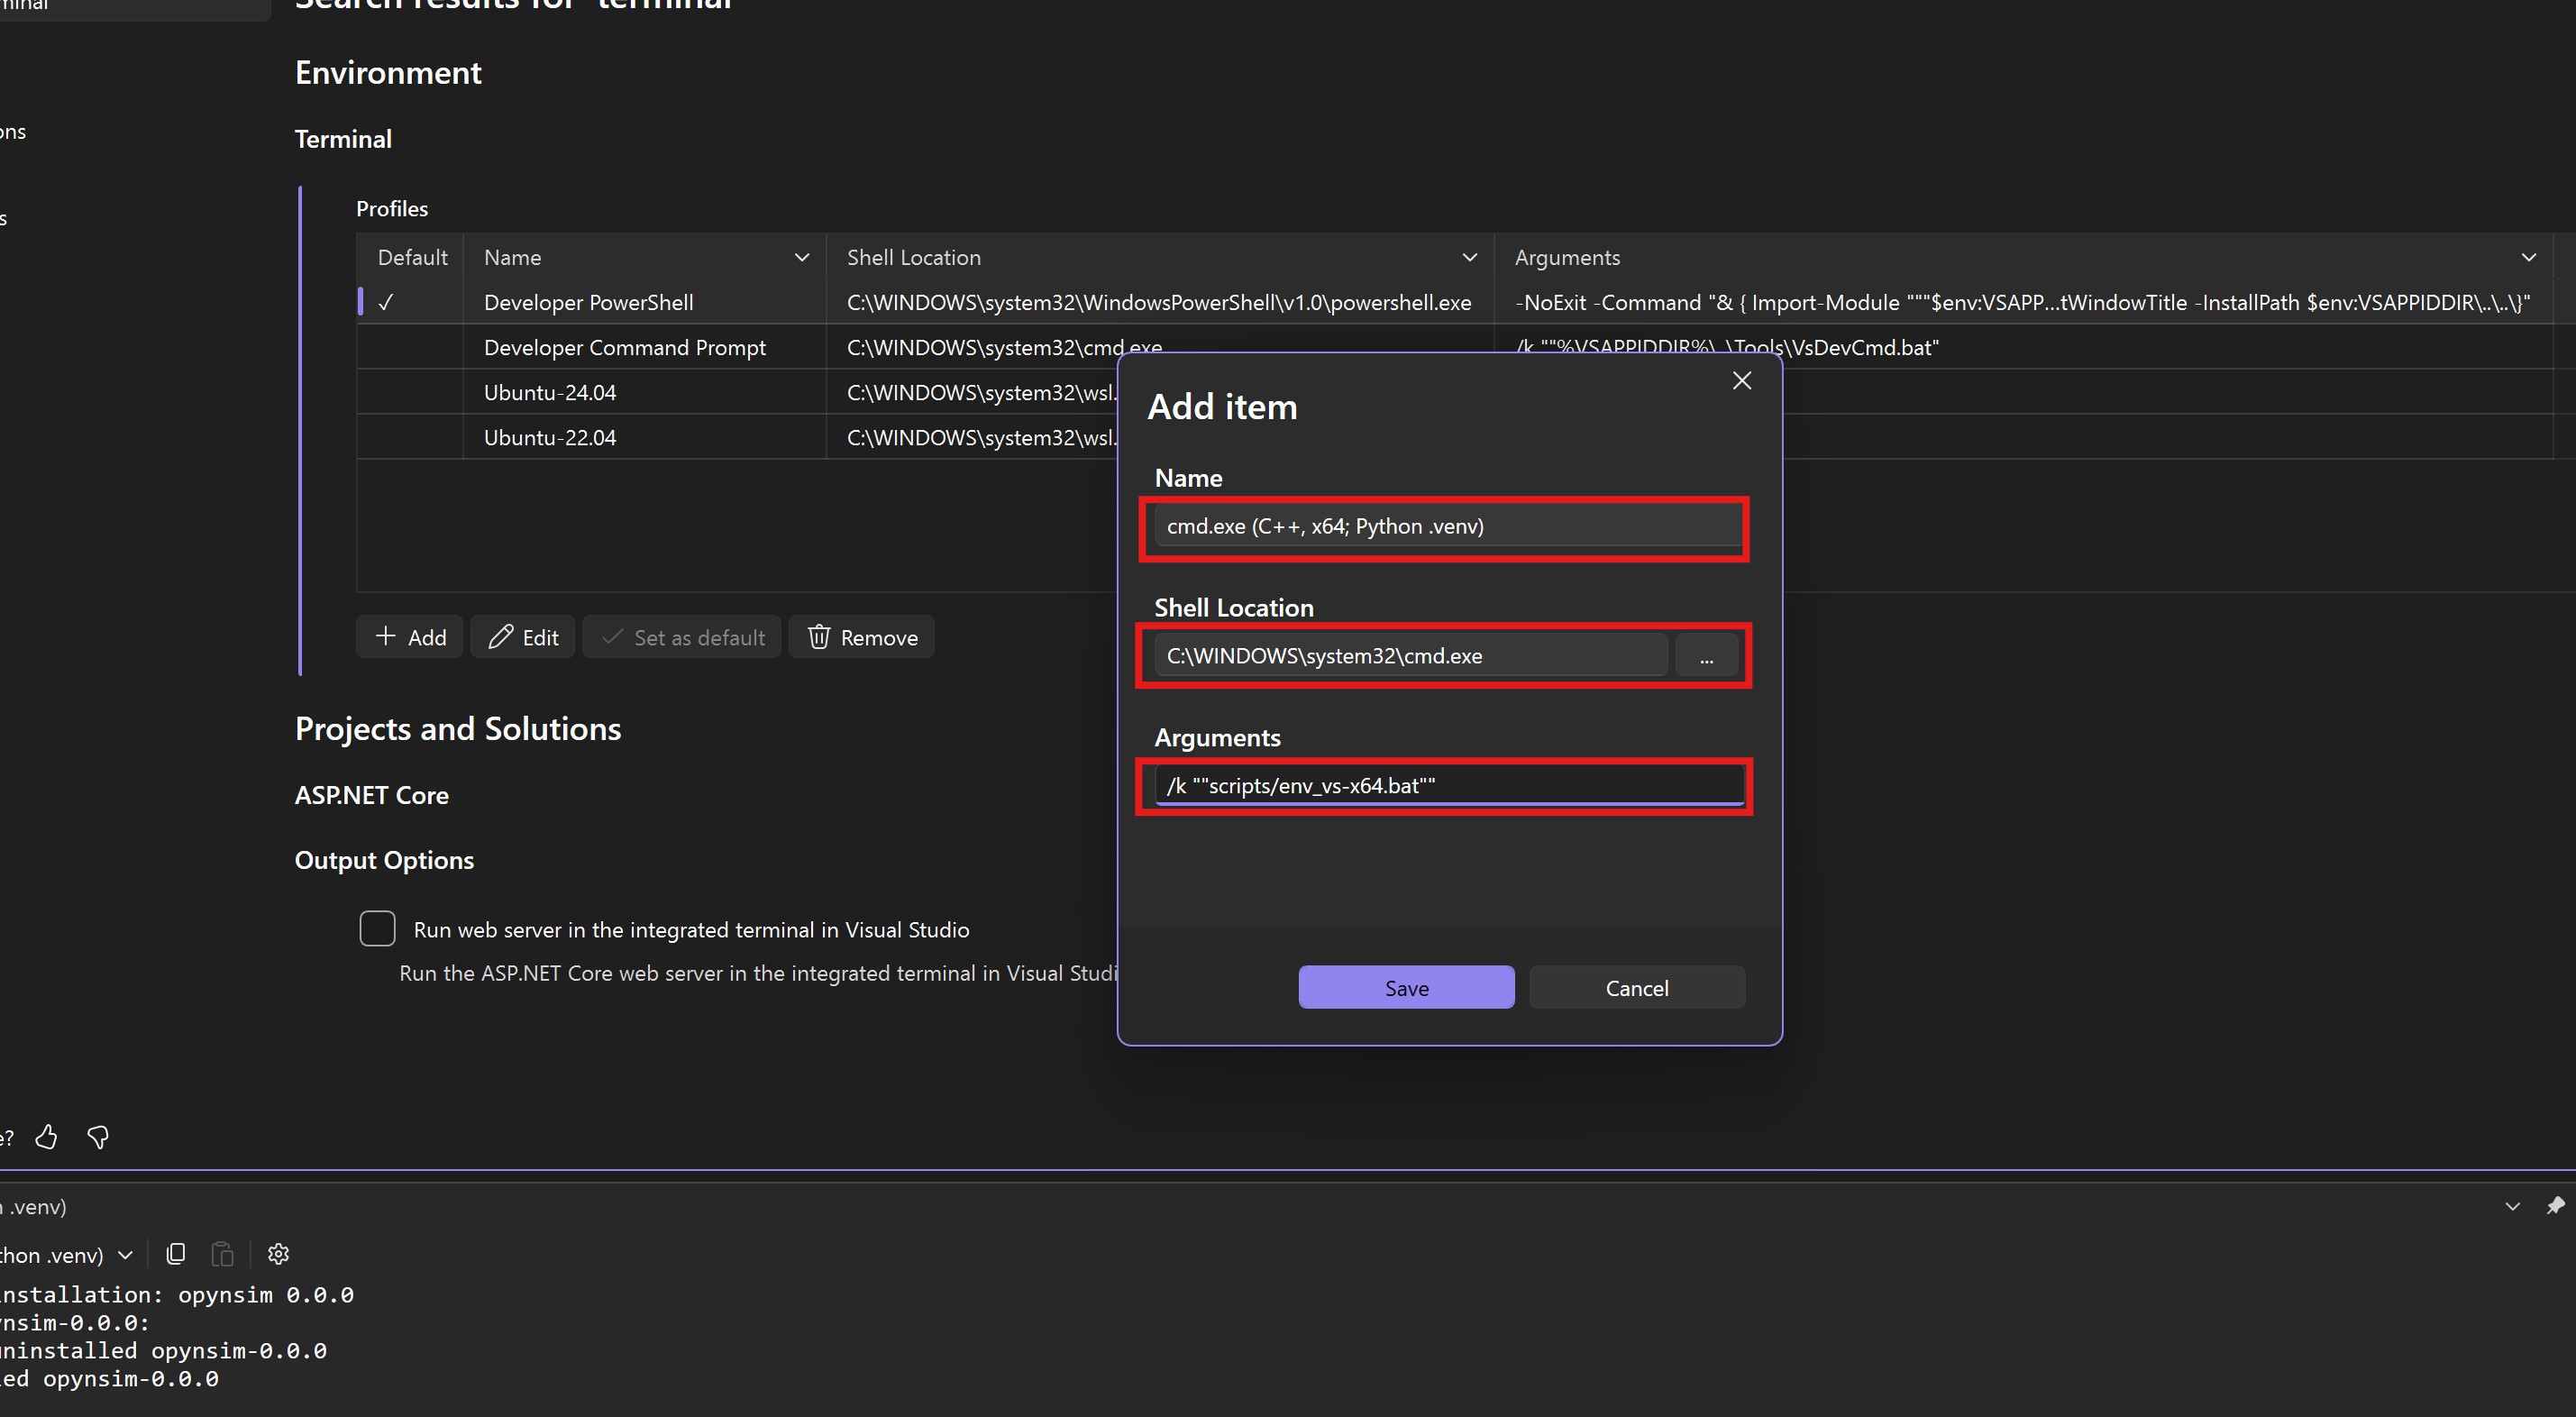
Fig. 2.15 Fill out the terminal details. opynsim includes a batch script (scripts/env_vs-x64.bat),
which sets up a batch terminal (cmd.exe) with the necessary configuration (points to .venv,
uses Visual Studio’s C++ compiler, etc.).#
The name can be anything (we use cmd.exe (C++, x64; Python, .venv)). The shell location must be
C:\WINDOWS\system32\cmd.exe. The arguments must be /k ""scripts/env_vs-x64.bat"".
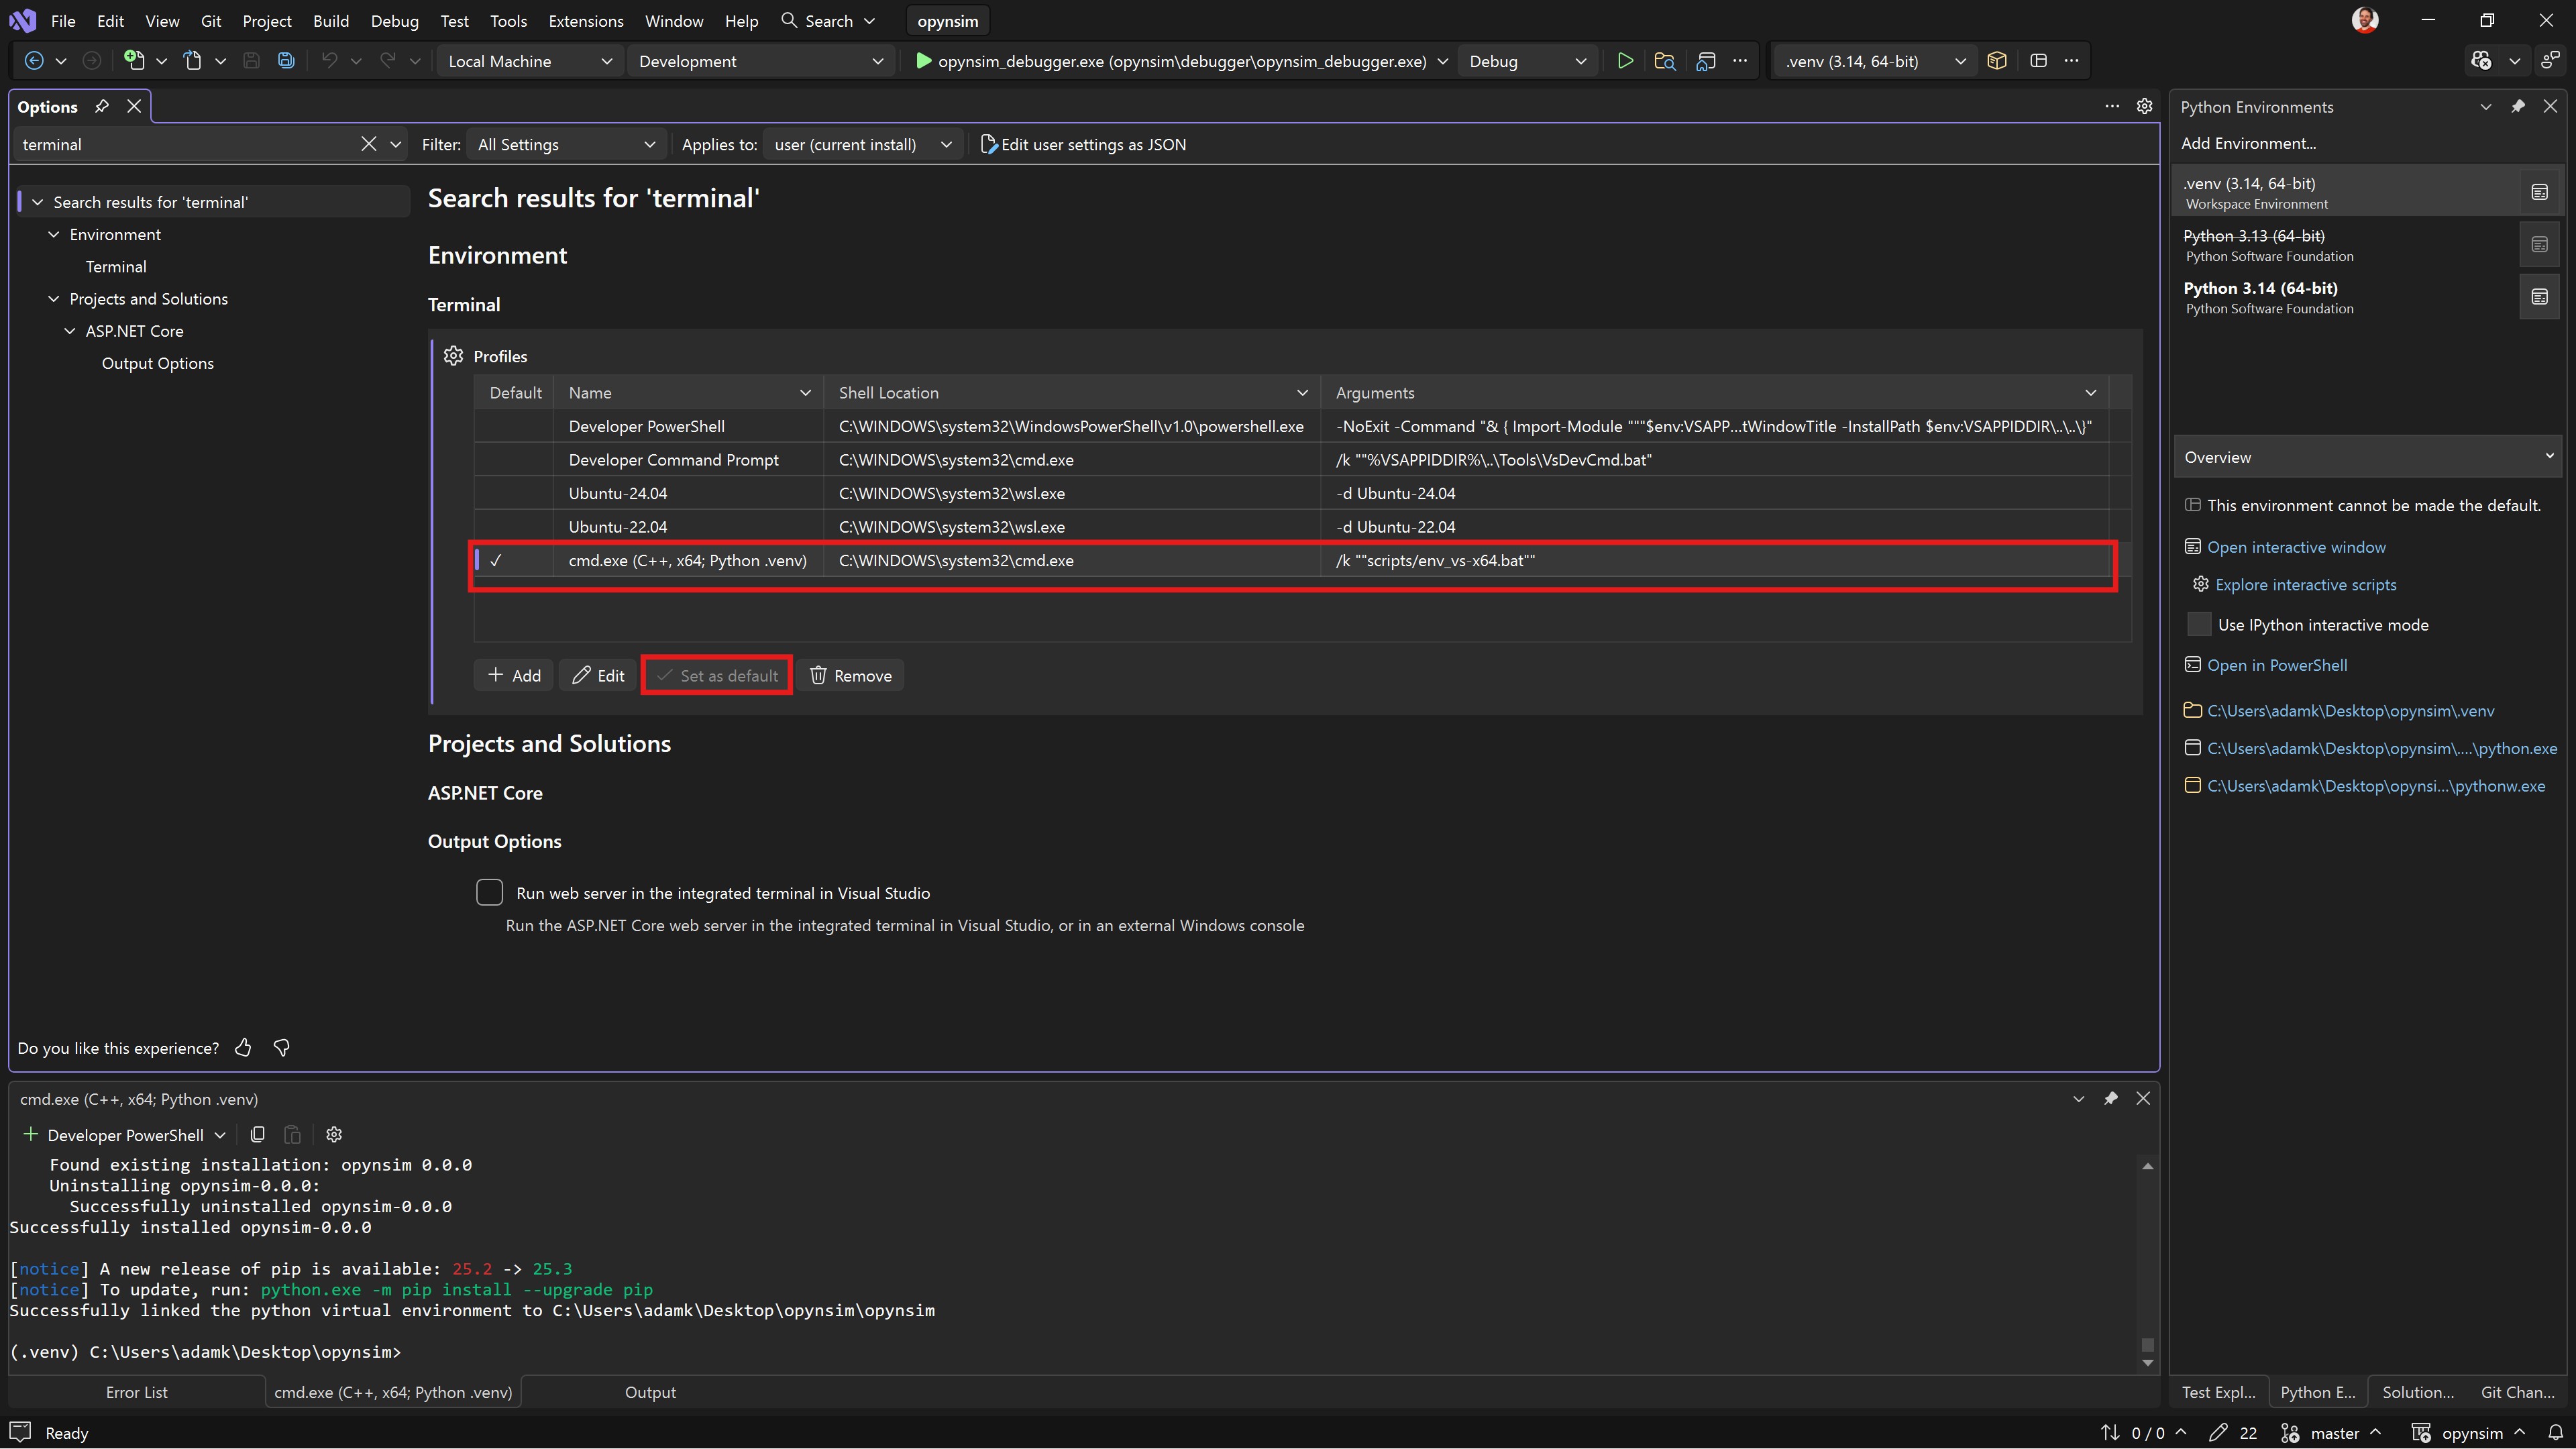
Fig. 2.16 After adding the terminal, set it as the default (annotated).#
2.5. Build OPynSim’s C++ Dependencies#
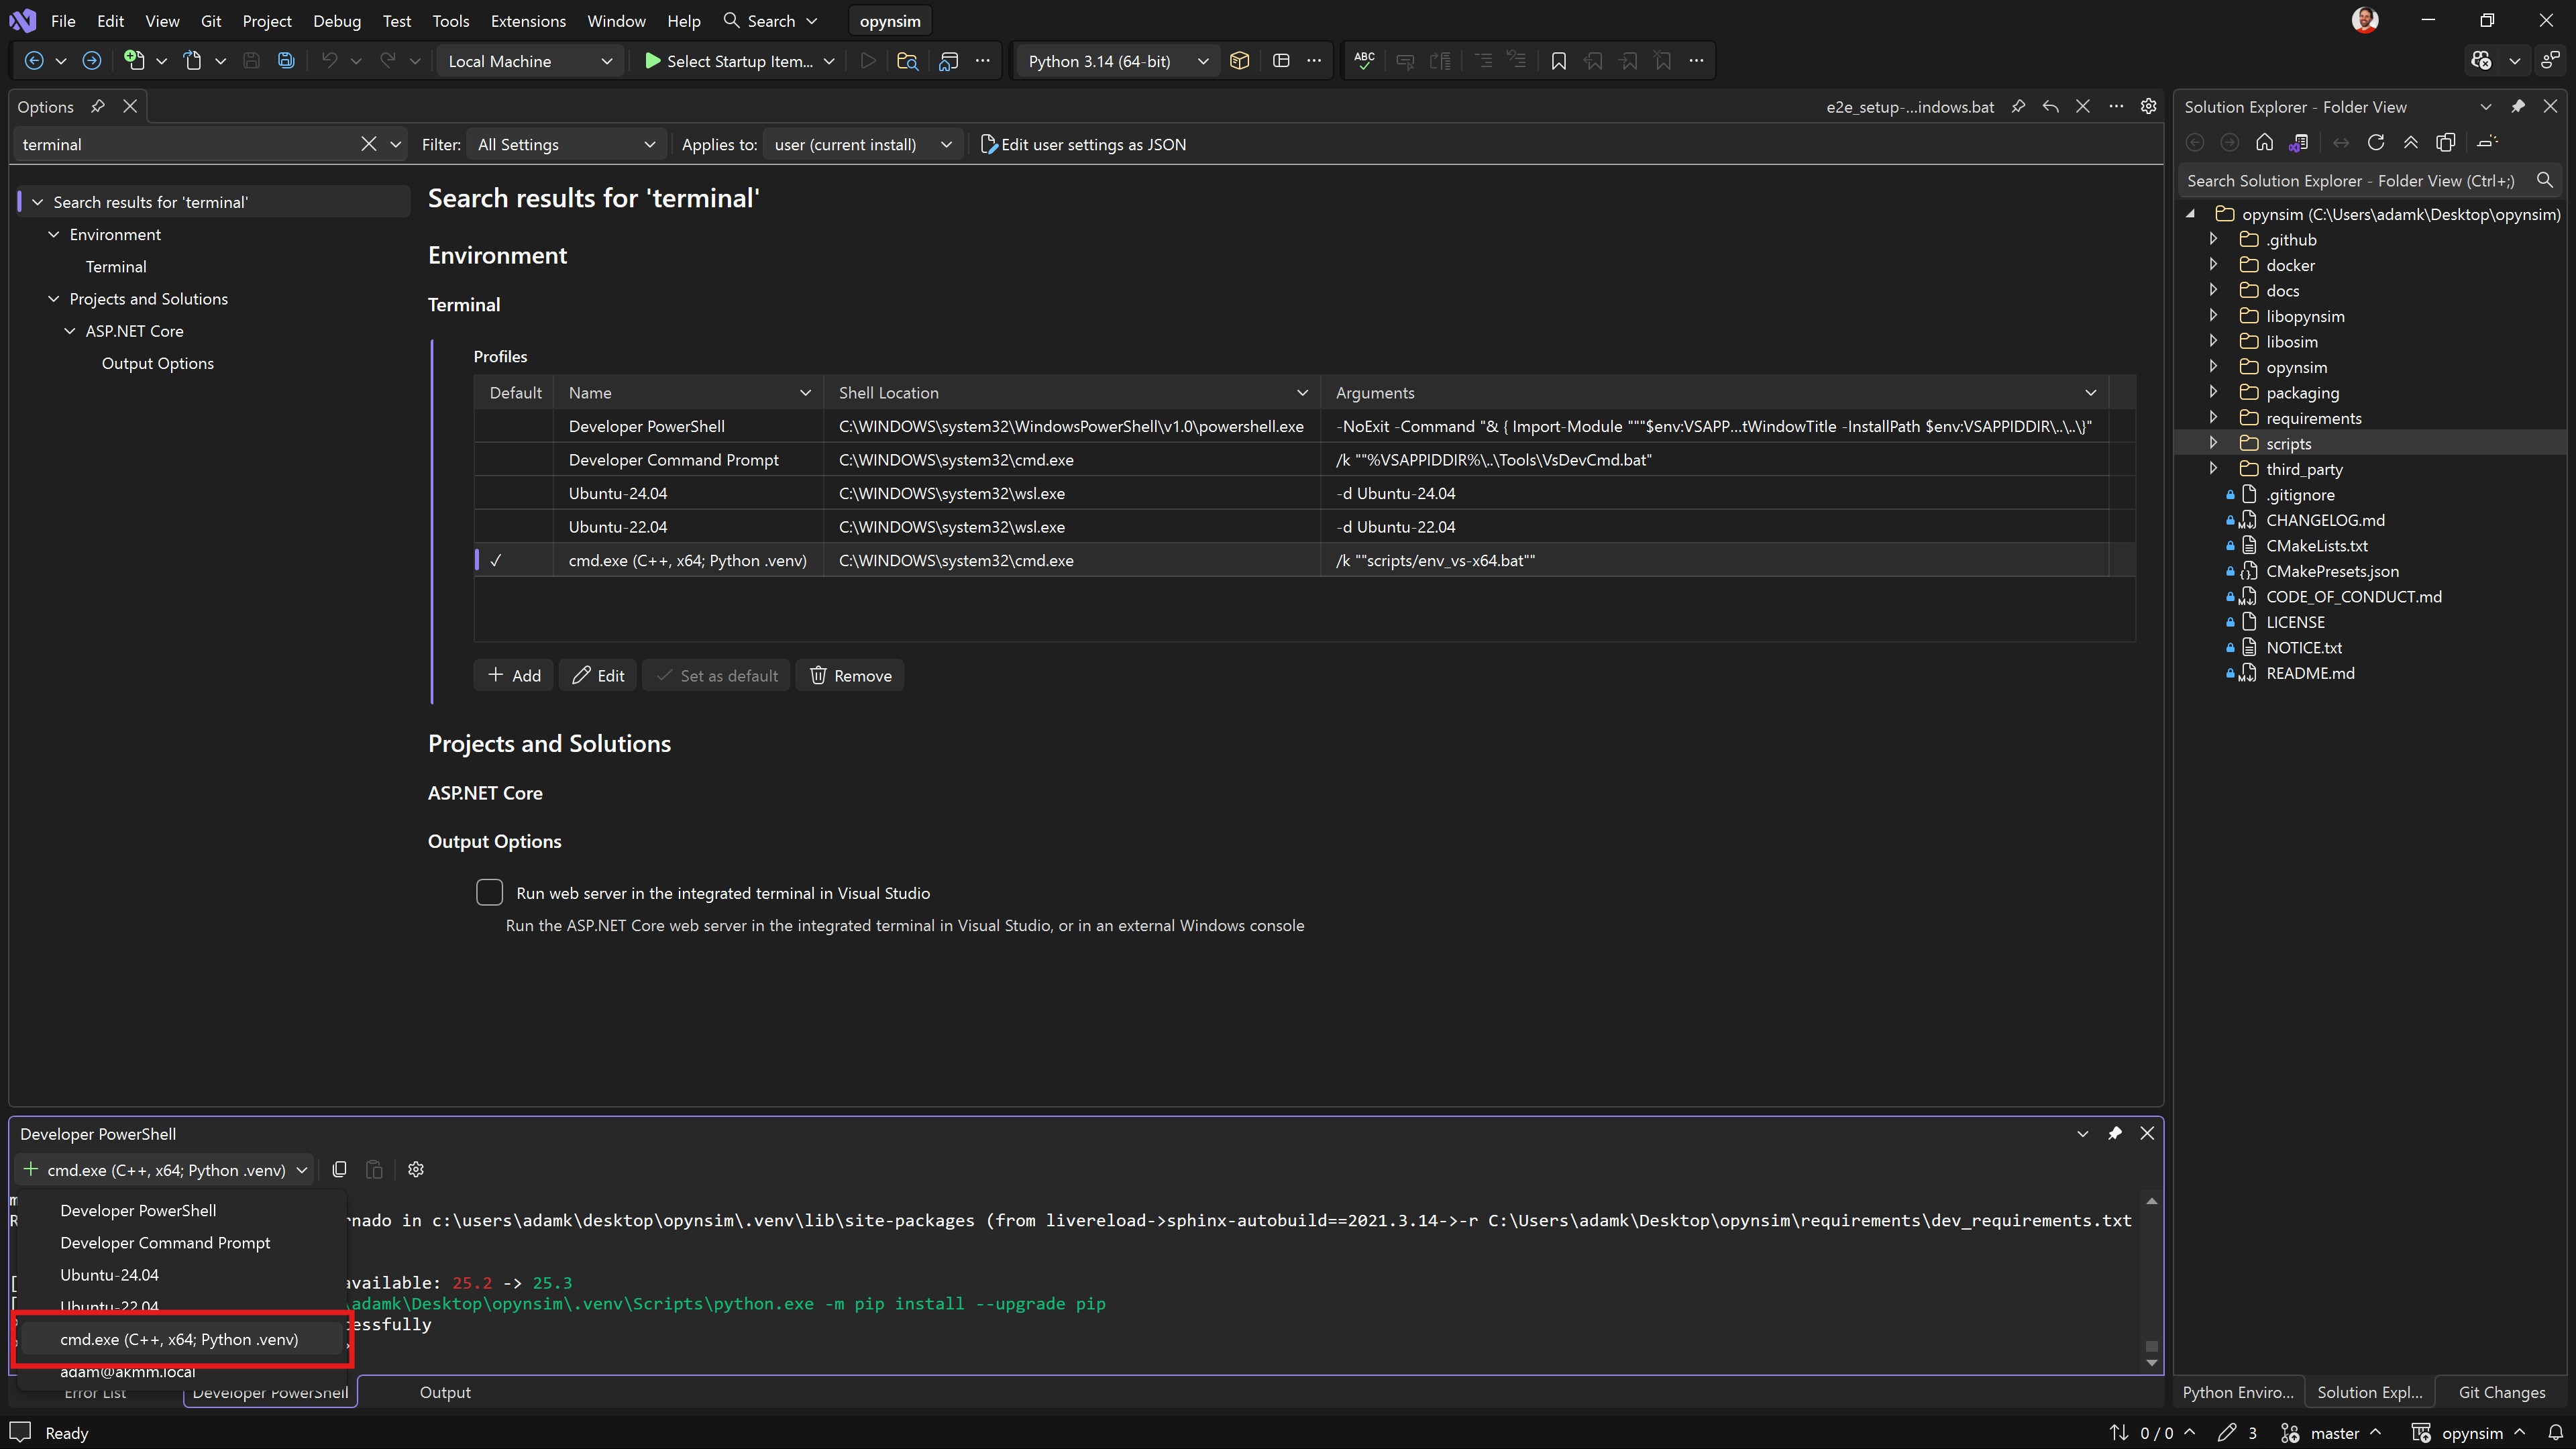
Fig. 2.17 Open the new terminal in your terminal window.#

Fig. 2.18 Use the new terminal window to build opynsim’s C++ dependencies. The command for doing this
is cd third_party && cmake --workflow --preset Development && cd ...#
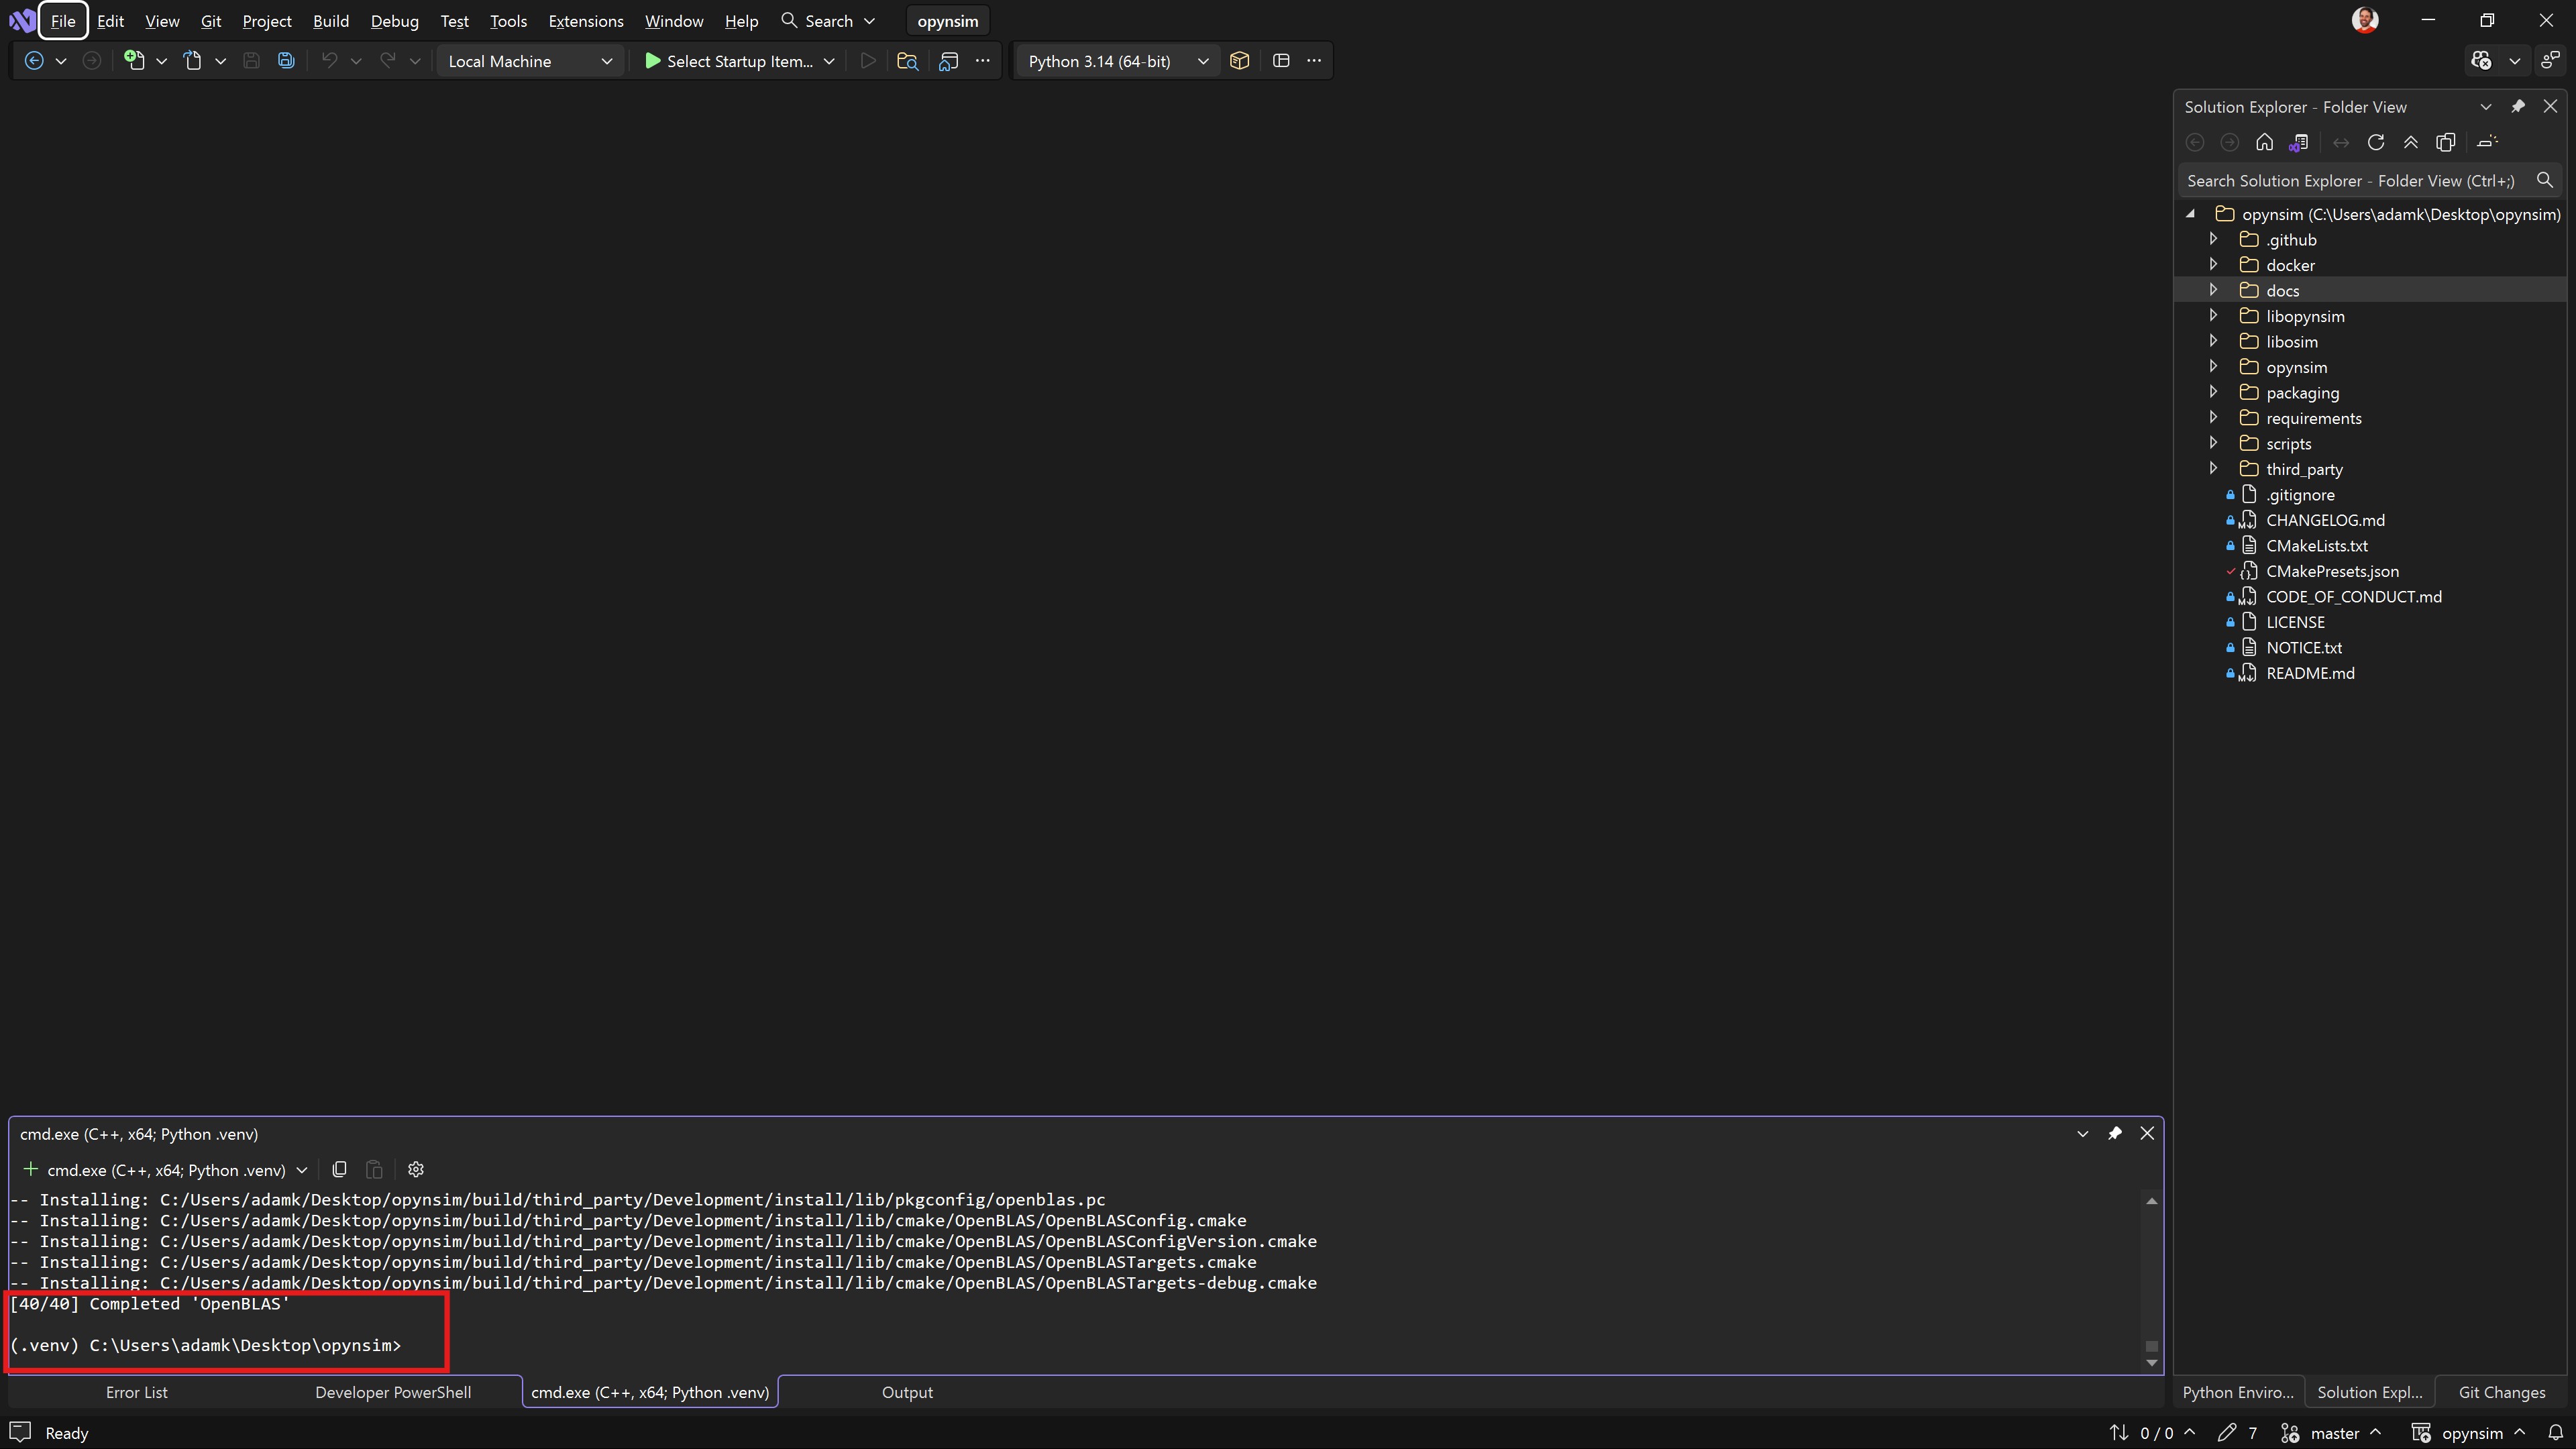
Fig. 2.19 Once the third-party C++ dependencies are built, you should see something resembling a completion
message. Now that they’re built, you should now (finally) be able to configure and build opynsim
itself.#
2.6. Build OPynSim#
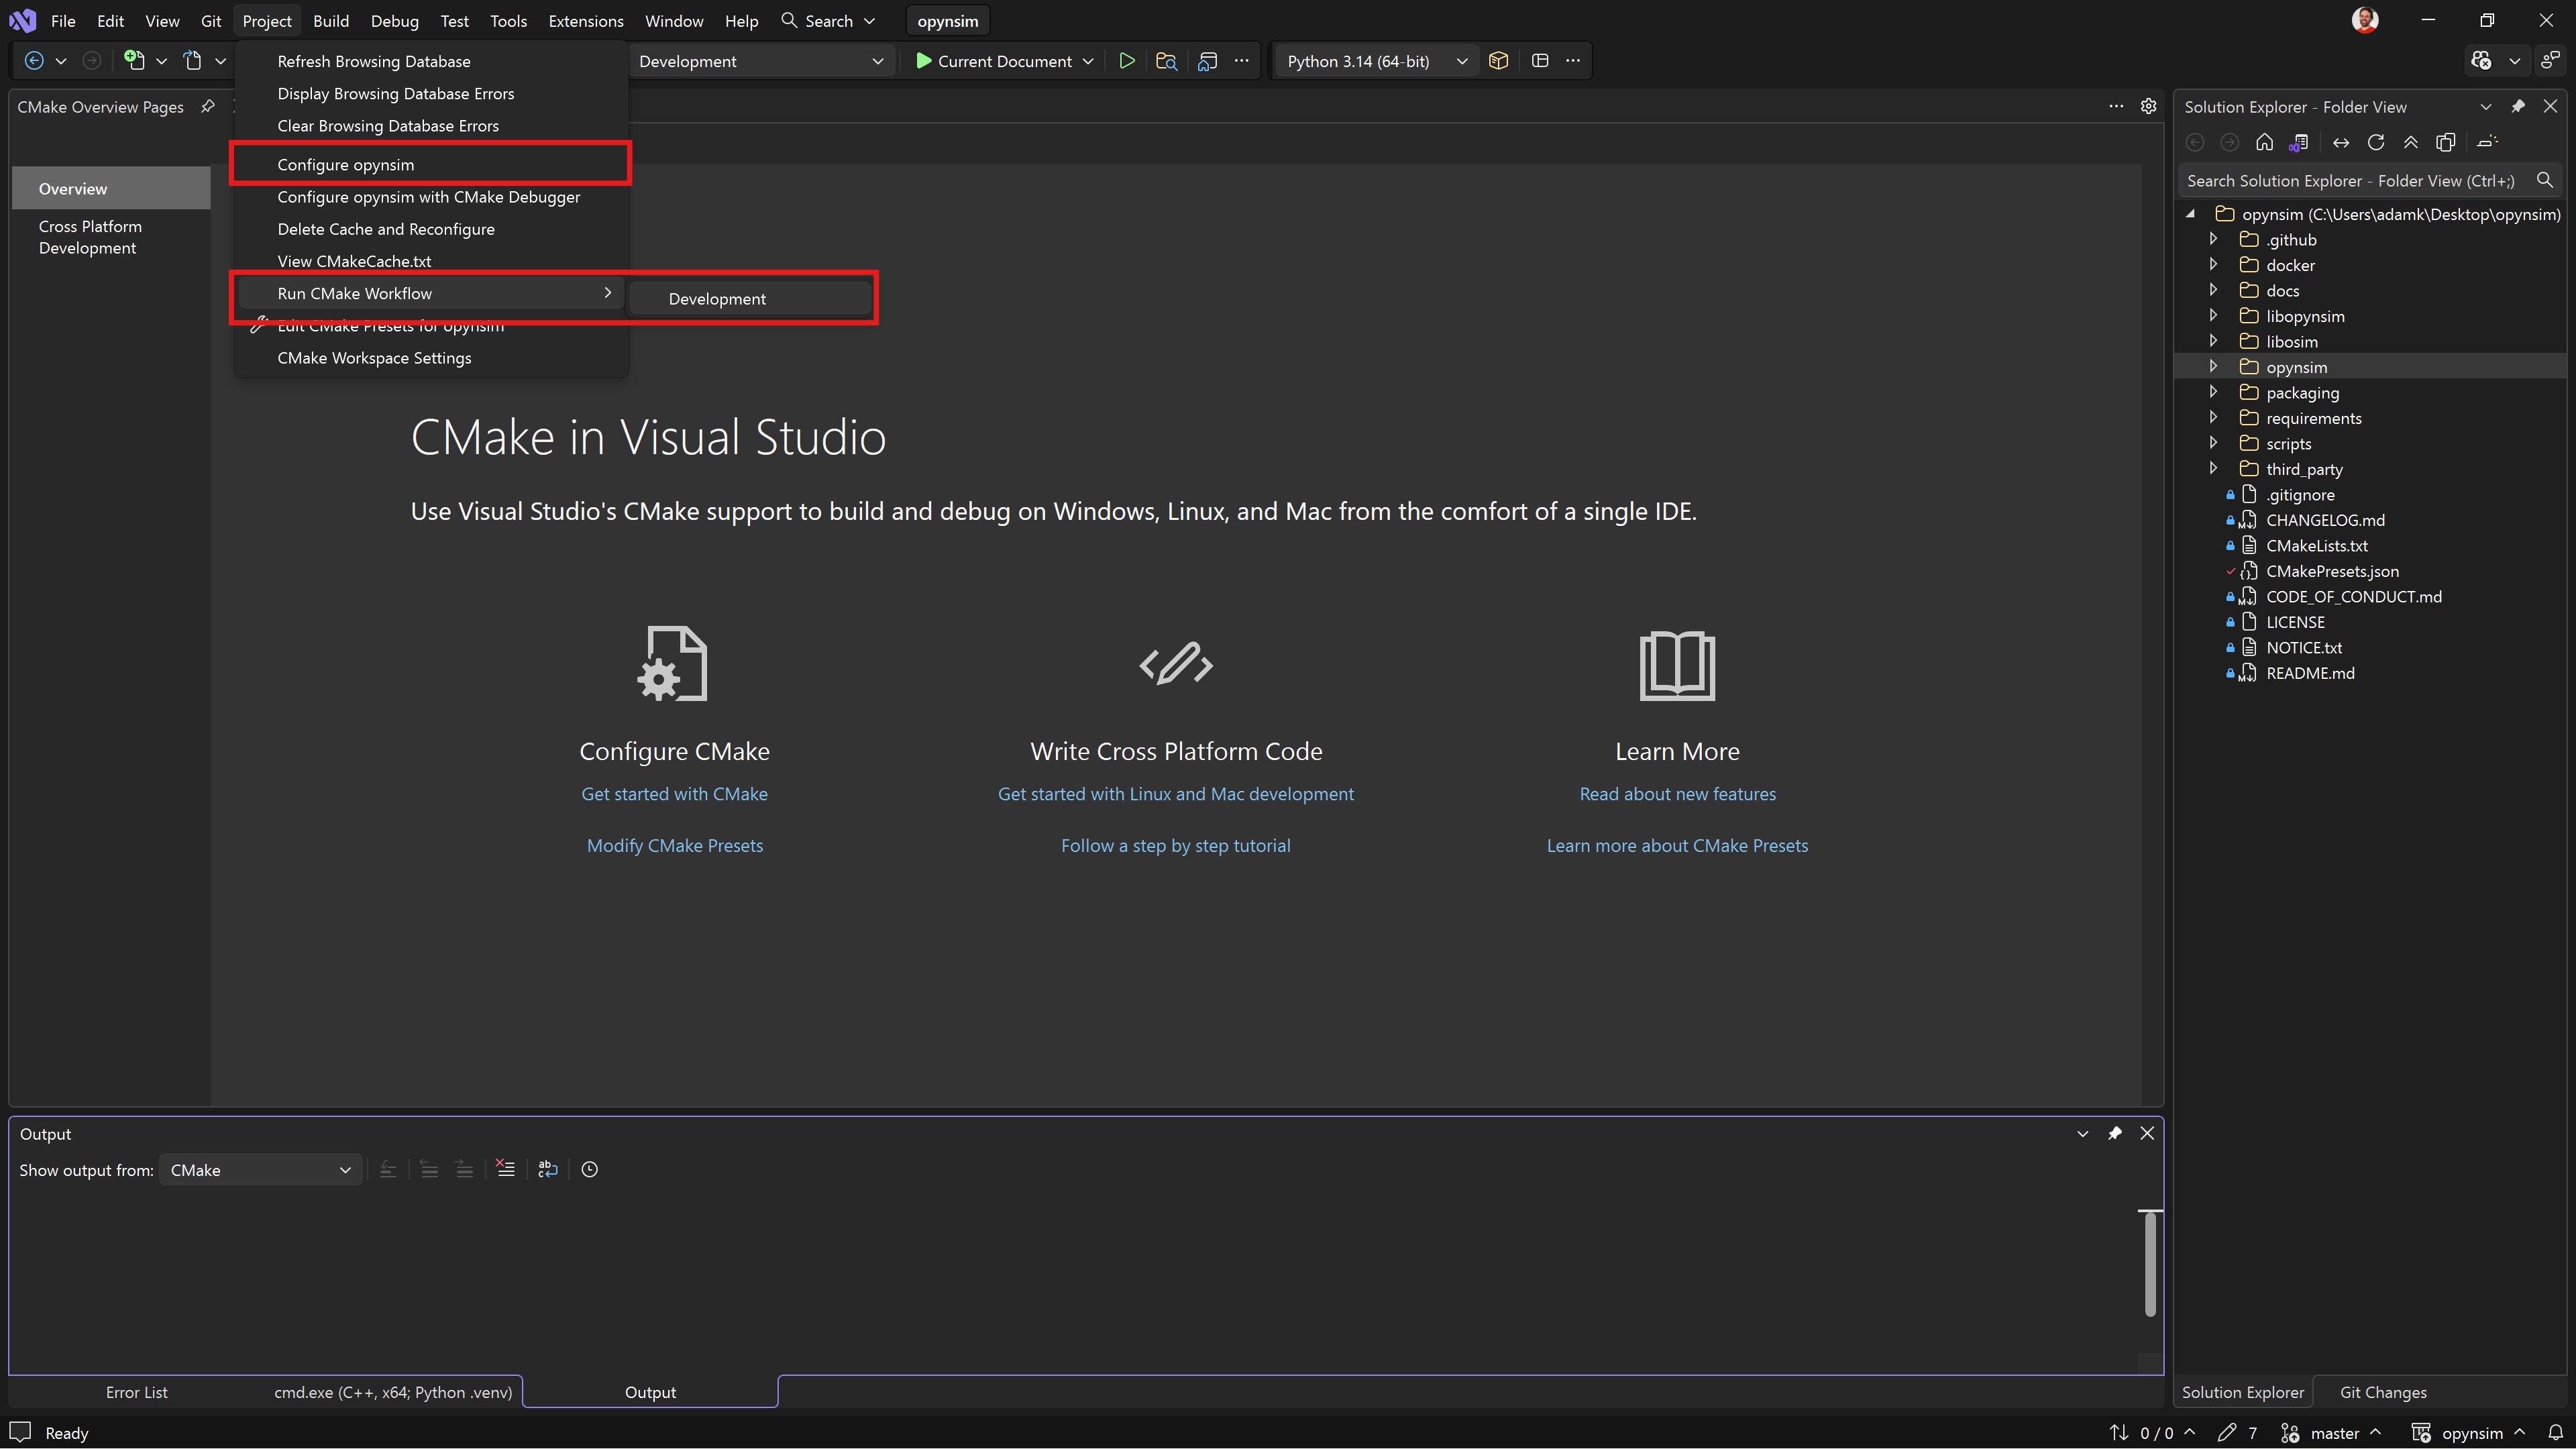
Fig. 2.20 Now build opynsim. We have provided a Development workflow preset that builds and tests
opynsim. It can be ran from the Project > Run CMake Workflow > Development menu option#
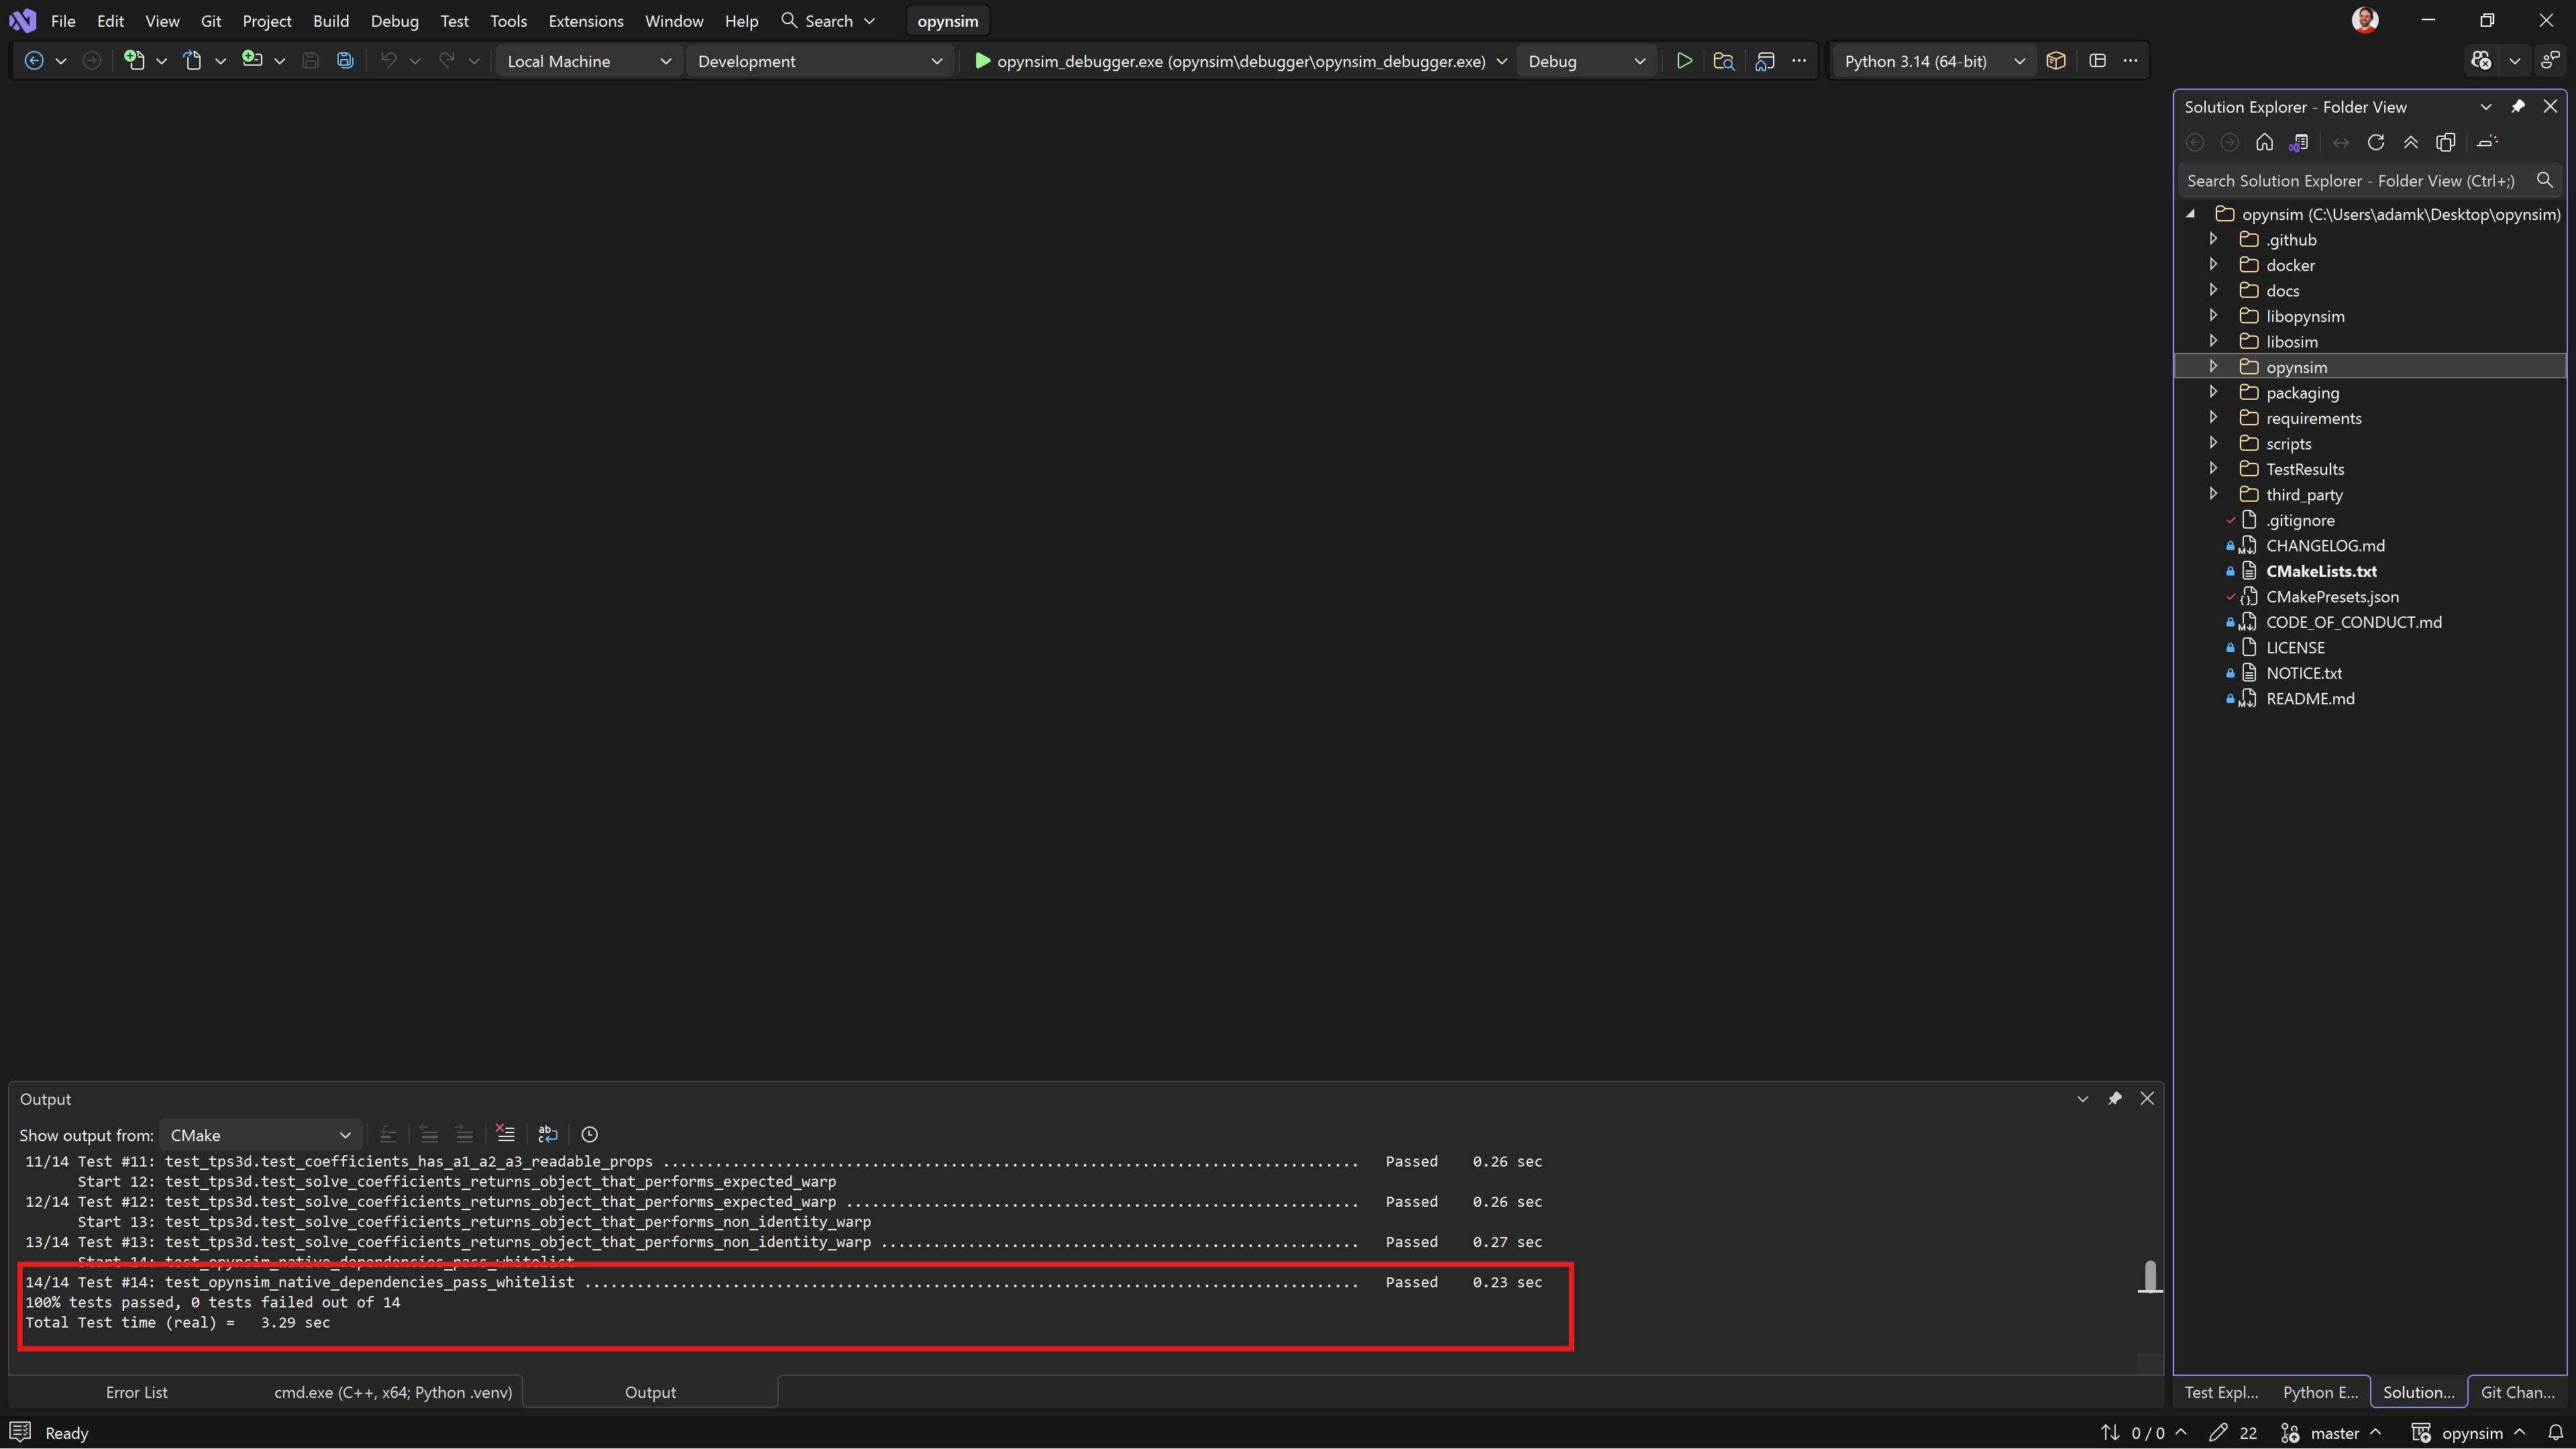
Fig. 2.21 Once the workflow has ran, it should run all the unit tests and they shouuld all pass. Congratulations 🎉
you are now building opynsim.#
2.7. Developing Python for OPynSim in Visual Studio#
If you want to run and debug python in the project, you need something to run. For this
demonstration, we’re going to run debugscript.py, because we know it’s a runnable script
(rather than, say, a library), and we know that the C++ debugger can also connect to it
(later section). That said, you can run any python script in the project with this same
technique.
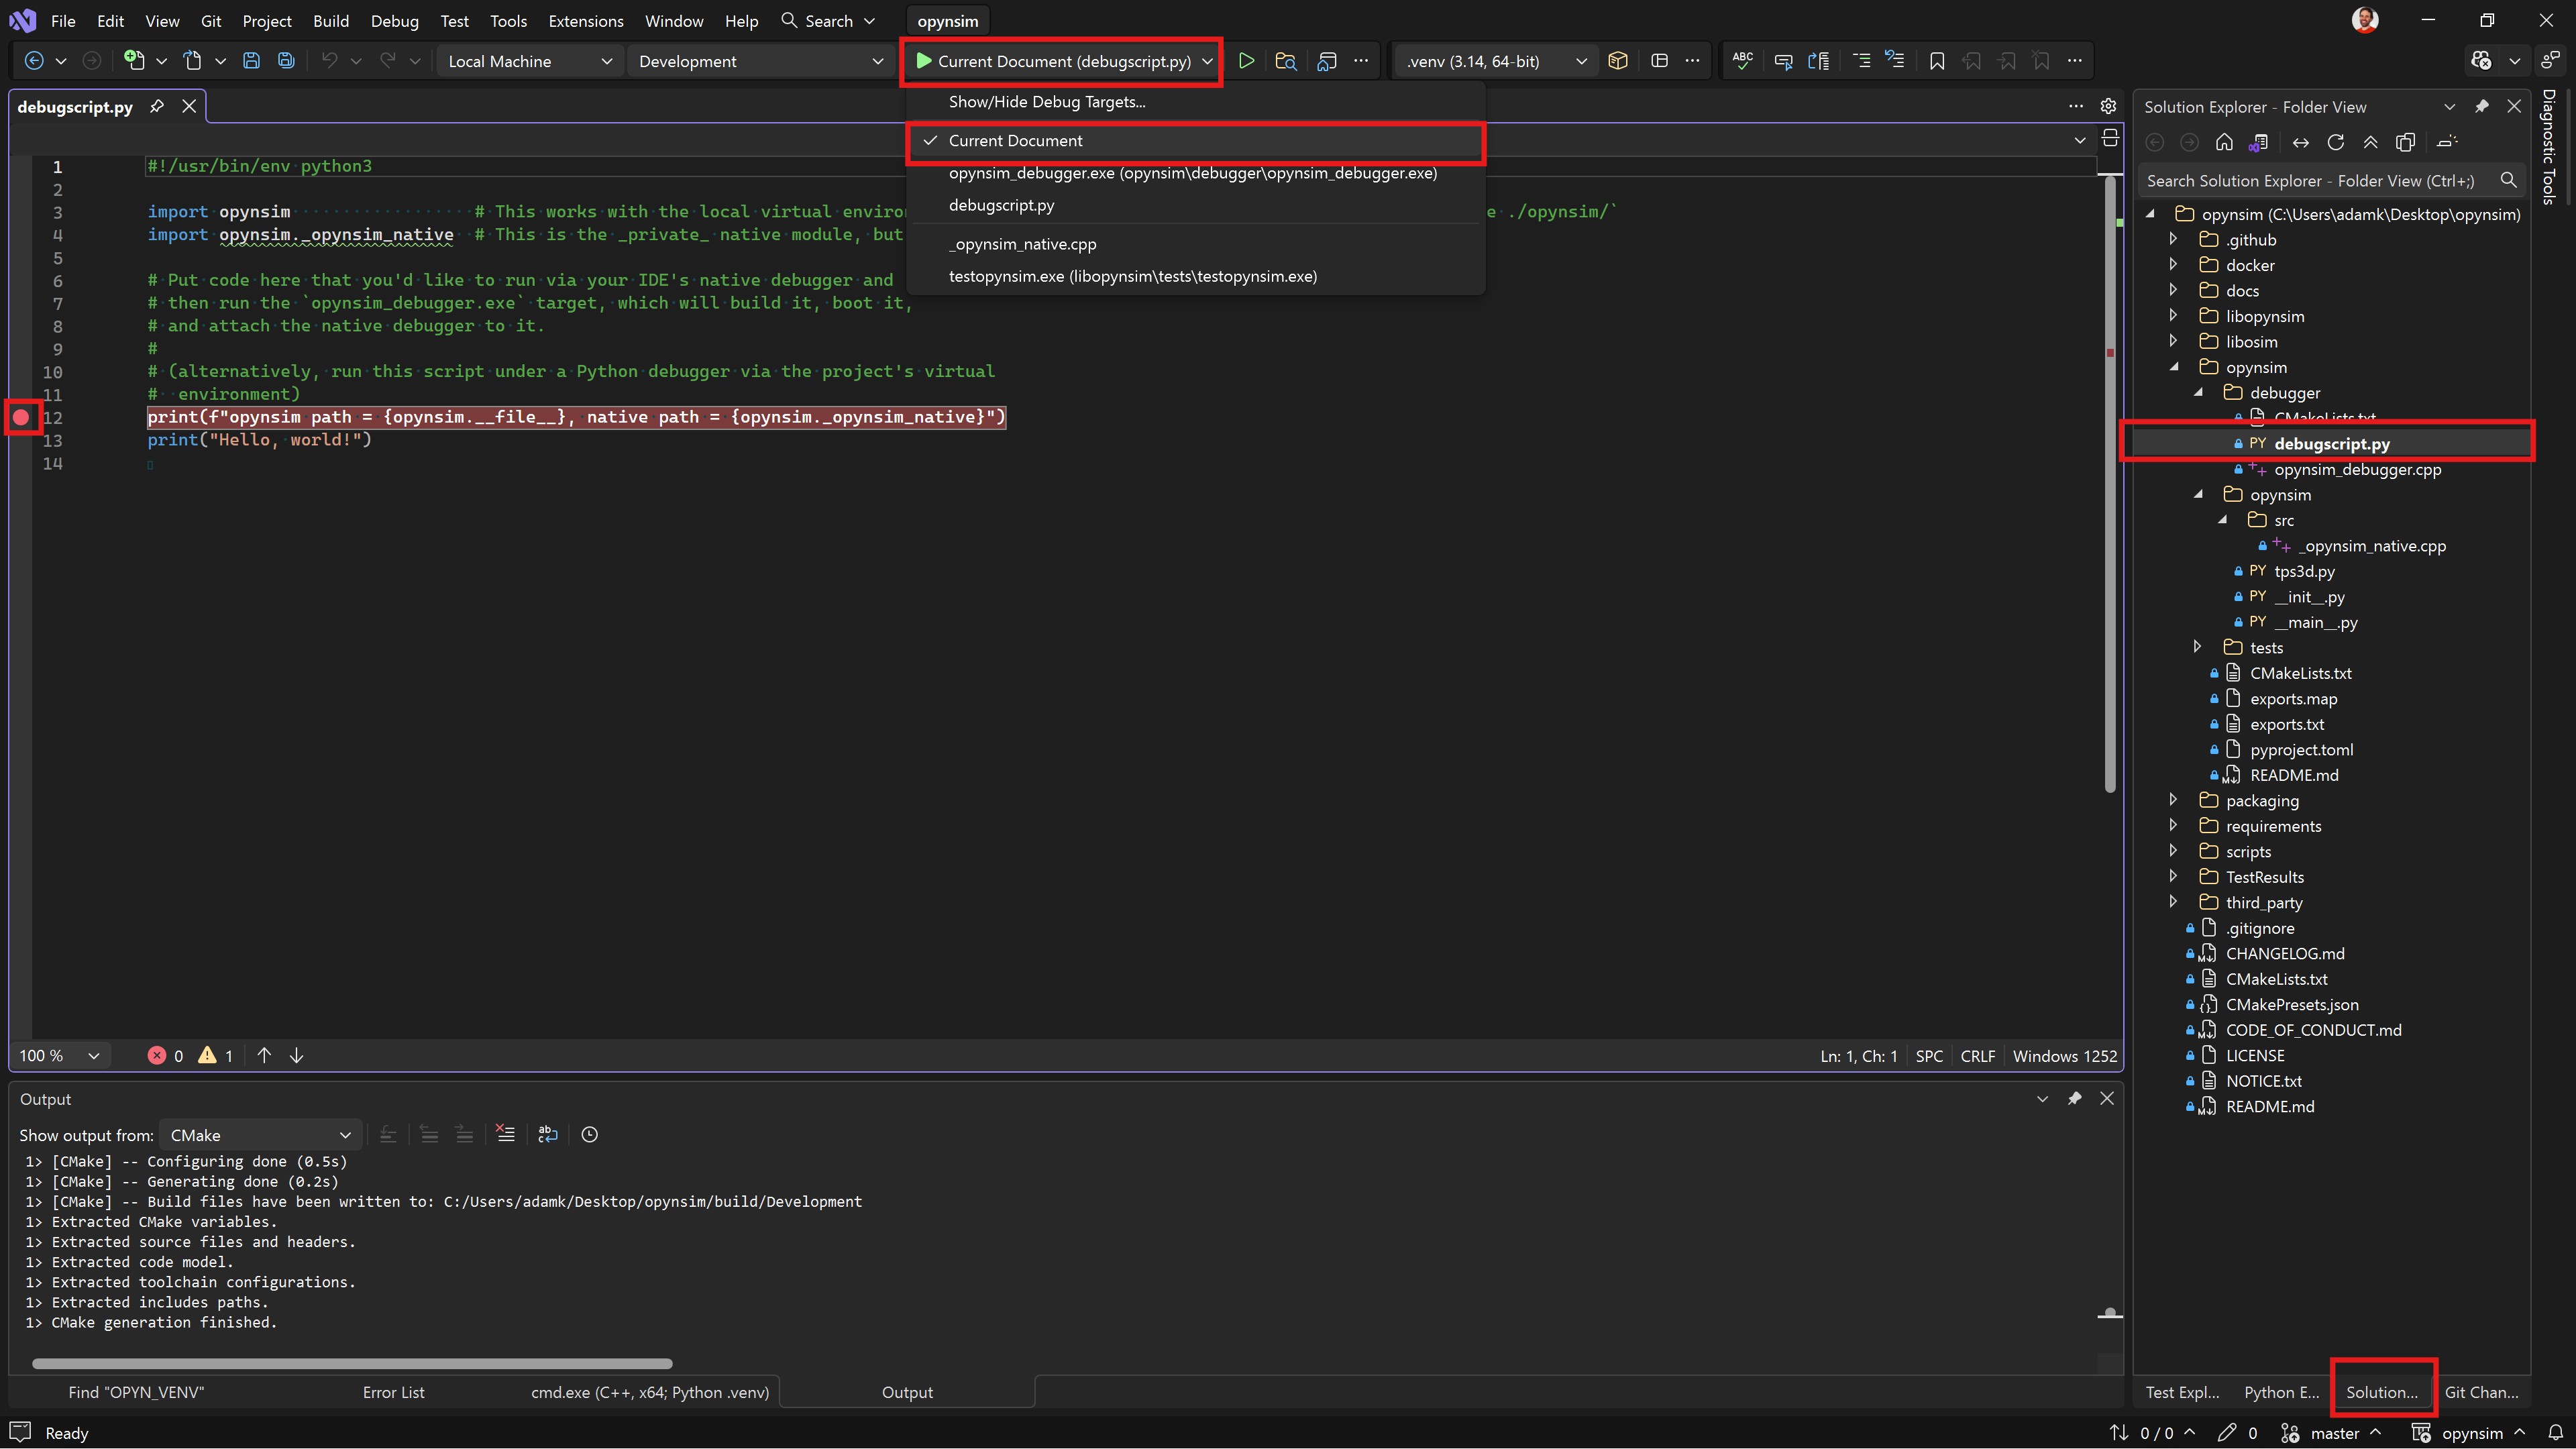
Fig. 2.22 To run a script, open it (debugscript.py is an example that’s annotated on the right-hand side)
and make sure that Visual Studio is configured such that the play button runs the current document
(annotated).#
Running scripts this way automatically runs the python debugger, so you can also set breakpoints (pictured).
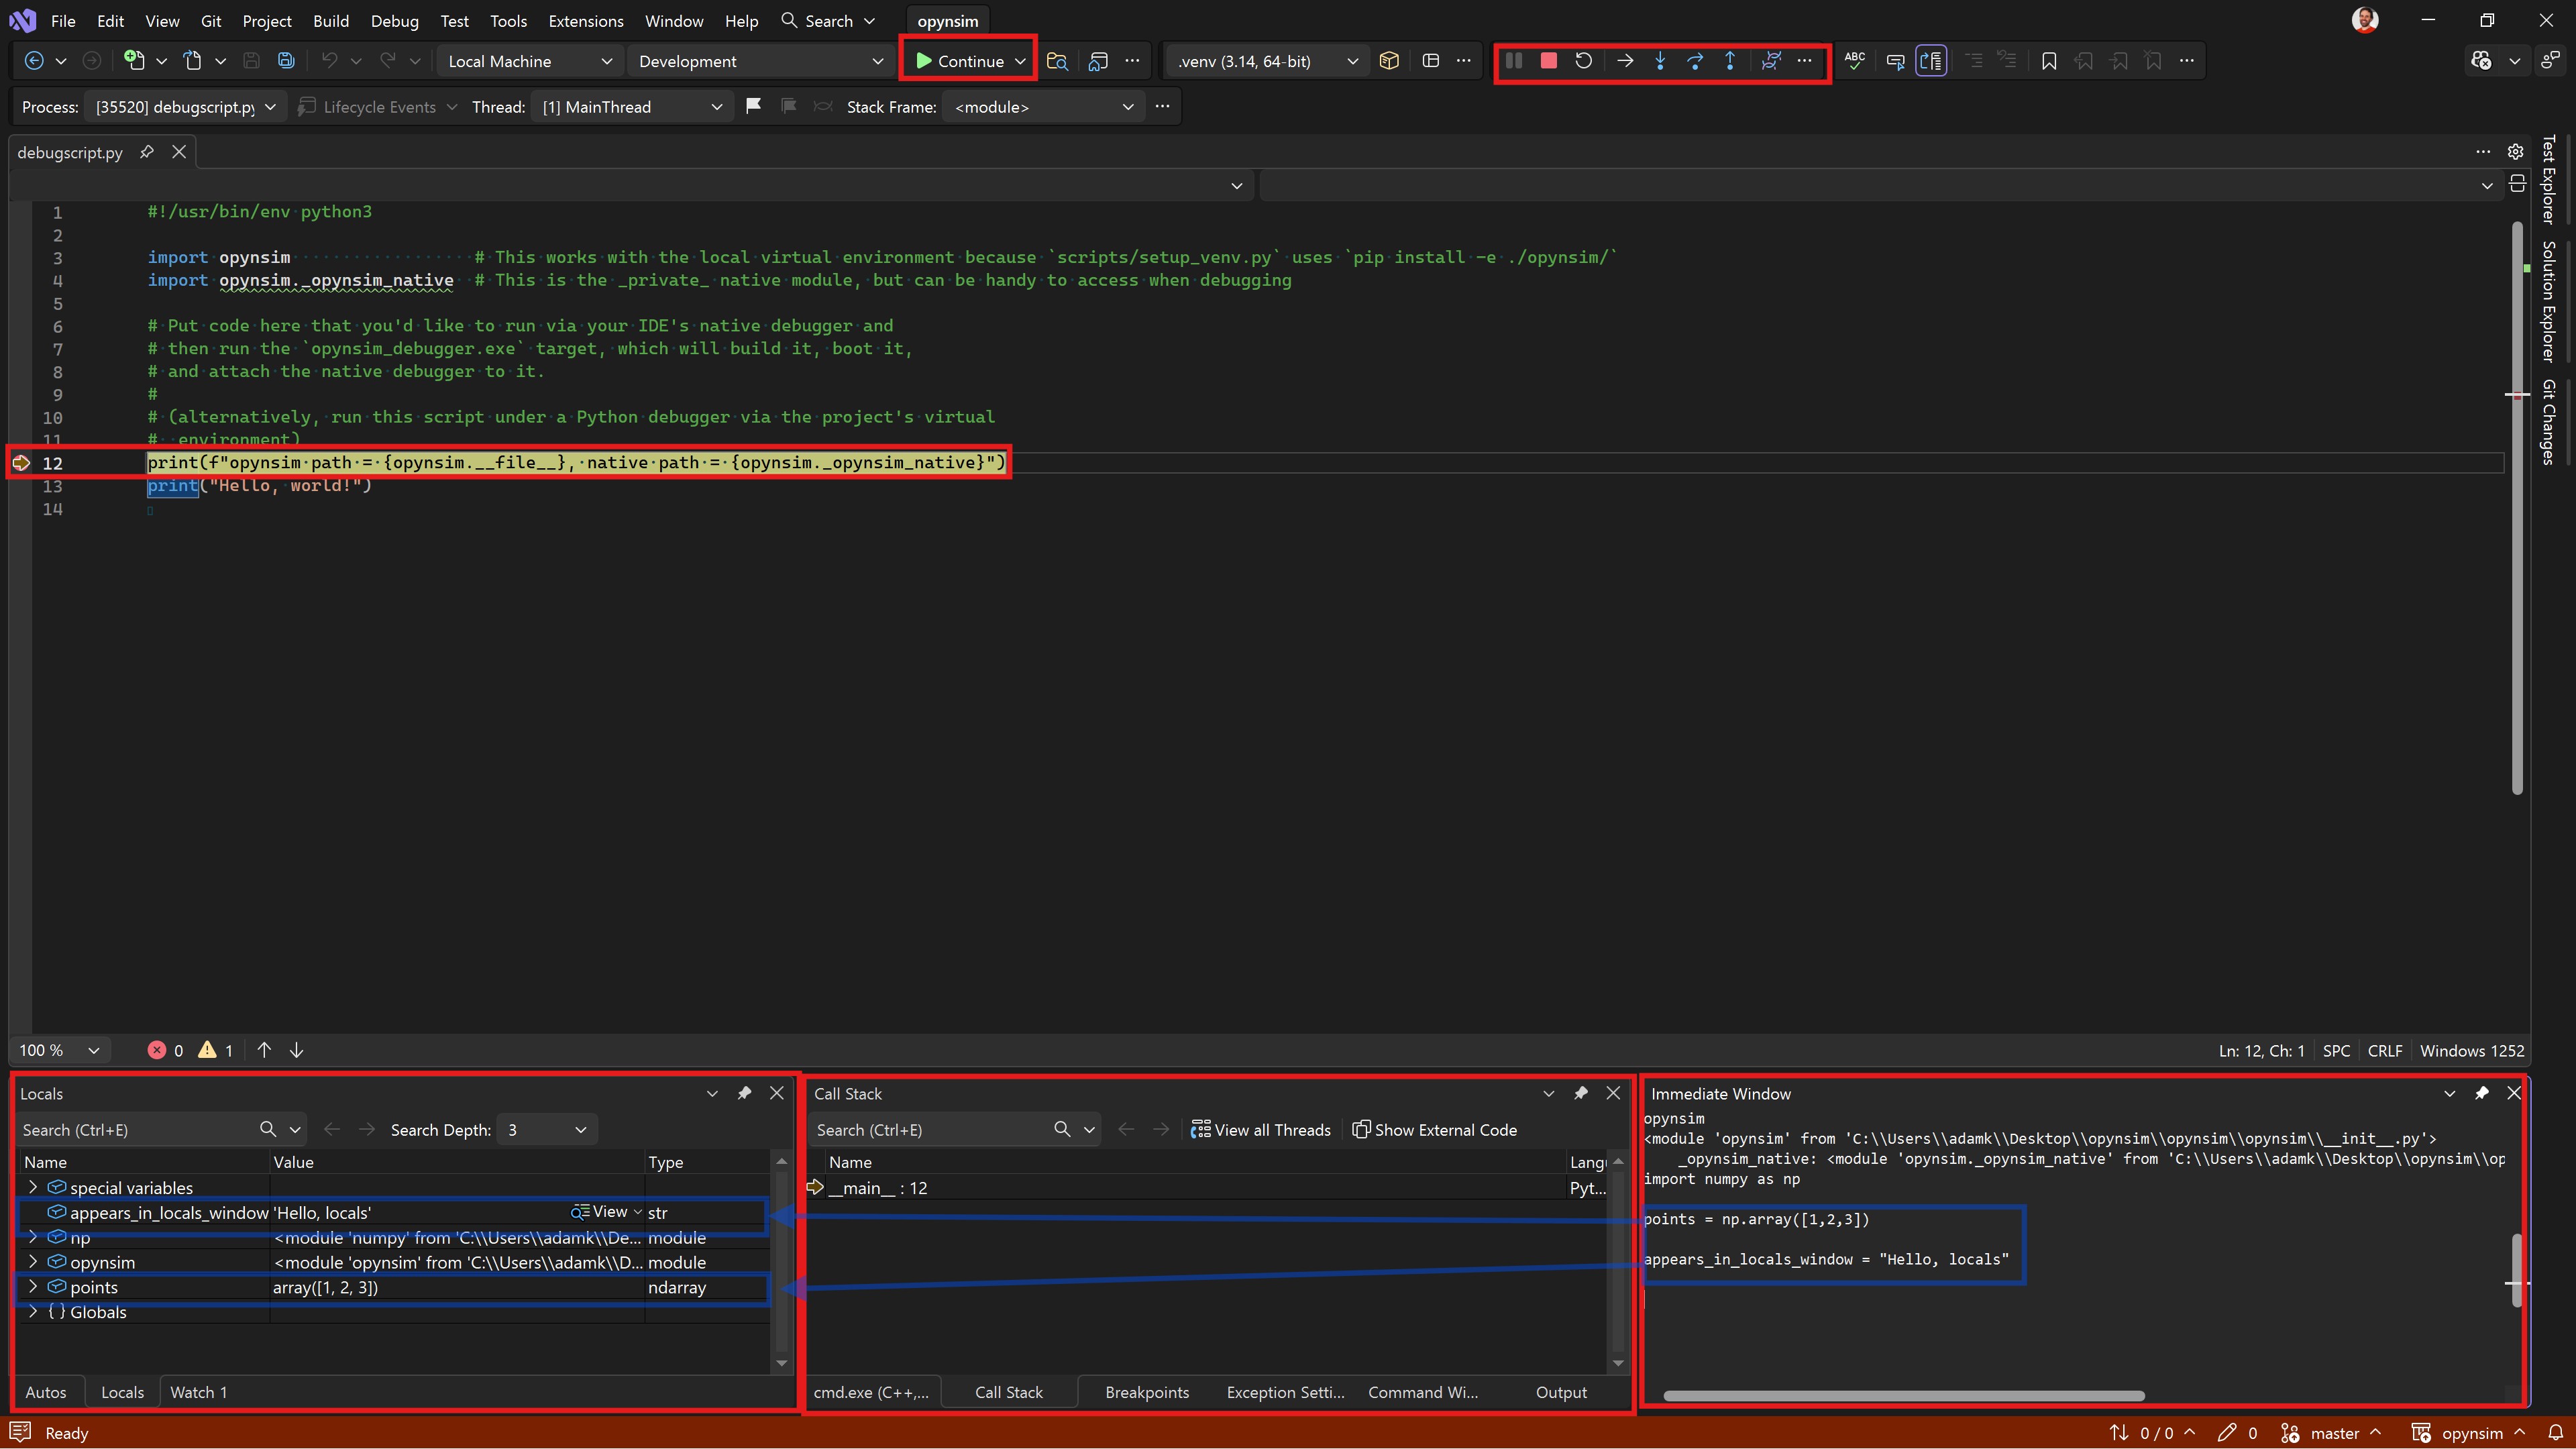
Fig. 2.23 When the python debugger is paused, you will have access to the running environment. Visual
Studio includes many debug panels that can be enabled/disabled and dragged around. Pictured
here is the Locals panel (bottom-right), which lists local variables; Call Stack, which
shows the sequence of function calls that led to this point; and Immediate Window, which lets you
run Python in the paused process.#
2.8. Developing C++ for OPynSim in Visual Studio#
If you want to run and debug C++ in the project, you can either attach to an existing process
(not described here, Google it), or run a native application (.exe) directly from Visual Studio.
opynsim provides a opynsim_debugger.exe application that you can run within Visual Studio,
which runs the debugscript.py for you. The advantage of this is that you can write python and
C++ and use either debugger on the same code.

Fig. 2.24 TODO: caption#
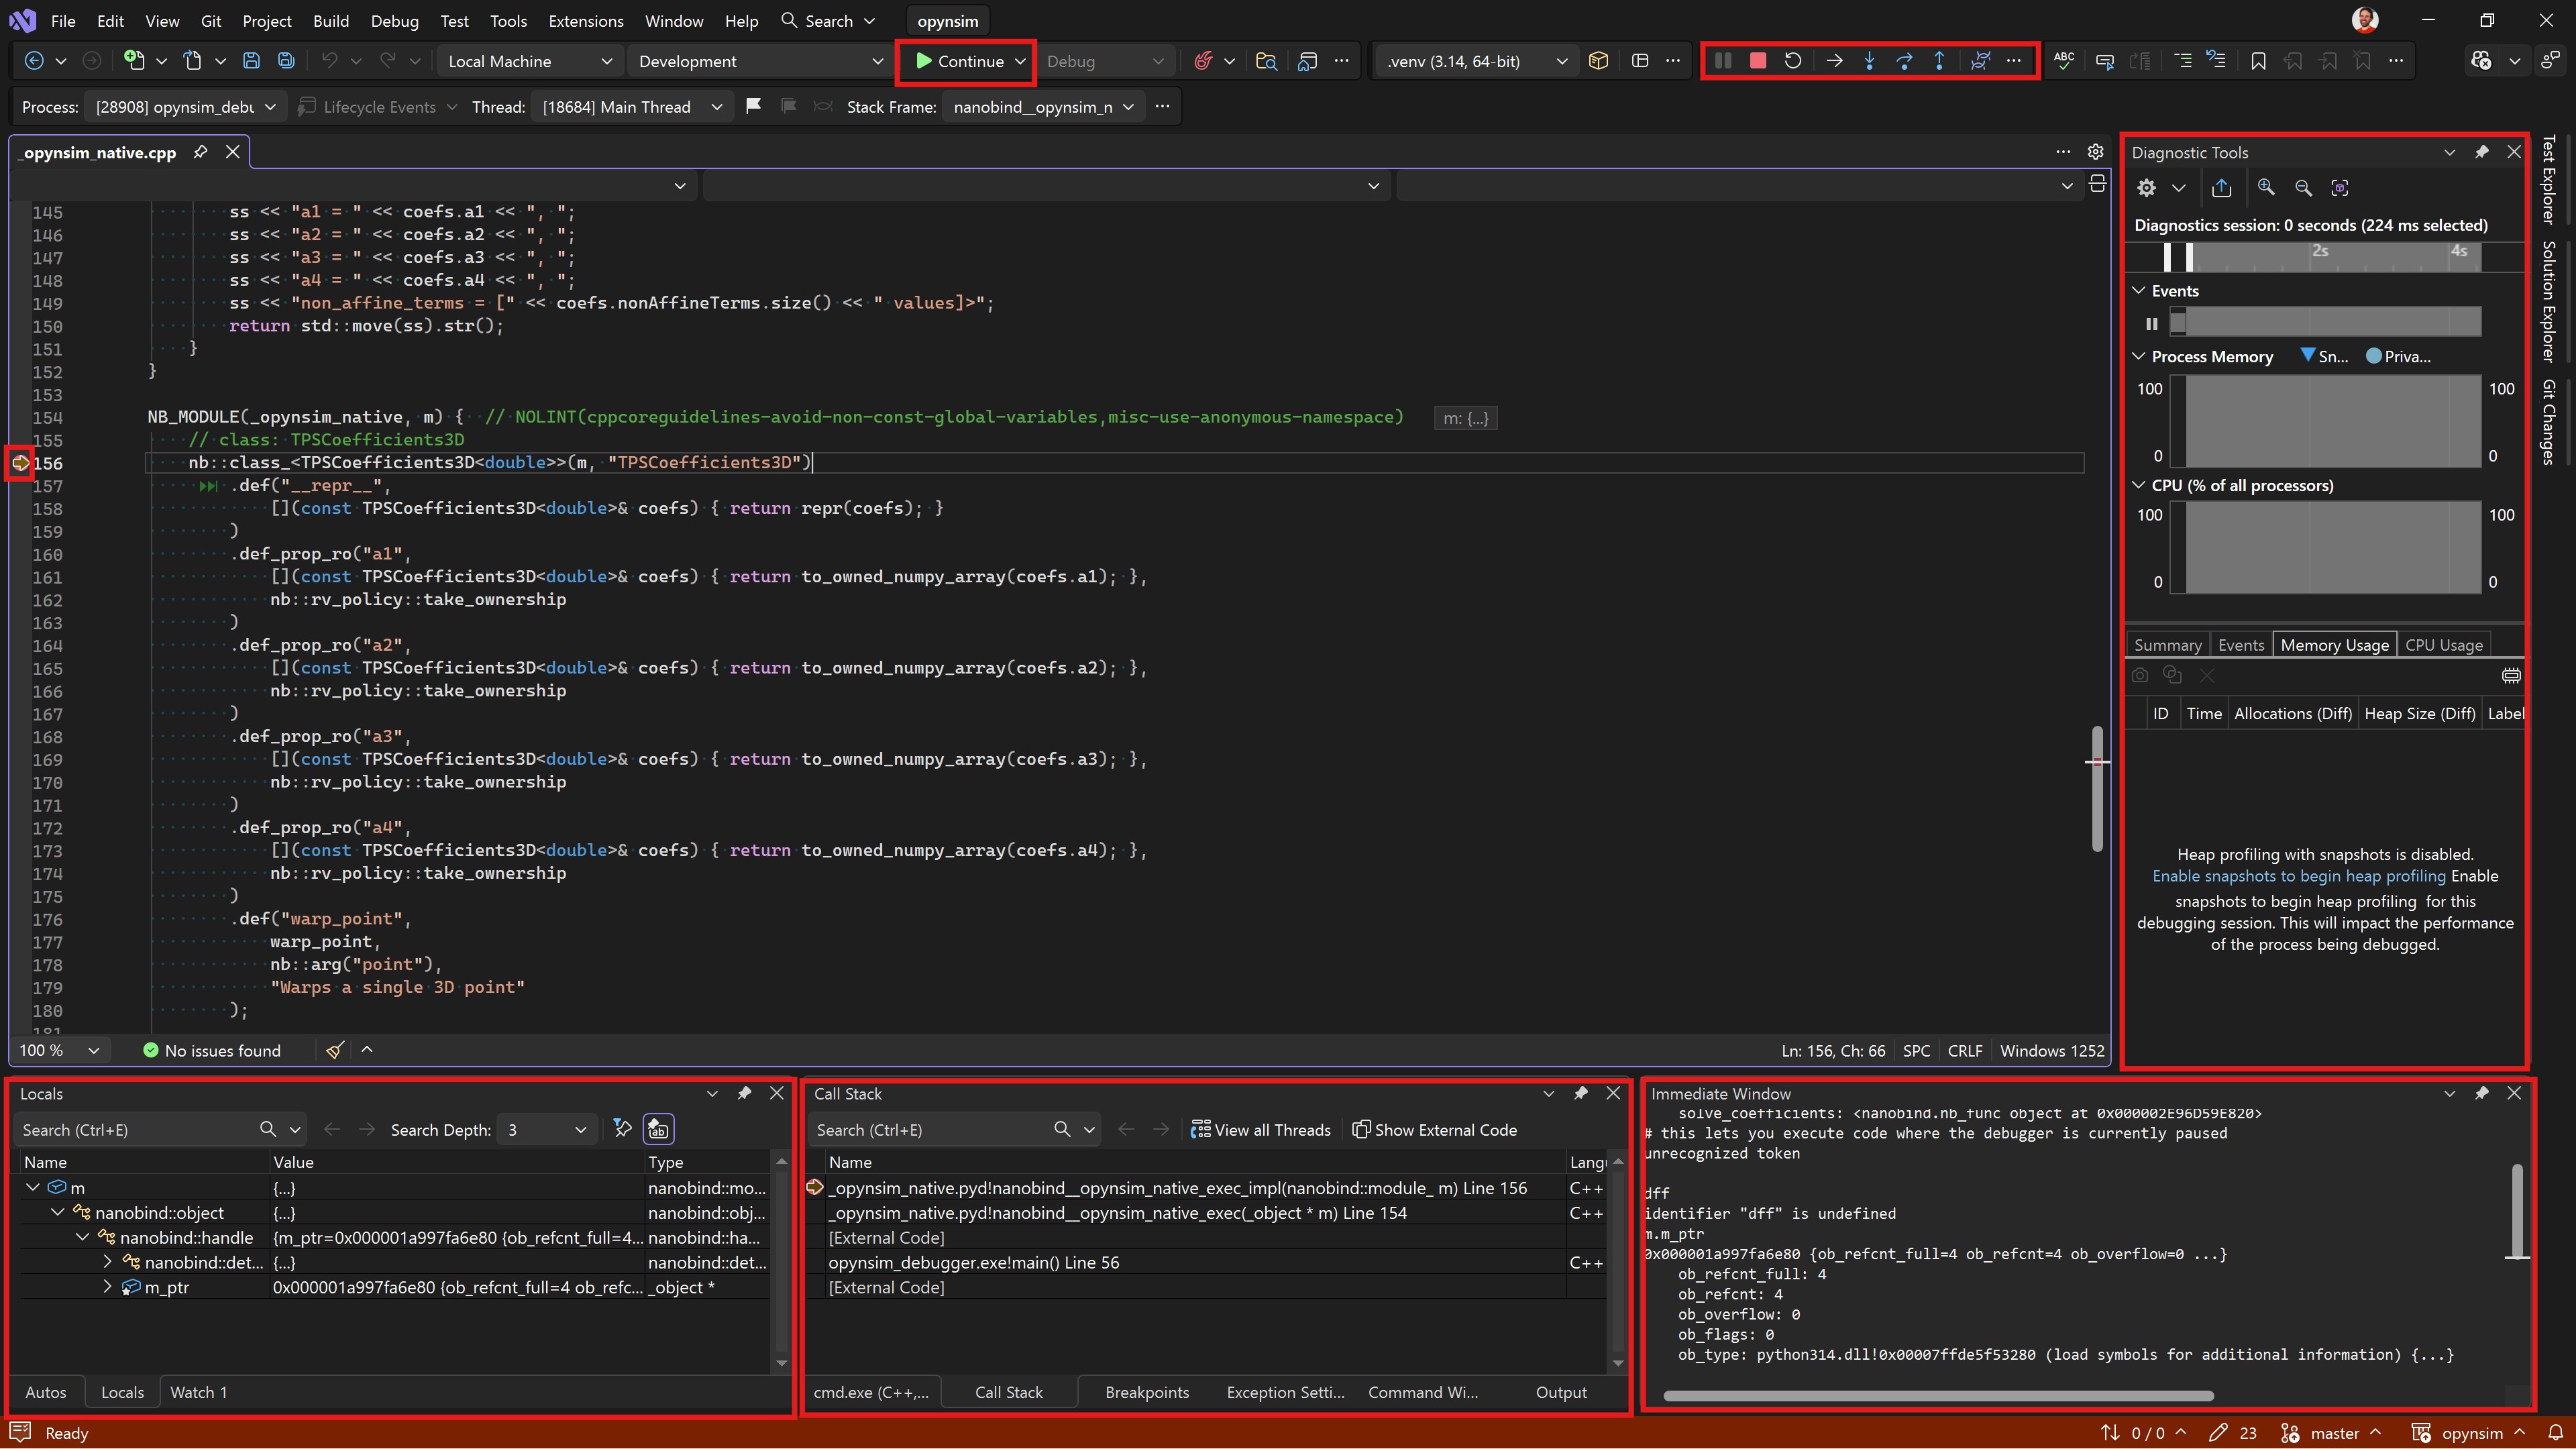
Fig. 2.25 TODO: caption#
TODO: mention the “cant find python312.dll” issue, usually related to the user Using a virtual environment.